Front Bumper Reinforcement: Service and Repair
Front Bumper Impact Bar Replacement
Tools Required
J 38778 Door Trim Pad and Garnish Clip Remover
Removal Procedure
1. Remove the front bumper fascia. Refer to Front Bumper Fascia Replacement (Front Bumper Fascia Replacement) .
2. Remove the front bumper energy absorber. Refer to Front Bumper Fascia Energy Absorber Replacement (Service and Repair) .
3. Remove the wiring harness from the rear of the front bumper impact bar.
4. Remove the horn bracket and set aside. Refer to Horn Replacement.
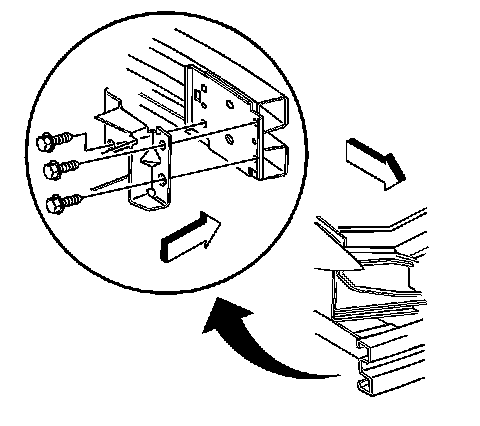
5. Remove the bolts from the front bumper impact bar.
6. Remove the front bumper impact bar from the vehicle.
Installation Procedure
1. Align the front bumper impact bar to the vehicle.
Notice: Refer to Fastener Notice in Cautions and Notices.
2. Install the bolts to the front bumper impact bar at the body.
Tighten the front bumper impact bar to body bolts to 25 N.m (18 lb ft).
3. Install the wiring harness to the rear of the front bumper impact bar.
4. Install the horn bracket. Refer to Horn Replacement.
5. Install the front bumper energy absorber to the front bumper impact bar. Refer to Front Bumper Fascia Energy Absorber Replacement (Service and Repair) .
6. Install the front bumper fascia. Refer to Front Bumper Fascia Replacement (Front Bumper Fascia Replacement) .