Trunk / Liftgate Handle: Service and Repair
Liftgate Outside Handle Replacement
Removal Procedure

1. Remove liftgate trim panel. Refer to Liftgate Trim Panel Replacement (Service and Repair).
2. Disconnect cable from handle.
3. Disconnect the lock actuator rod (1).

4. Remove the two nuts (1).
5. Remove the liftgate outside door handle (2).

6. Remove the two bolts (1).
7. Remove the liftgate outside handle bezel (2).

8. Remove the liftgate lock cylinder (1) from the liftgate outside handle bezel (2), by turning counter clockwise and pulling up.
Installation Procedure
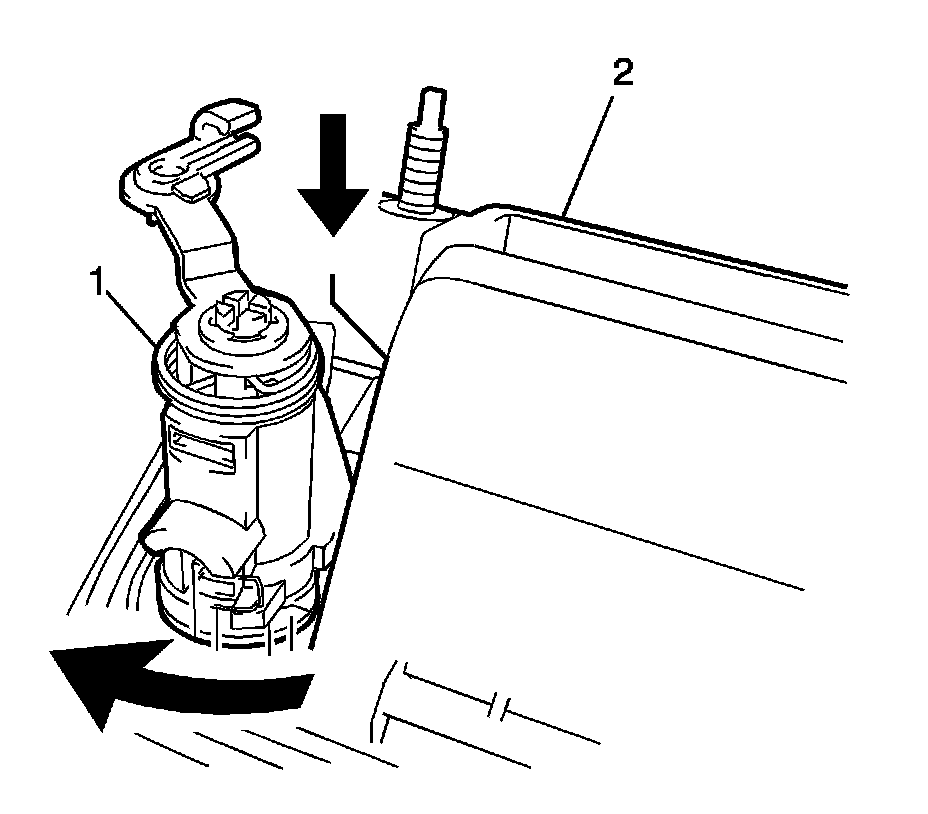
1. Install the liftgate lock cylinder (1) to the liftgate outside handle bezel (2), by pushing down and turning clockwise.
2. Install the liftgate outside handle bezel (2) to the liftgate.
Caution: Refer to Fastener Caution (Fastener Caution)
3. Install the 2 bolts (1) to the liftgate outside handle bezel (2) and tighten to 7.5 Nm (66 lb in).
4. Install the liftgate outside door handle (2).
5. Install the two nuts (1) and tighten to 5.5 Nm (49 lb in).
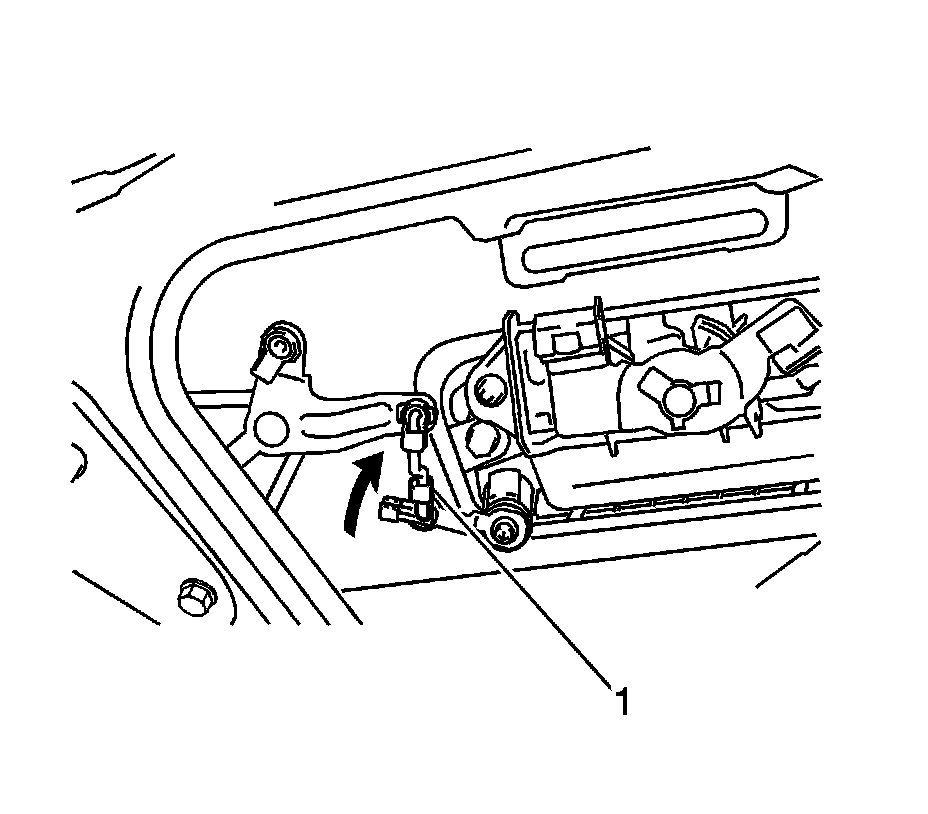
6. Connect the lock actuator rod (1).
7. Connect cable to handle.
8. Install liftgate trim panel. Refer to Liftgate Trim Panel Replacement (Service and Repair).