Connecting Rod: Testing and Inspection
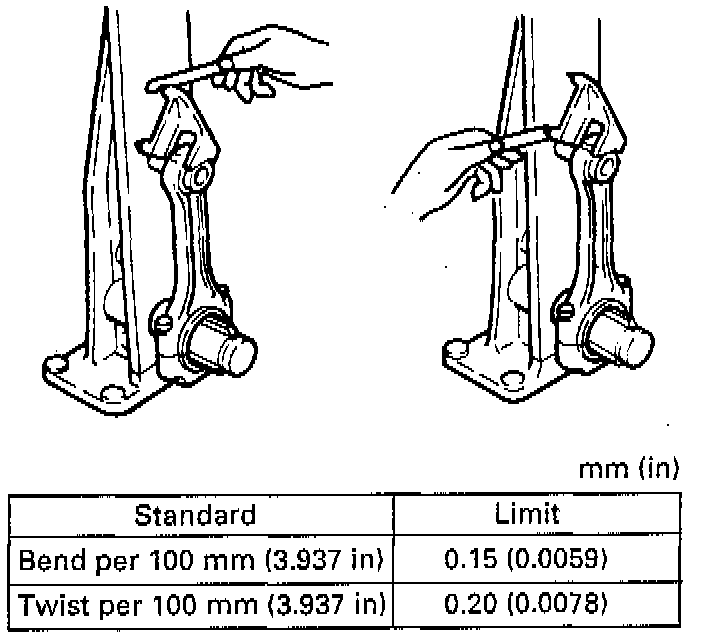
1. Check the connecting rod alignment. If either the bend or the twist exceeds the specified limit, the connecting rod must be replaced.
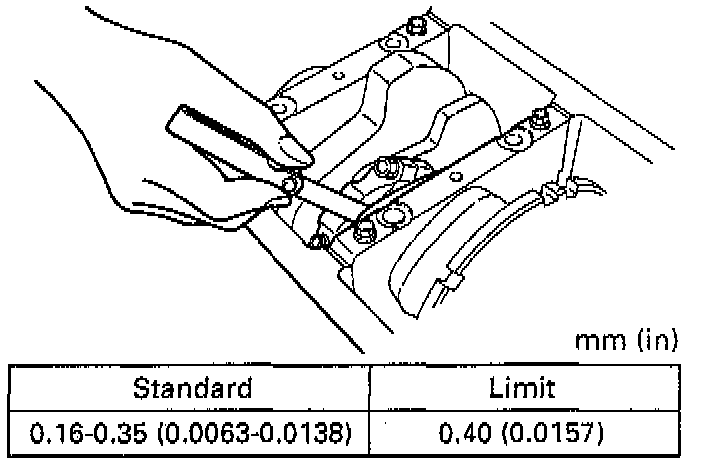
2. Measure the connecting rod thrust clearance.
Use a feeler gauge to measure the thrust clearance at the big end of the connecting rod.
If the clearance exceeds the specified limit, the connecting rod must be replaced.
3. Measure the oil clearance between the connecting rod and the crankshaft by:
a. Remove the connecting rod cap nuts and the rod caps.
- Arrange the removed rod caps in the cylinder number order.
b. Clean the rod bearings and the crankshaft pins.
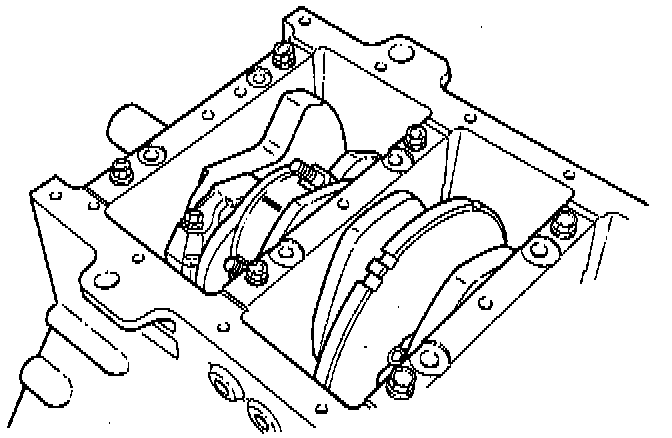
c. Carefully check the rod bearings.
If even one bearing is found to be damaged or badly worn, the entire bearing assembly must be replaced as a set. Reinstall the bearings in their original positions.
Apply plastigage to the crank pin.
d. Reinstall the rod caps to their original positions.
Tighten the rod caps to 54 Nm (40 ft. lbs.)
NOTE: Do not allow the crankshaft to rotate.
e. Remove the rod caps.
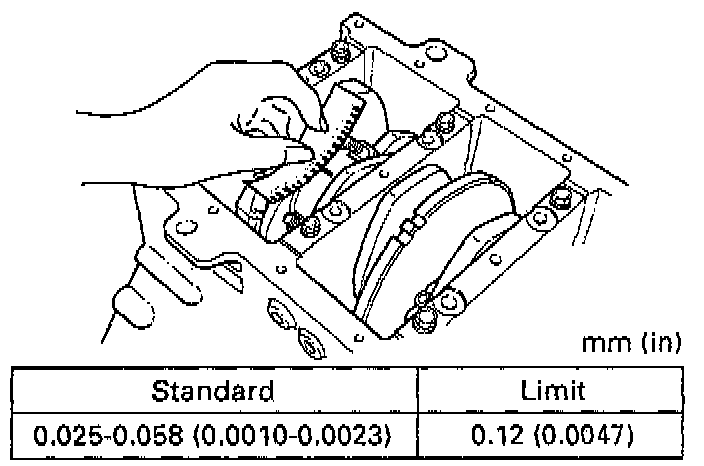
f. Measure the width of the plastigage and determine the oil clearance. If the oil clearance exceeds the limit, replace the rod bearing as a set.
g. Clean the plastigage from the bearings and the crankshaft pins.