Starting System - Starter Motor Is Inoperative
10-040October 5, 2010
Applies To:
2003-06 MDX - ALL
Starter Does Not Work
SYMPTOM
The starter does not work.
PROBABLE CAUSE
Debris coming through the torque converter housing caused the starter to fail.
CORRECTIVE ACTION
Remove the starter and the debris from the torque converter housing. Then install a new starter, and seal its mounting surface.
PARTS INFORMATION
Starter Motor:
P/N 06312-RDJ-505RM
REQUIRED MATERIALS
Hondabond HT Silicone Gasket:
P/N 08718-0001
(One tube repairs about 100 vehicles.)
WARRANTY CLAIM INFORMATION
The normal warranty applies.
Operation Number: 116100
Flat Rate Time: 0.5 hour
Failed Part: P/N 31201-RDJ-A01
Defect Code: 06401
Symptom Code: 09004
Skill Level: Repair Technician
REPAIR PROCEDURE
1. Make sure you have the anti-theft codes for the radio and the navigation system, then write down the audio presets.
2. With the ignition switch in LOCK (0), disconnect the negative cable from the battery.
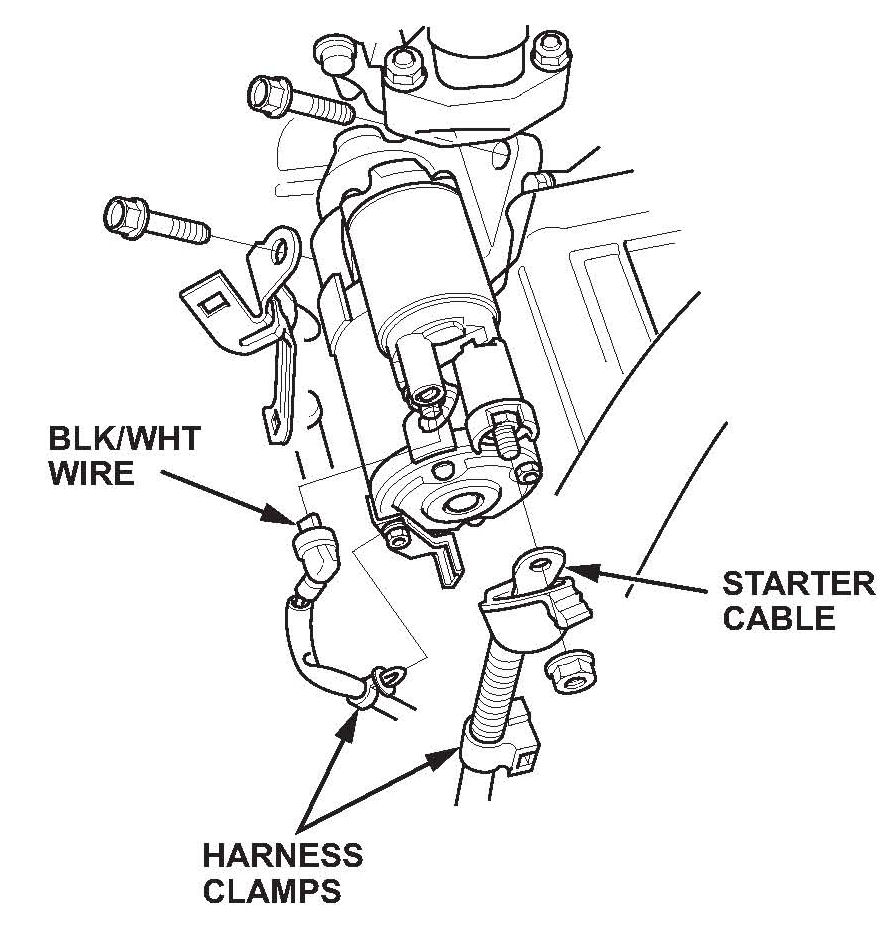
3. Remove the starter:
^ Remove the harness clamps.
^ Disconnect the starter cable from the B terminal.
^ Disconnect the BLK/WHT wire from the S terminal.
^ Remove the two starter bolts.
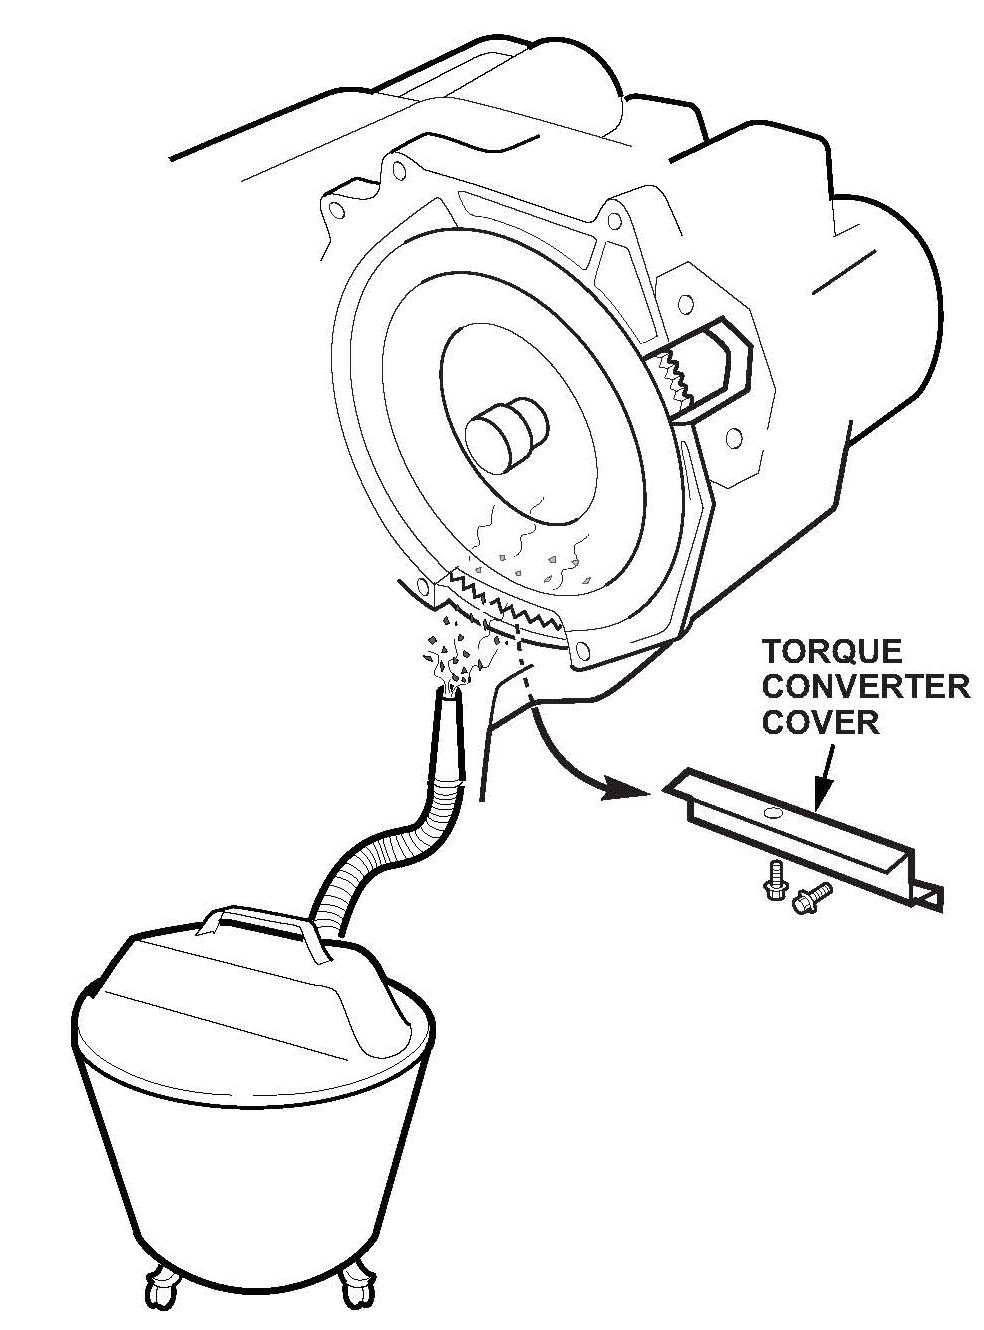
4. Remove the torque converter cover, then use a shop vac at the opening to remove any debris inside the torque converter housing.
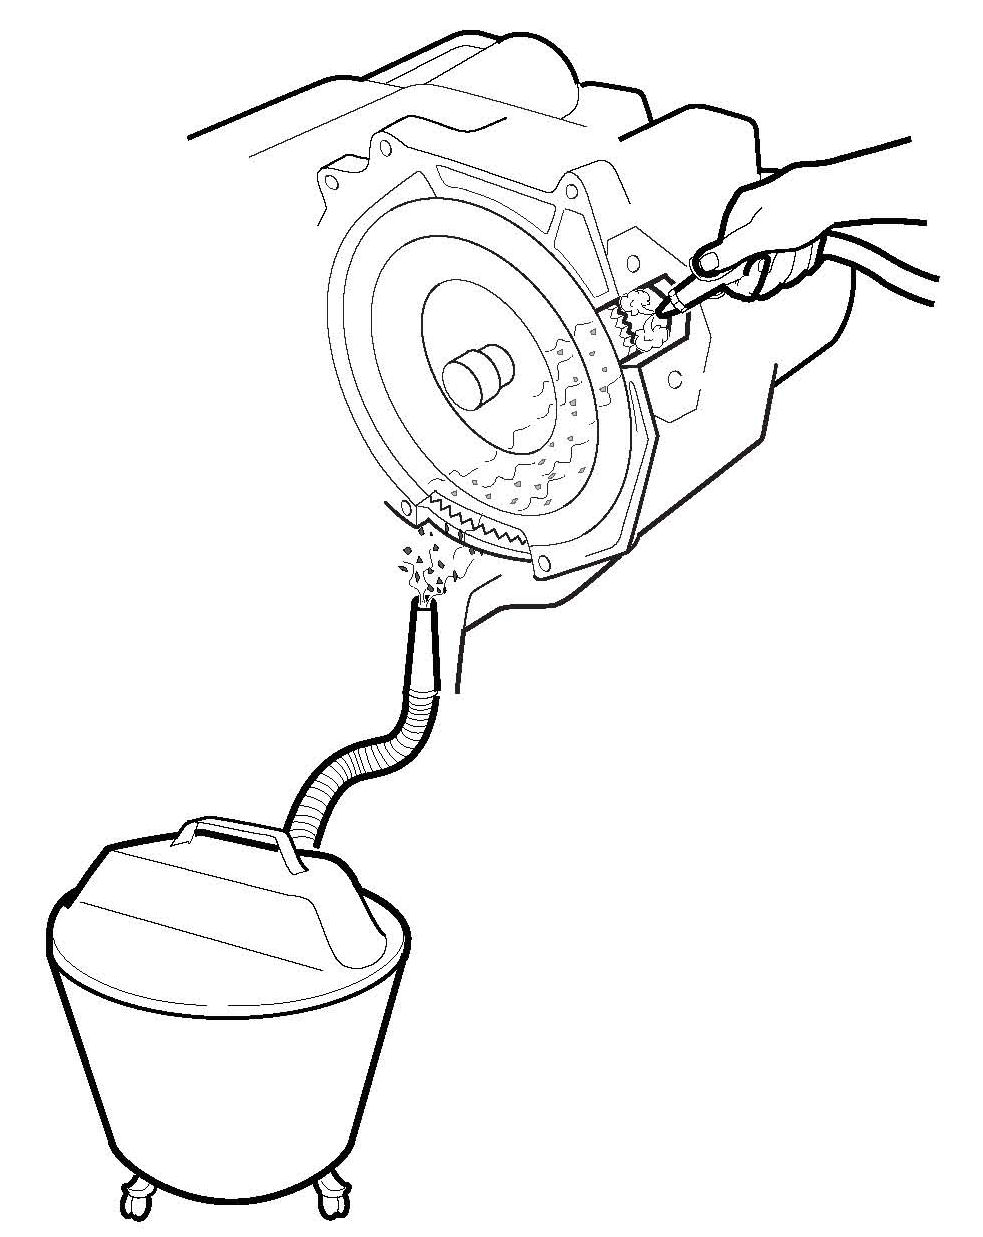
5. To remove more debris, blow shop air into the starter mount opening while continuing to vacuum through the torque converter cover opening.
NOTE:
Do not use any liquids to remove the debris.
6. Spray parts cleaner on a clean shop towel, then use the towel to clean the starter mount area on the torque converter housing.
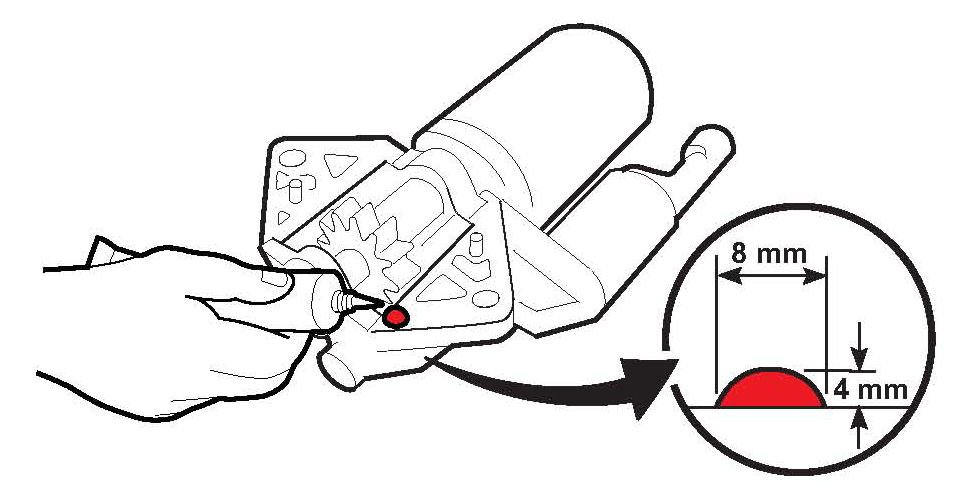
7. Apply a dab (about 4 mm thick and 8 mm wide) of Hondabond HT to a new starter in the area shown.
NOTE:
Install the new starter within 5 minutes of applying the Hondabond HT. If you wait longer that that, remove and reapply the Hondabond.
8. Install the new starter:
^ Install the starter bolts, and torque them to 44 N.m (33 lb-if).
^ Connect the BLK/WHT wire to the S terminal.
^ Connect the starter cable to the B terminal, with the crimped side of the cable end facing out. Torque the starter cable nut to 9.8 N.m (7.2 lb-ft).
^ Connect the harness clamps.
9. Reinstall the torque converter cover. Torque the bolts to 12 N.m (8.7 lb-ft).
10. Reconnect the negative cable to the battery.
11. Start the engine to make sure the starter works normally.
12. Enter the anti-theft codes for the radio and the navigation system.
13. Enter the audio presets, then set the clock.
14. Turn the ignition switch to LOCK (0), and then to ON (II).
15. Lower the driver's window all the way by pushing the driver's window switch to the second detent (AUTO DOWN). When the window reaches the bottom, hold the switch in AUTO DOWN for 2 seconds.
16. Raise the driver's window all the way by pulling the driver's window switch to the second detent (AUTO UP). When the window reaches the top, hold the switch in AUTO UP for 2 seconds.
17. Check the driver's window auto-down/auto-up function. If it doesn't work, repeat steps 14 thru 16.

Disclaimer