Front Axle Camber, Checking and Adjusting
Front Axle Camber, Checking and Adjusting
Camber cannot be adjusted.
By moving subframe, it is possible to center camber evenly within the specified/tolerance range.
- Remove noise insulation.
Convertible only
- Remove front diagonal brace. Refer to => [ Front or Rear Diagonal Braces ] Rear Suspension.
Continuation for all vehicles
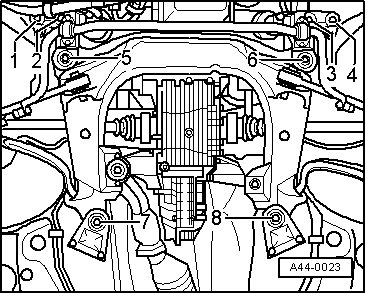
- Loosen hex bolts - 1 -, - 2 -, - 3 -, - 4 -, - 5 -, - 6 -, - 7 - and - 8 -.
- Using a plastic-coated tire iron, slide subframe in corresponding location.
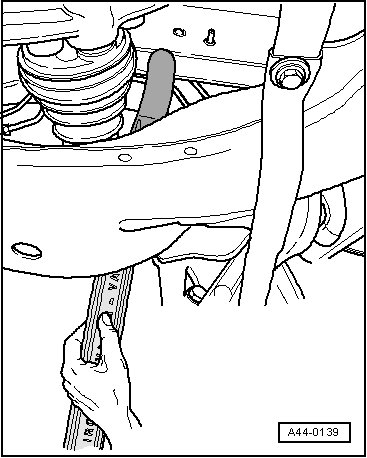
Press in center of subframe between subframe and body longitudinal member.
If you do not have a plastic-coated tire iron, wrap a standard tire iron in adhesive tape.
CAUTION!
Do not damage any parts!
Specified values for wheel alignment. Refer to => [ Wheel Alignment Specifications ] Wheel Alignment Specifications.
- Install new hex head bolts - 7 - and - 8 - and tighten.
- Install new hex head bolts - 5 - and - 6 - and tighten.
- Install new hex head bolts - 1 -, - 2 -, - 3 - and - 4 - and tighten.
Convertible only
- Install front diagonal brace. Refer to => [ Front or Rear Diagonal Braces ] Rear Suspension.
Continuation for all vehicles
- Install noise insulation.
CAUTION!
Every time camber is corrected, axle alignment values should be checked.