Control Arm: Service and Repair
Fig. 4 Replacing Lower Control Arm Bushings:
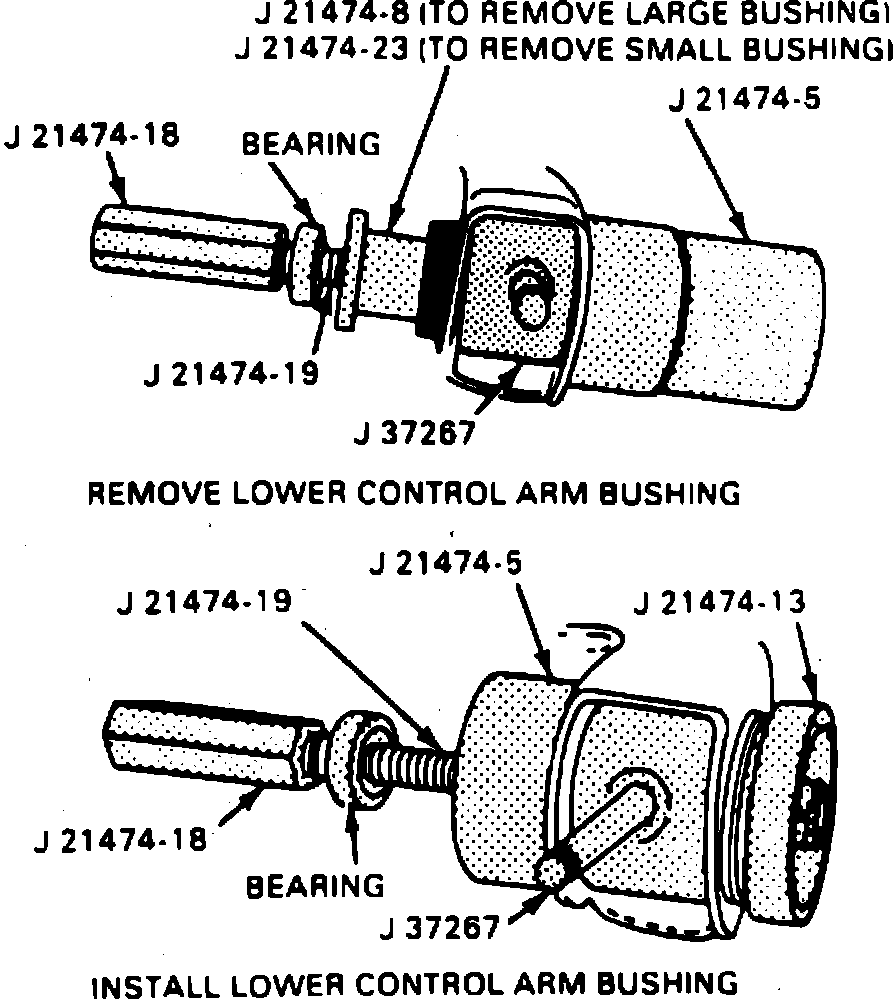
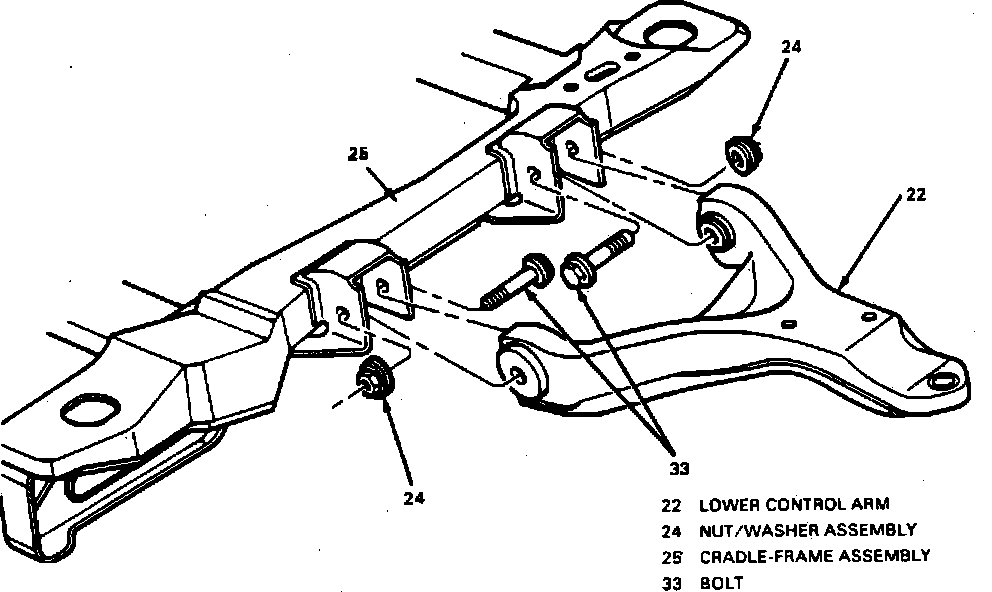
Fig. 5 Installing Lower Control Arm:
1. Raise and support vehicle, then remove wheel and tire assembly.
2. On 3.4L engine models, Remove engine splash shields.
3. On all models, remove stabilizer shaft to lower control arm insulator bracket bolts.
4. Remove lower ball joint cotter pin and nut, then, using tie rod puller/ball joint remover tool No. J-35917 or equivalent, separate ball joint from lower control arm.
5. Remove lower control arm to frame attaching nuts and bolts, then the lower control arms.
6. If bushing replacement is necessary, refer to Fig. 4. Coat threads of control arm bushing service tool set No. J-21474-19 or equivalent with an extreme pressure lubricant. To facilitate installation, coat outer casing of bushing with suitable lubricant.
7. Reverse procedure to install, noting the following:
a. Lower control arm to frame bolts must be installed as shown, Fig. 5.
b. Torque lower control arm to frame bolts to specifications.
c. Torque lower ball joint nut 15 ft. lbs. and tighten an additional 90°, then further tighten to align next slot in nut with cotter pin hole in stud. Do not tighten more than 60° to align with hole and do not loosen nut at any time during installation.
d. Torque stabilizer shaft bolts to specifications.
e. Torque lug nuts to 100 ft. lbs.