Fuel Rail: Service and Repair
REMOVAL PROCEDURETOOLS REQUIRED
J 37088-A Fuel Line Quick Connect Separator
NOTE:
^ Use care when servicing the fuel system components, especially the fuel injector electrical connectors, the fuel injector tips, the injector O-rings. Plug the inlet and the outlet ports of the fuel rail in order to prevent contamination.
^ Do not use the compressed air to clean the fuel rail assembly as this may damage the fuel rail components.
^ Do not immerse the fuel rail assembly in a solvent bath in order to prevent damage to the fuel rail assembly.
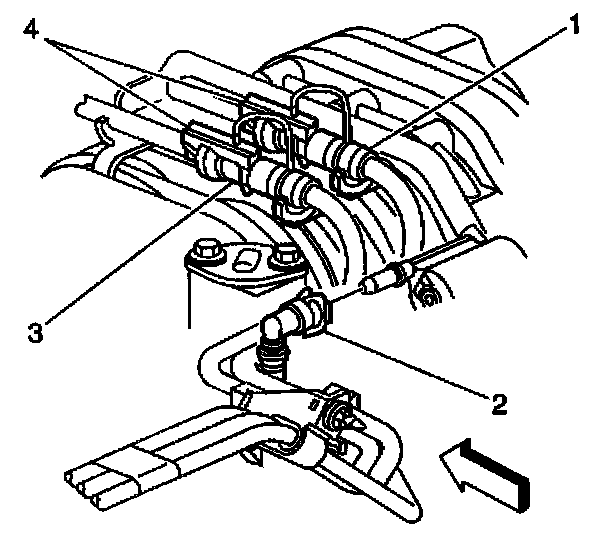
1. Relieve the fuel pressure from the Fuel System. Refer to Fuel Pressure Relief Procedure.
2. Clean the fuel rail assembly and connections.
3. Remove the fuel feed and return pipe quick connect retainers (4).
4. Remove the fuel feed (3) and return pipes (1) from the fuel rail.

5. Remove the vacuum lines from the throttle body.

6. Remove the ignition coil wires from the ignition coil and retainer clips on top of the supercharger.

7. Remove the generator and rear generator mounting bracket.
8. Remove the fuel injector electrical connectors from the fuel injectors.

9. Remove the vacuum line from the fuel pressure regulator.
10. Remove the injector electrical harness clips holding the harness to the front of the fuel rail.

11. Remove the supercharger boost control solenoid (2).
12. Remove the supercharger bypass valve actuator (1).

13. Remove the fuel rail hold-down bolts from the fuel rail.
IMPORTANT: When servicing the fuel rail assembly, precautions must be taken to prevent dirt and other contaminants from entering the fuel passages. It is recommended that the fittings be capped, and the holes be plugged during servicing.
14. Remove the fuel rail with equal force on both sides of the fuel rail.
INSTALLATION PROCEDURE
CAUTION: In order to reduce the risk of fire and personal injury that may result from a fuel leak, always install the fuel injector O-rings in the proper position. If the upper and lower )-rings are different colors (black and brown), be sure to install the black O-ring in the upper position and the brown 0-ring in the lower position on the fuel injector. The O-rings are the same size but are made of different materials.
NOTE:
^ Use care when servicing the fuel system components, especially the fuel injector electrical connectors, the fuel injector tips, the injector O-rings. Plug the inlet and the outlet ports of the fuel rail in order to prevent contamination.
^ Do not use the compressed air to clean the fuel rail assembly as this may damage the fuel rail components.
^ Do not immerse the fuel rail assembly in a solvent bath in order to prevent damage to the fuel rail assembly.

1. The O-rings must be replaced on all components that are replaced.
2. Lightly oil the fuel injector 0-rings with clean motor oil (2).

3. Place the fuel rail assembly on the supercharger.
4. Seat the fuel injectors by HAND.
NOTE: Refer to Fastener Notice in Service Precautions.
5. Install the fuel rail hold-down bolts.
Tighten
Tighten the fuel rail hold-down bolts to 10 N.m (7 lb ft).
6. Install the fuel rail hold down stud.
Tighten
Tighten the fuel rail hold-down stud to 25 N.m (18 lb ft).

7. Install the supercharger bypass valve actuator (1).
8. Install the supercharger boost control solenoid (2).
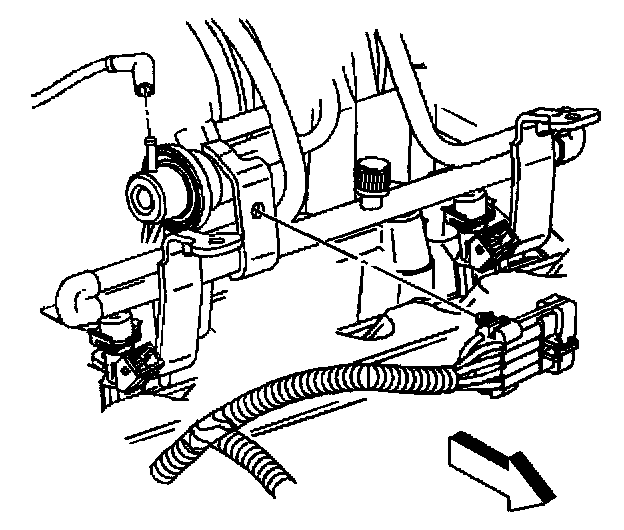
9. Install the generator and rear generator mounting bracket.
10. Install the fuel Injector electrical harness clips holding the harness to the front of the fuel rail.

11. Install the fuel injector electrical connectors to the fuel injectors.
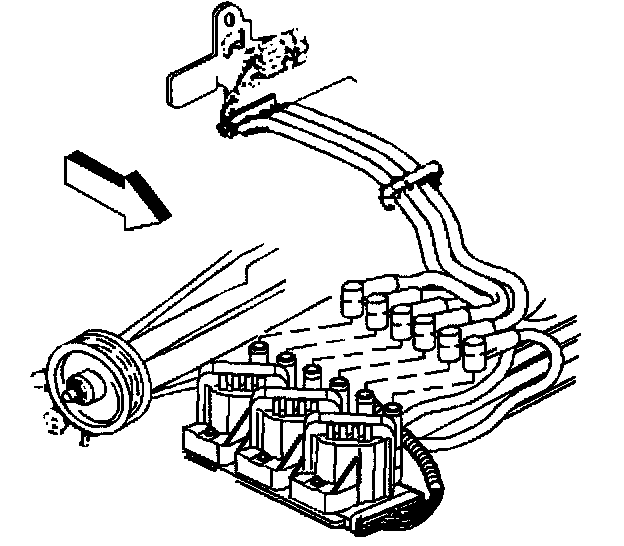
12. Install the ignition coil wires to the coils and retainer clips on top of the supercharger.

13. Install the vacuum line to the fuel pressure regulator.

14. Install the vacuum lines to the throttle body.

15. Install the fuel teed (3) and return (1) pipes to the fuel rail.

16. Reconnect the negative battery cable.
16.1. Turn ON the ignition for 2 seconds.
16.2. Turn OFF the ignition for 10 seconds.
16.3. Turn ON the ignition.
16.4. Check for fuel leaks.
17. Install the fuel injection sight shield.
Tighten
Tighten the nut to 2 N.m (18 lb in).