Fluid Line/Hose: Service and Repair
REMOVE OR DISCONNECT1. Air cleaner.
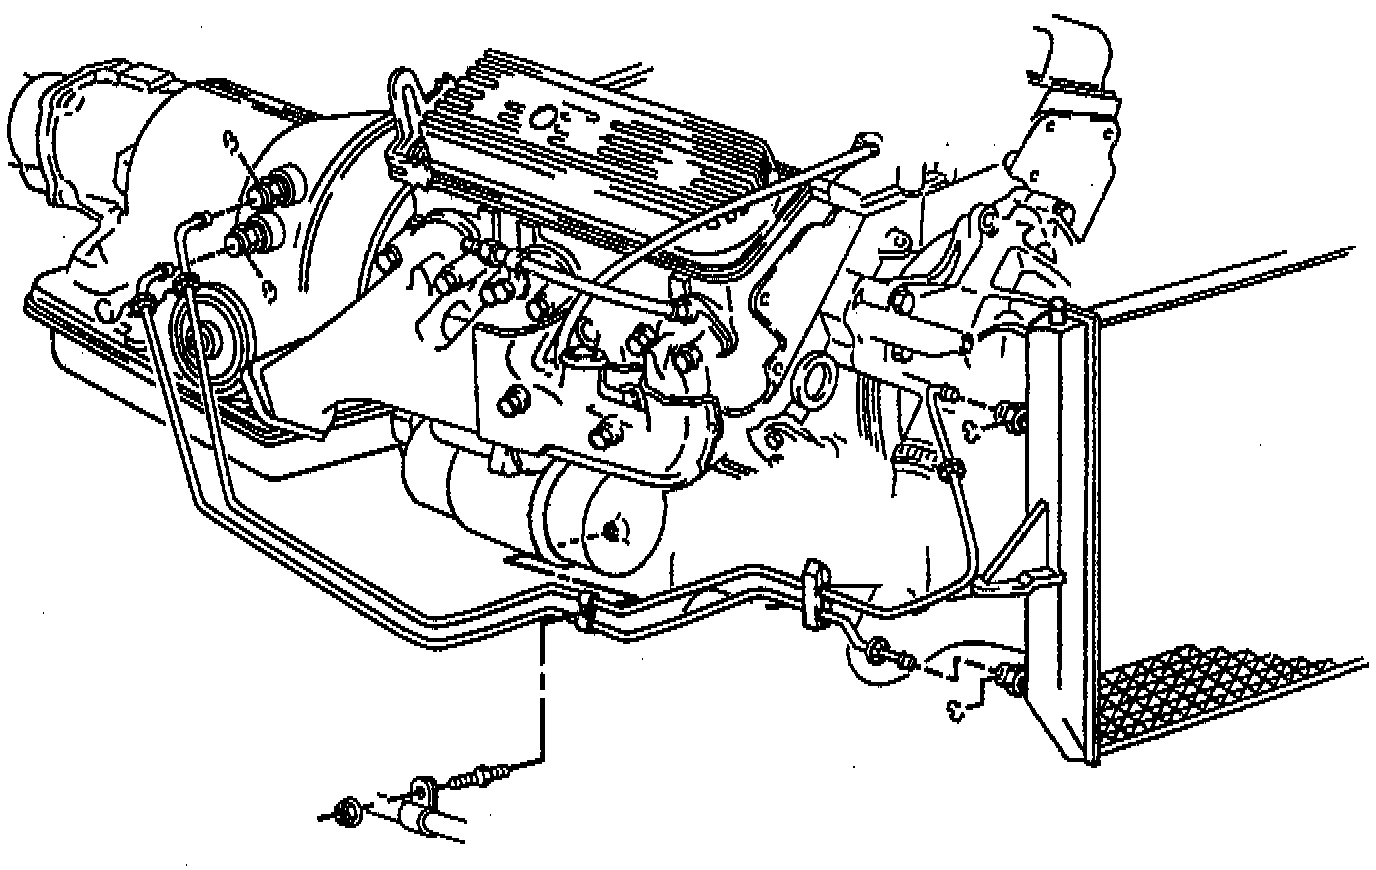
2. Stud and nut securing the clips and transmission cooler lines to the engine.
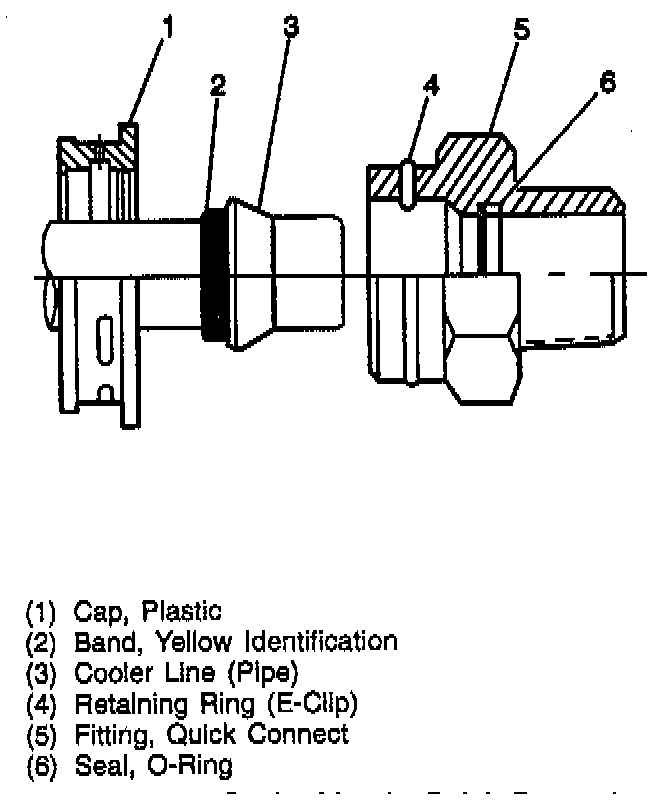
3. Remove the four quick connect fitting on the transmission and radiator by using the following procedure:
- Remove the plastic cap from the connector by pulling back along the pipe (About 2 inches).
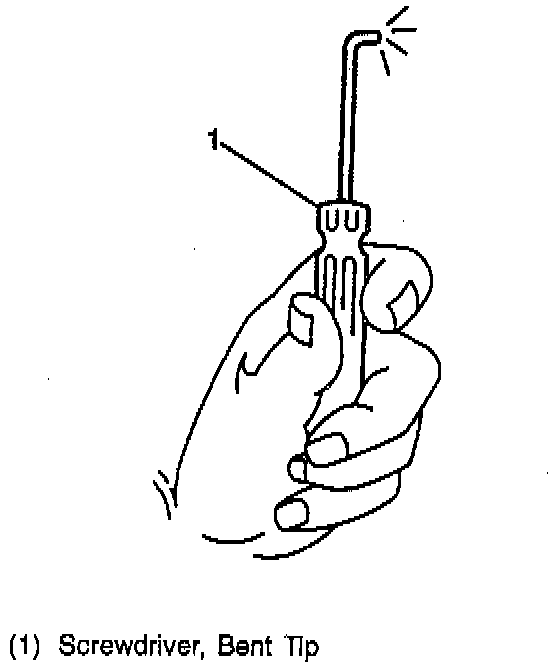
- Using a bent tip screwdriver, pull on one of the open ends of the retaining ring clip.
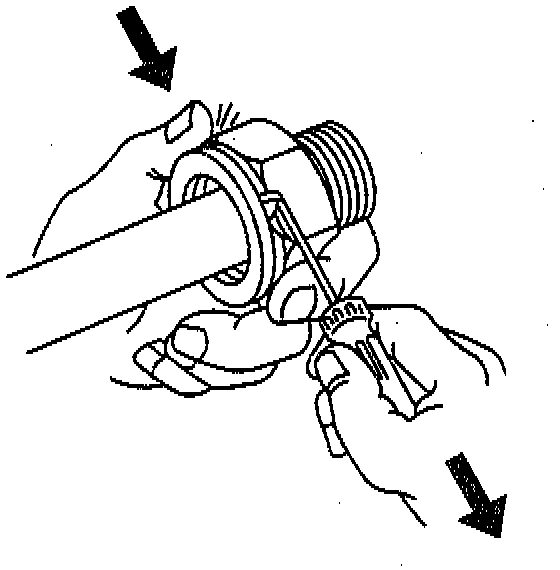
- Rotate the retaining ring out of the position on the connector and remove completely.
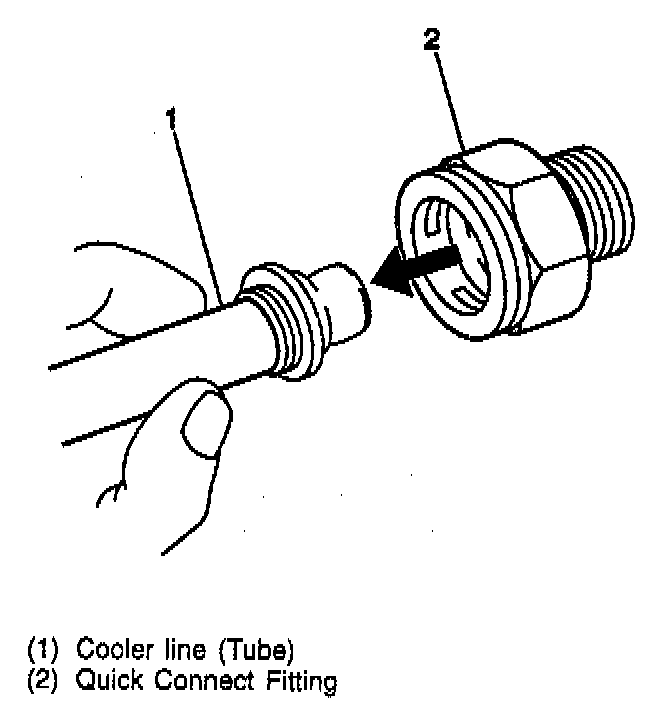
- Pull on the cooler line and remove the connector from the fitting.
4. Remove the cooler line from the vehicle.
INSTALL OR CONNECT
1. Position the cooler lines to the vehicle.
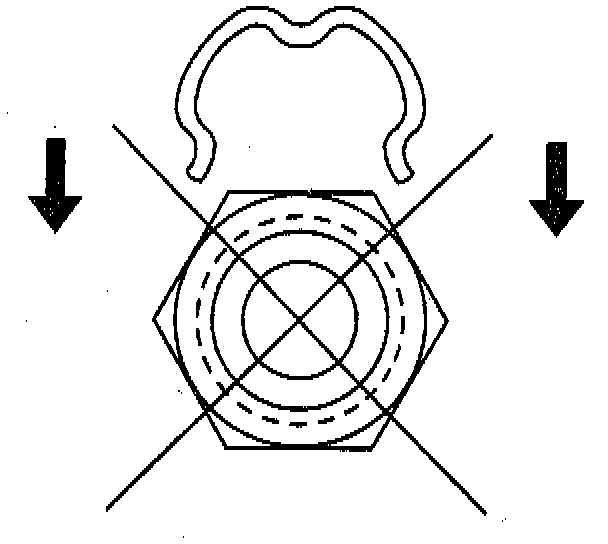
Important: The figure depicts the improper installation of the retainer ring to the connector fitting. Failure to follow the proper installation procedure could result in cooler line separation from the connector fitting.
2. Install the retaining rings (E-clips) onto the four quick connect fittings by using the following procedures:
- Obtain a "NEW" retaining ring for assembly.
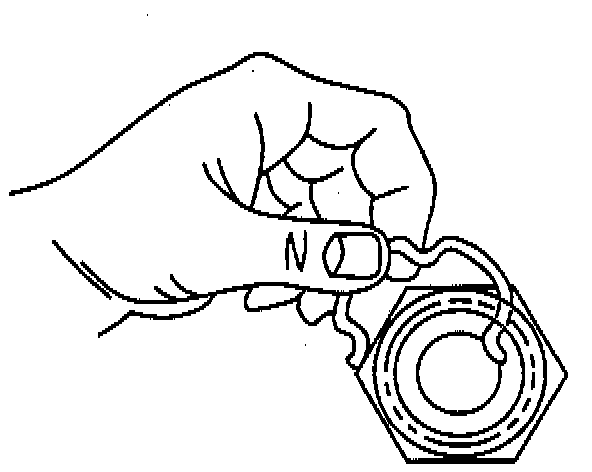
- Hook one of the ends of the retainer spring into one of the quick connector slots.
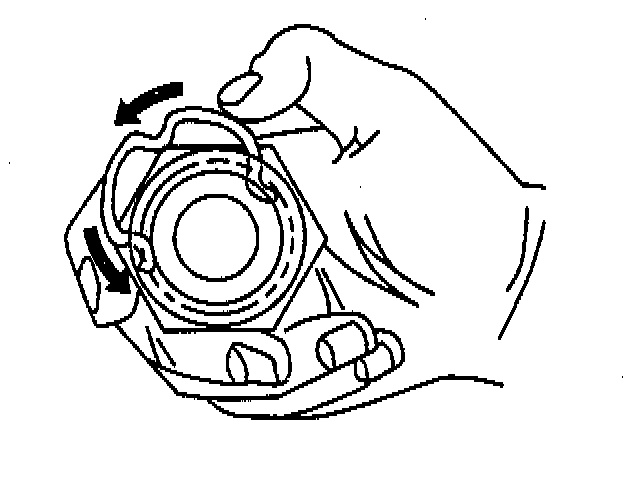
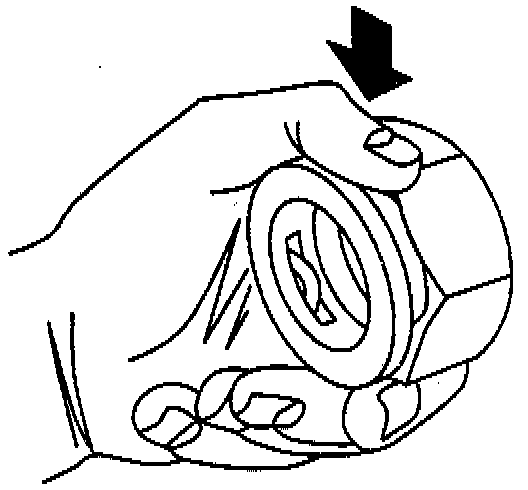
- Rotate the retainer into position and ensure all three "Ears" are visible on the inside of the connector and the ring can move in the slots freely.
- Repeat the above procedures for installation of the remaining retaining rings.
NOTICE: Ensure the cooler line has the plastic cap positioned onto the cooler line. If no plastic cap exist, obtain a NEW plastic cap and position it onto the cooler line prior to cooler line installation.
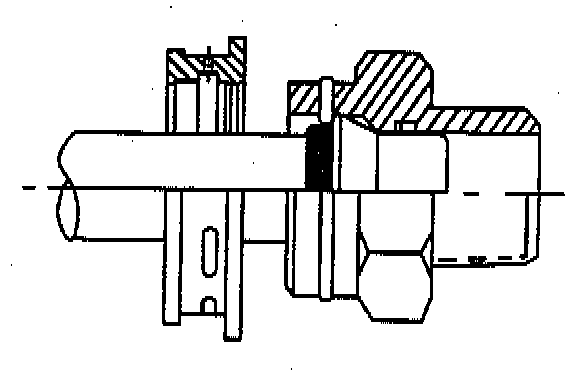
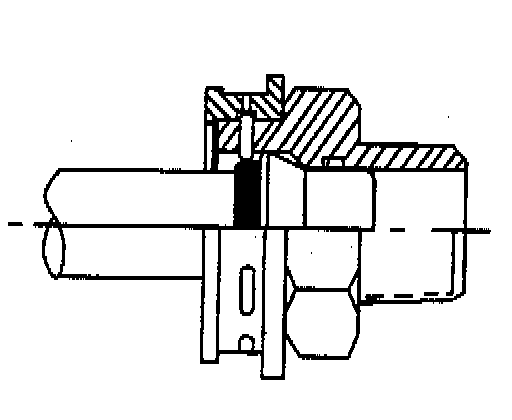
3. Insert the cooler line into the connector until a "Click" is heard or felt.
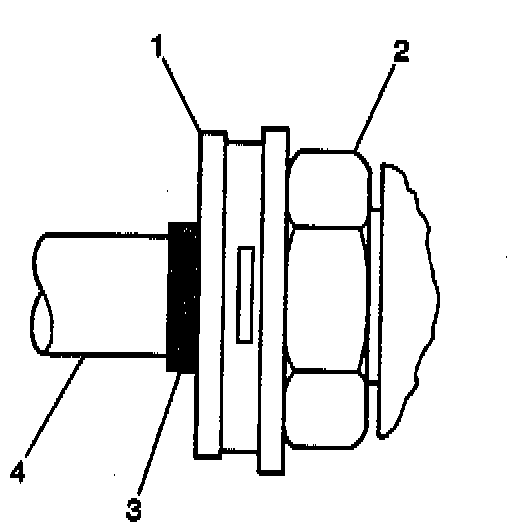
- Ensure the yellow identification band on the cooler line is hidden within the quick connector, (this indicates proper joint seating).
- Pull back sharply on the cooler line to ensure proper installation.
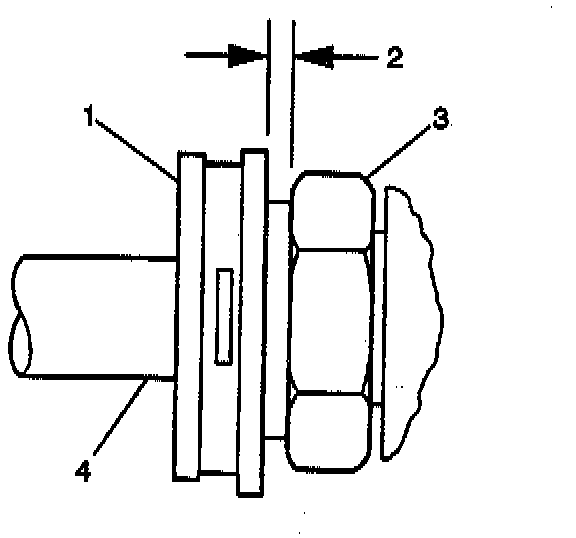
- Plastic cap by sliding over the attached joint until the cap snaps into place and it is flushed with the connector.
- Pull back sharply on the cooler line to assure the line is fastened into the connector. If the plastic cap is not properly seated, remove the existing retaining clip and install a "NEW" retaining clip per Step 2 of the installation procedure.
Important: The 2 previous figures depict the improper installation of the cooler line into the quick connect fitting. Failure to follow the proper installation procedure could result in separation of the cooler line to connector fitting.
4. Repeat Step 3 for installation of the remaining cooler lines to the remaining connectors fittings.
5. Stud and nut securing the clip and transmission cooler lines to the engine.
6. Air cleaner.