Starter Motor Replacement
Mounting Starter Motor:
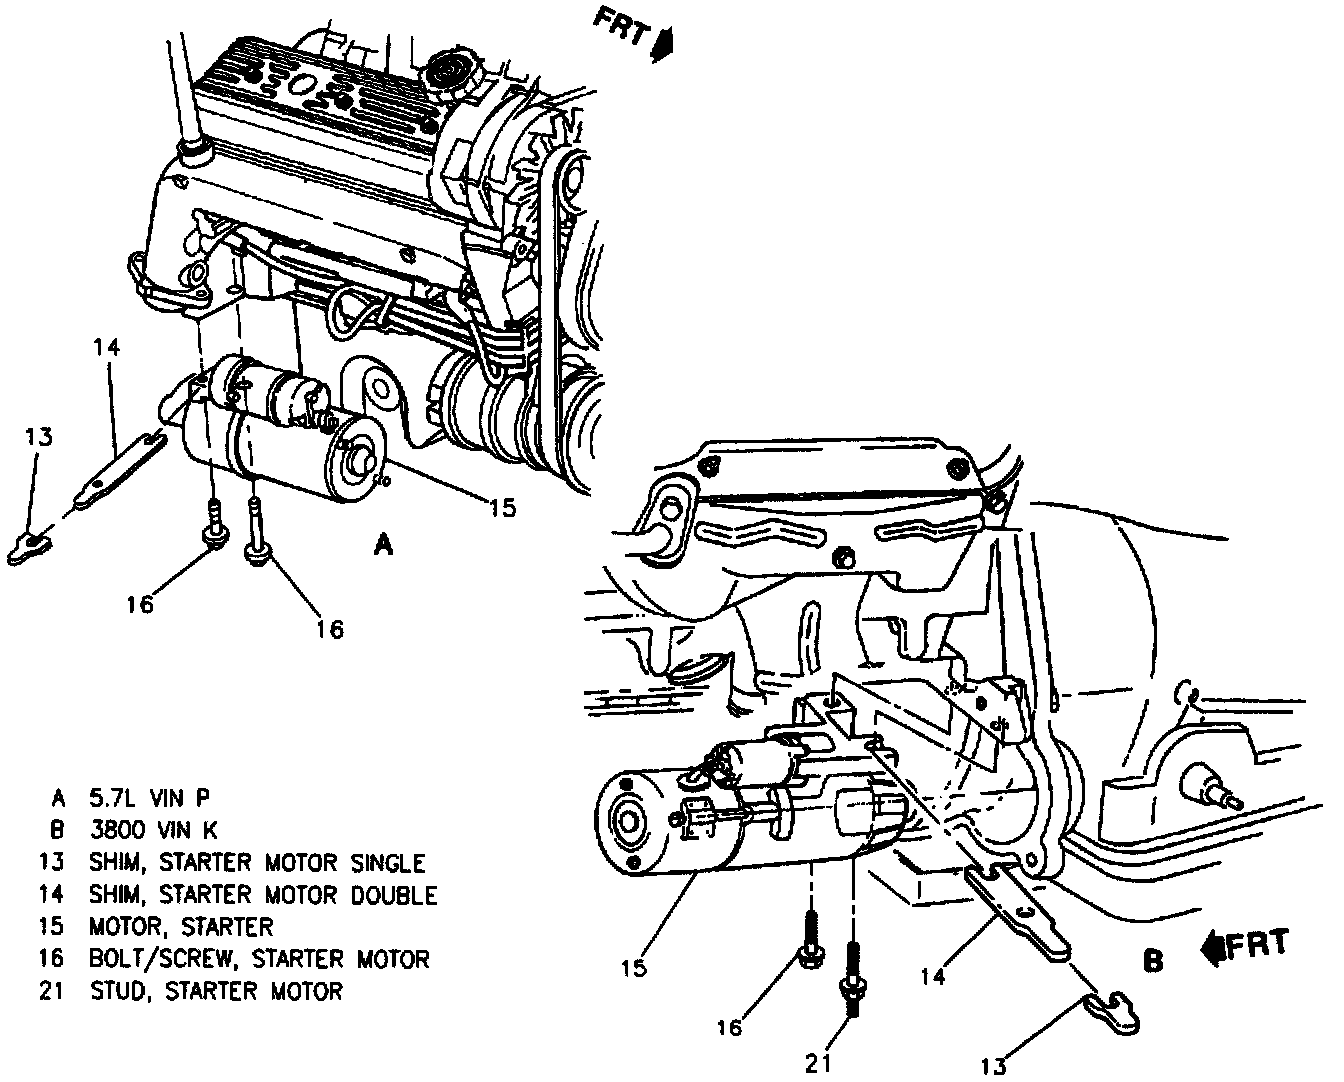
Fig. 4 - Flywheel To Pinion Clearance Check:

REMOVE OR DISCONNECT
Important: This vehicle was designed for starter mounting without shims. However if single shims (13) or double shims (14) have been added to correct a noise or engagement condition, they should be reinstalled in their original location to ensure proper pinion-to-flywheel engagement.
CAUTION: Refer to "Service Precautions".
1. Negative battery cable.
2. Raise and suitably support vehicle.
3. 3-way catalytic converter.
4. Starter shield.
5. Starter motor bolt/screw (16) and stud (21).
6. Electrical leads from starter motor (15).
^ Note position of wires before disconnecting.
7. Starter motor (15) from engine.
INSTALL OR CONNECT
NOTICE: Refer to "Service Precautions".
1. Electrical leads to starter motor (15).
Tighten
^ Starter solenoid 'BAT" terminal nut to 10 N.m (89 lb. in.).
^ Starter solenoid "S" terminal nut to 2 N.m (18 lb. in.).
2. Starter motor bolt/screw (16) and stud (21) attaching starter motor (15) to engine.
Tighten
^ Starter motor bolt/screw (16) to 47 N.m (35 lb. ft.).
^ Starter motor stud (21) to 45 N.m (33 lb. ft.).
Measure
Fig. 4 - Flywheel To Pinion Clearance Check:
^ Pinion-to-flywheel clearance. Add shims (13 or 14) if necessary.
3. 3-way catalytic converter.
4. Lower vehicle.
5. Negative battery cable.
Tighten
^ Negative battery cable to 15 N.m (11 lb. ft.).