Ignition Control Module: Service and Repair
Ignition Coil:

Ignition Control Module And Coil:
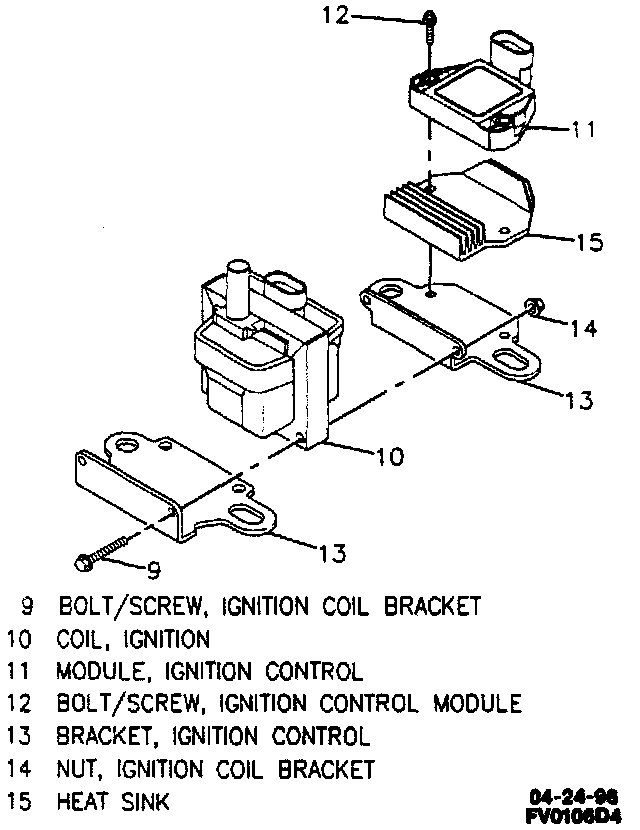
Numbers used below refer to image caption.
REMOVE OR DISCONNECT
^ Ignition coil.
DISASSEMBLE
1. Ignition control module bolts/screws (12).
2. Ignition control module (11).
3. Ignition control module heat sink (15).
4. Ignition coil bracket bolt/screw (9) and nut (14).
5. Ignition coil (10) from ignition control brackets (13).
ASSEMBLE
NOTICE: A package of silicone grease is included with a new ignition control module. This grease is necessary for ignition control module cooling. Spread the silicone grease on the metal face of ignition control module (11) and on the heat sink (15), and position the ignition control module (11) and heat sink (15) to the bracket
1. Ignition coil (10) to ignition control brackets (13).
2. Ignition coil bracket bolt/screw (9) and nut (14).
Tighten
^ Ignition coil bracket bolts/screws (9) to 2.8 Nm (25 lb. in.).
3. Ignition control module heat sink (15).
4. Ignition control module (11).
5. Ignition control module bolts/screws (12).
Tighten
^ Bolts/screws (12) to 1.7 Nm (15 lb. in.).
INSTALL OR CONNECT
^ Ignition coil.