Skid Bar Replacement
Skid Bar Replacement: Removal Procedure:
REMOVAL PROCEDURE
1. Raise the vehicle and suitably support.
Skid Bar Replacement: Removal Procedure:
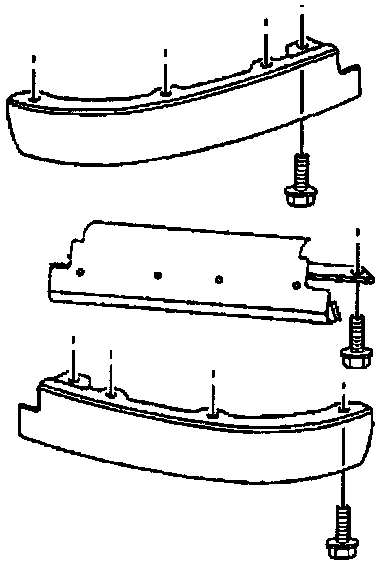
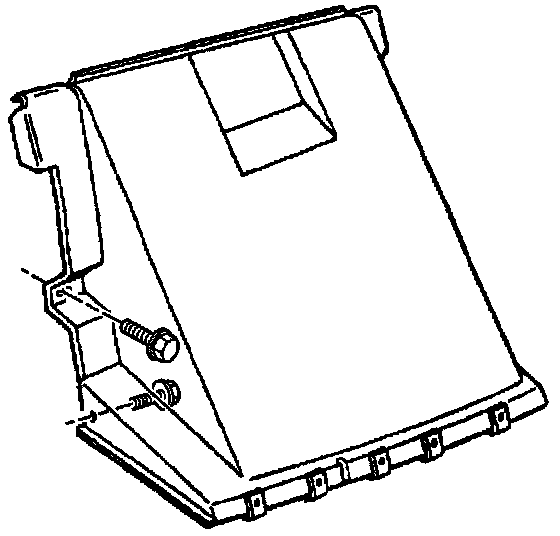
3. Remove the center air deflector.
Skid Bar Replacement: Removal Procedure:
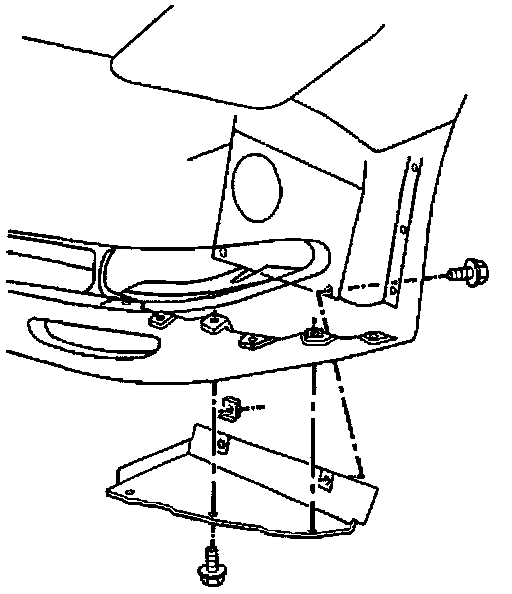
4. Remove the right and left fascia close out panels.
Skid Bar Replacement: Removal Procedure:
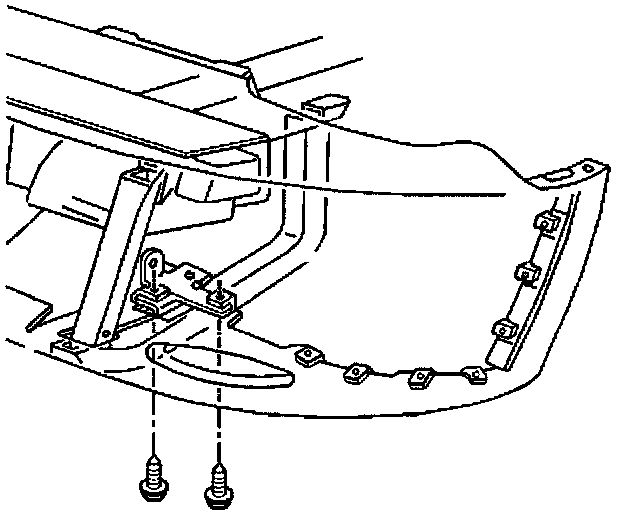
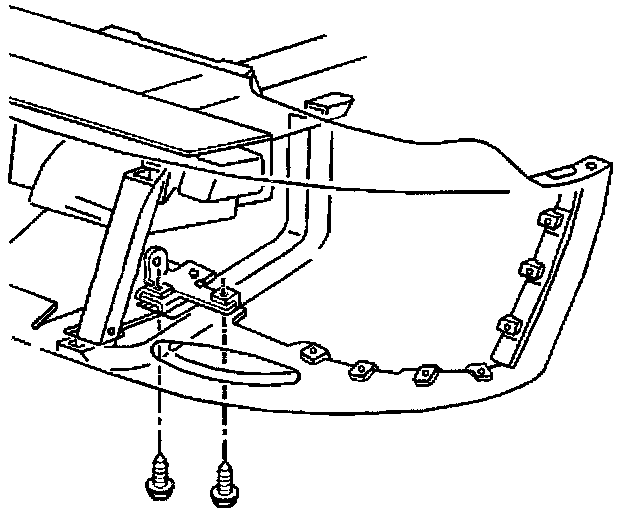
5. Remove the bolts attaching the fascia to the right and left skid bar brackets.
Skid Bar Replacement: Removal Procedure:
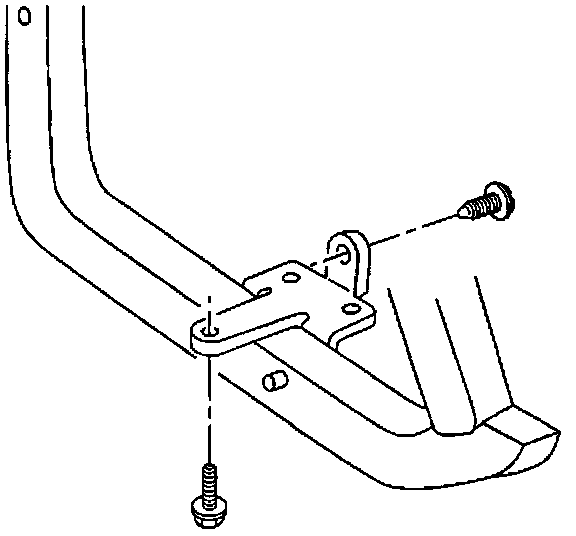
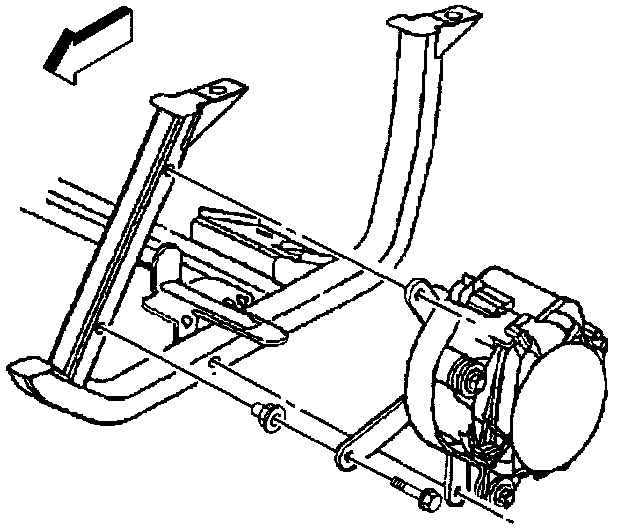
6. Remove the bolt attaching the lower radiator support to the right skid bar bracket and the bolt attaching the support to the left skid bar bracket.
Skid Bar Replacement: Removal Procedure:
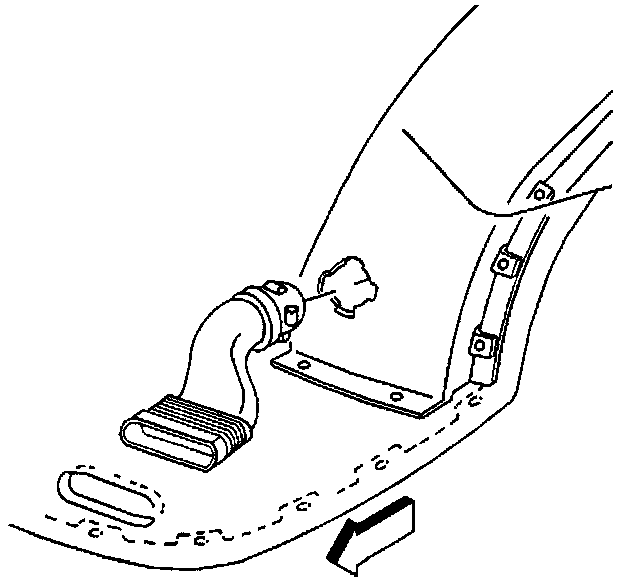
7. Reposition the left brake caliper air duct.
Skid Bar Replacement: Removal Procedure:
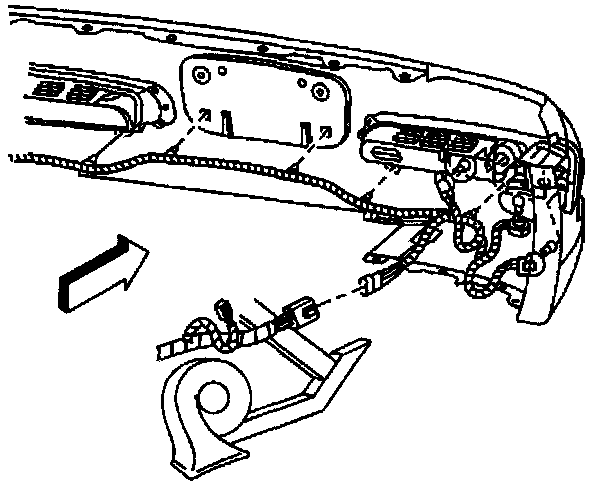
8. Remove the tie strap attaching the AIR hose to the skid bar.
9. Remove the AIR pump bracket attaching bolts.
10. Reposition the AIR pump.
11. Reposition the AIR pump electrical harnesses.
Skid Bar Replacement: Removal Procedure:

12. Remove the wire harness from the clip on the right rear side of the skid bar.
13. Remove the harness connector from the right front side of the skid bar.
14. Remove the horn bracket with the horns from the skid bar.
15. Disconnect the horn electrical connection.
Skid Bar Replacement: Removal Procedure:
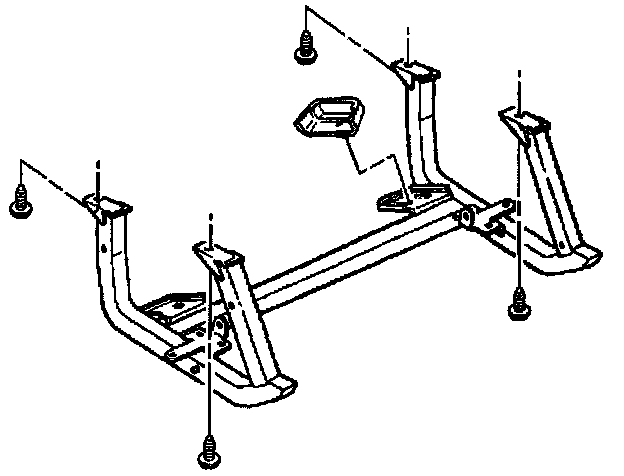
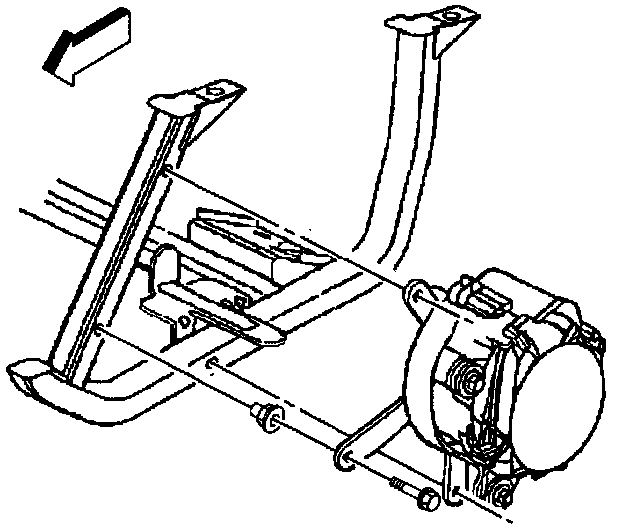
16. Support the skid bar.
17. Remove the four skid bar to frame attaching bolts.
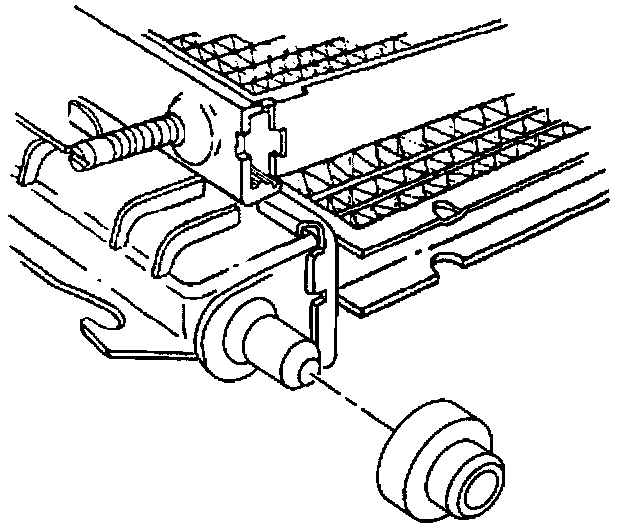
18. Lower the skid bar removing the right radiator insulator from the skid ban.
19. Remove the skid bar.
20. Transfer parts as necessary.
Skid Bar Replacement: Installation Procedure:
INSTALLATION PROCEDURE
1. Install the right insulator to the radiator.
Skid Bar Replacement: Installation Procedure:

2. Install the left insulator to the skid bar.
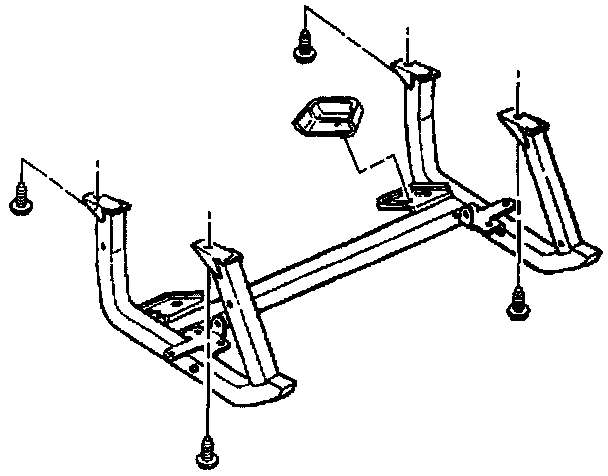
3. Position the skid bar.
4. Install the skid bar to the frame with the attaching bolts.
Tighten
Tighten the skid bar to frame bolts to 50 N.m (36 lb ft).
Notice: Refer to Fastener Notice in General Information.
Skid Bar Replacement: Installation Procedure:
5. Install the right bolt and the left bolt attaching the lower radiator support to the skid bar.
Tighten
Tighten the lower radiator support to skid bar bolts to 2.5 N.m (22 lb in).
Skid Bar Replacement: Installation Procedure:
6. Install the AIR pump and bracket.
Tighten
Tighten The AIR pump bracket to skid bar bolts to 9 N.m (79 lb in).
7. Tie strap the AIR hose to the skid bar.
Skid Bar Replacement: Installation Procedure:
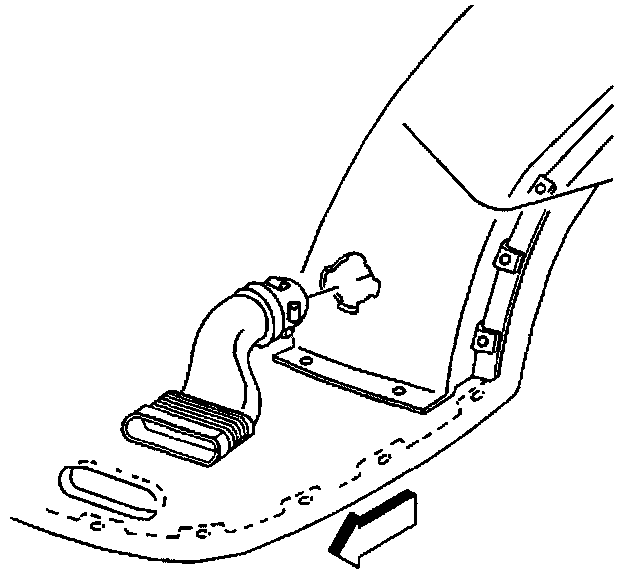
8. Install the left brake caliper air duct.
Skid Bar Replacement: Installation Procedure:
9. Connect the electrical connector to the horns.
10. Install the horns with bracket to the skid bar.
Tighten
Tighten the horn bracket bolts to 9 N.m (79 lb in).
11. Install the harness connector to the front of the skid bar.
12. Install the harness to the clip on the rear of the skid bar.
Skid Bar Replacement: Installation Procedure:
13. Install the bolts attaching the fascia to the right and left skid bar brackets.
Tighten
Tighten the fascia to skid bar bolts to 5 N.m (44 lb in).
Skid Bar Replacement: Installation Procedure:
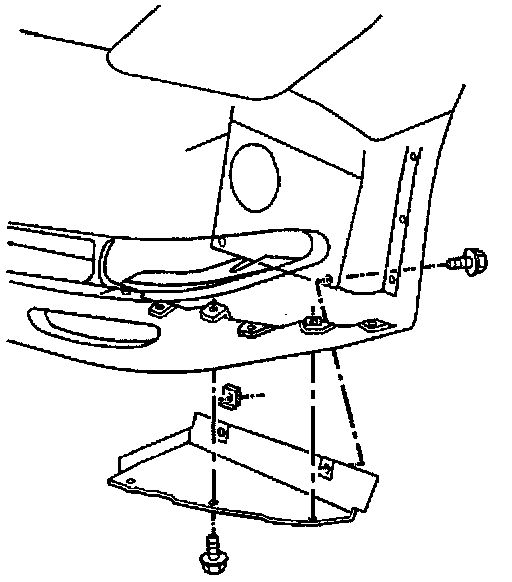
14. Install the right and left fascia close out panels.
Tighten
Tighten the fascia lower close out panel bolts to 7 N.m (62 lb in).
Skid Bar Replacement: Installation Procedure:
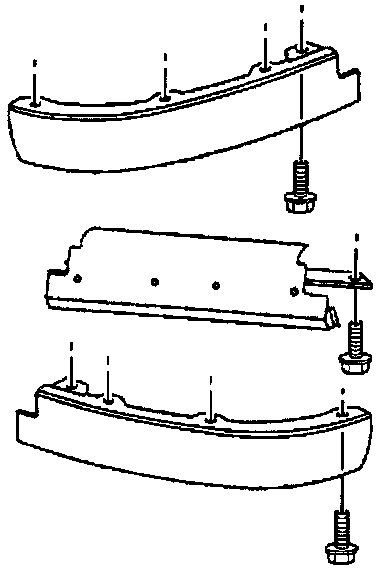
15. Install the center air deflector.
Tighten
Tighten the center air deflector bolts to 7 N.m (62 lb in).
16. Remove the support from the radiator.
17. Lower the vehicle.