Accumulator: Service and Repair
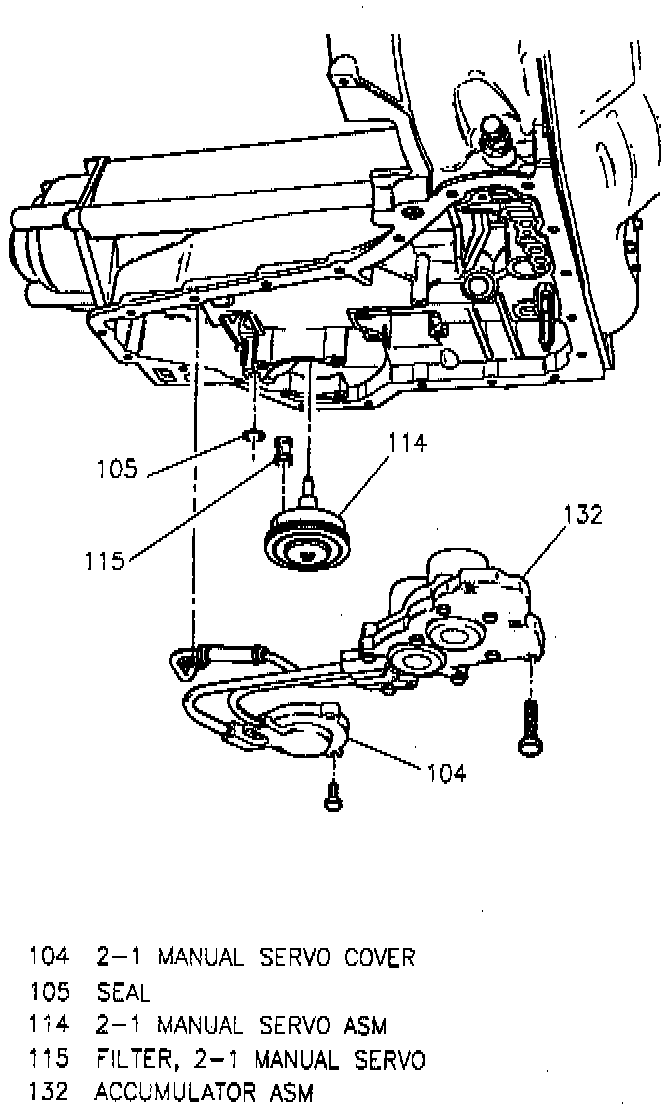
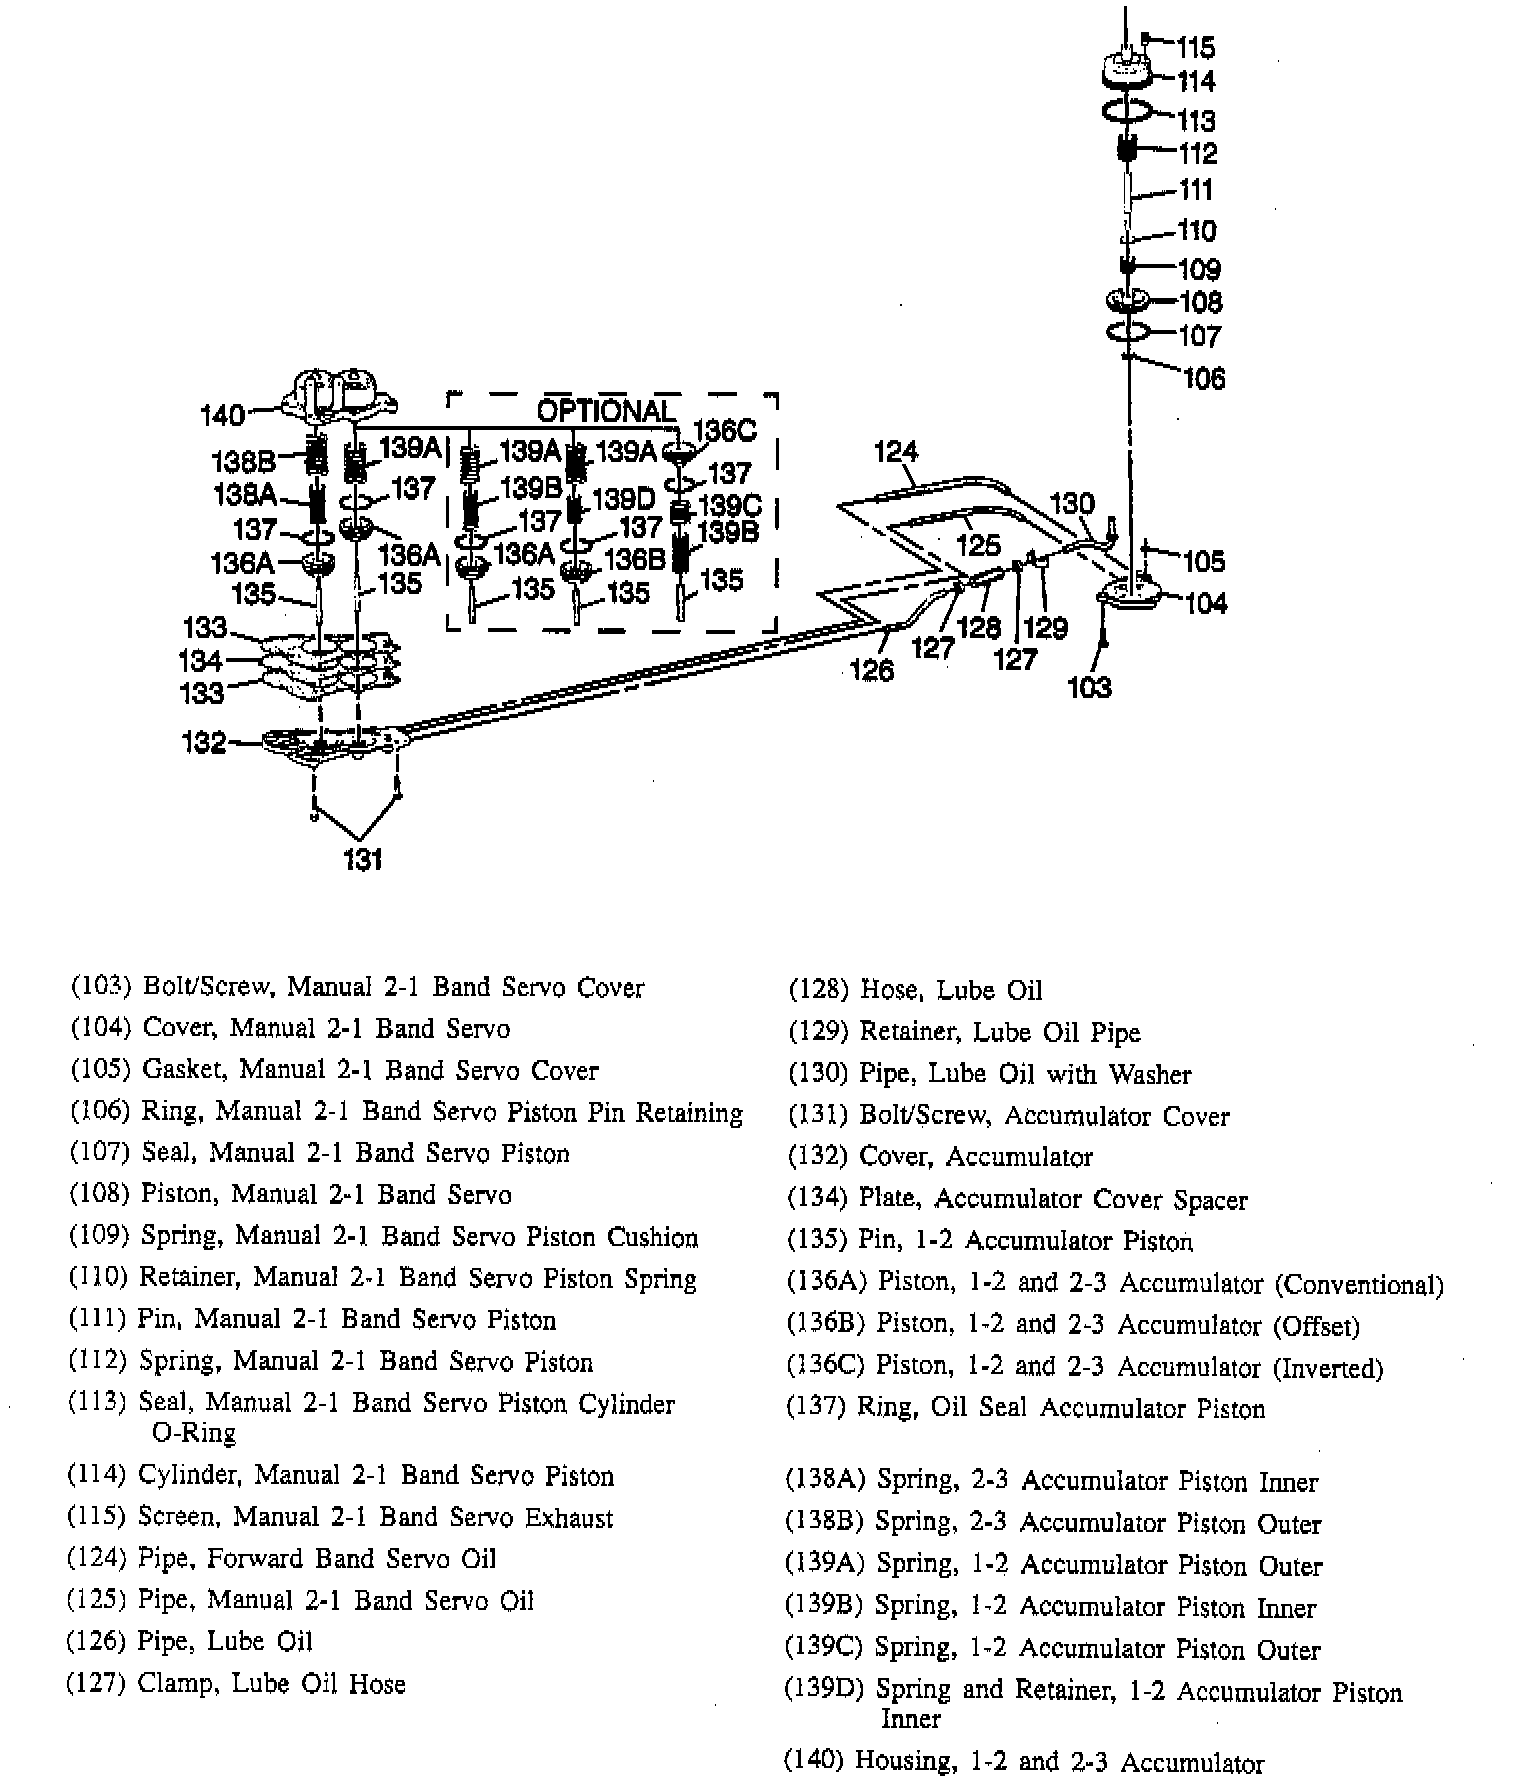

REMOVE OR DISCONNECT
1. Oil pan.
2. Filter.
3. Accumulator cover attaching bolts/screws and cover.
4. Accumulator piston, oil seal ring and spring.
5. Manual 2-1 band servo cover.
- To disassemble and inspect the accumulator and 2-1 manual servo, refer to TRANSAXLE UNIT REPAIR.
INSTALL OR CONNECT
NOTICE: Always use the correct fastener in the proper location. When you replace a fastener, use ONLY the exact part number for that application. The manufacturer will call out those fasteners that require a replacement after removal. The manufacturer will also call out the fasteners that require thread lockers or thread sealant. UNLESS OTHERWISE SPECIFIED, do not use supplemental coatings (paints, greases, or other corrosion inhibitors) on threaded fasteners or fastener joint interlaces. Generally, such coatings adversely affect the fastener torque and the joint clamping force, and may damage the fastener. When you install fasteners, use the correct tightening sequence and specifications. Following these instructions can help you avoid damage to parts and systems.
1. Accumulator piston, spring and new oil seal ring.
2. Accumulator cover and attaching bolts/screws.
- Tighten bolts/screws to 11 Nm (97 inch lbs.).
3. Manual 2-1 band servo cover.
- Tighten bolts/screws to 24 Nm (17 ft. lbs.).
4. Filter.
5. Oil pan.
Adjust
- Fluid level.
Inspect
- For proper completion of repairs.
- For proper fluid level.
- For fluid leaks.