Exhaust Camshaft and Lifter Replacement
Exhaust Camshaft and Lifter Replacement
Tools Required
J 43655 Camshaft Sprocket Holding Tool
Removal Procedure
1. Remove the camshaft position (CMP) sensor.
2. Remove the camshaft cover.
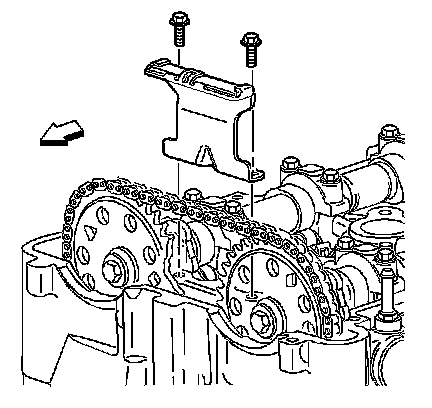
3. Remove the upper timing chain guide.

4. Install the J 43655.

5. Remove both the intake and the exhaust camshaft sprocket bolts and discard.
6. Slide the camshaft sprockets forward.

7. Mark the caps to ensure that the bearing caps are installed in the original position.
Important: Remove each bolt on each cap one turn at a time until there is no spring tension on the camshaft.
8. Remove the caps.
9. Remove the exhaust camshaft.

10. Remove the camshaft roller followers.

11. Remove the hydraulic lash adjusters.
Installation Procedure

1. Lubricate the valve tips.
2. Install the hydraulic lash adjusters.
3. Install the camshaft roller followers.

4. Ensure that the alignment notches are aligned with the camshaft sprocket.
5. Install the exhaust camshaft.
6. Install the camshaft caps.
Notice: Refer to Fastener Notice.
7. Tighten the camshaft cap bolts in increments of 3 turns until they are seated.
Tighten the camshaft cap bolts to 10 N.m (89 lb in).
8. Install camshaft sprockets onto the camshafts.
9. Hand tighten NEW camshaft sprocket bolts.
10. Remove the J 43655.
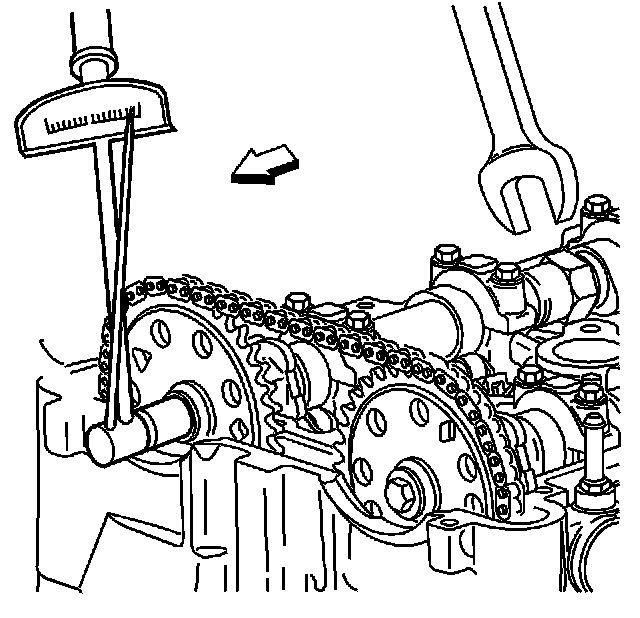
11. Tighten the camshaft sprocket bolts.
Tighten the bolts to 85 N.m (63 lb ft) plus 30 degrees.
12. Install the upper timing chain guide.
Tighten the upper timing chain guide to 10 N.m (89 lb in).
13. Install the camshaft cover.
14. Install the CMP sensor.