Shifter A/T: Service and Repair
Gearshift Control Lever Replacement
Removal Procedure

Caution: Refer to Battery Disconnect Caution (Battery Disconnect Caution).
1. Disconnect the negative battery cable.
2. Remove the floor console. Refer to Front Floor Console Replacement (Notchback) (Service and Repair)Front Floor Console Replacement (Hatchback) (Service and Repair).
3. Disconnect the wiring harness connectors from the shift control lever.

4. Loosen the control cable adjusting nut.
5. Disconnect the control cable from the shift control lever assembly.
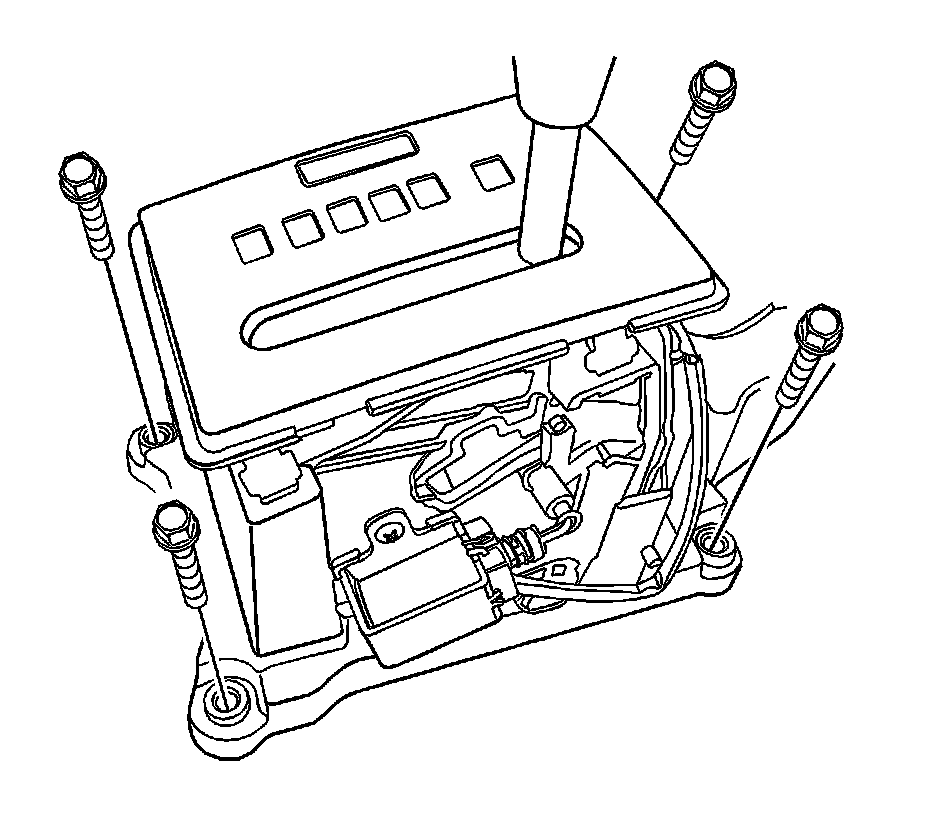
6. Remove the shift control lever assembly mounting bolts.
7. Remove the shift control lever assembly.
Installation Procedure
Notice: Refer to Fastener Notice (Fastener Notice).
1. Install the shift control lever assembly and mounting bolts.
Tighten the shift control lever assembly mounting bolts to 8 N.m (71 lb in).
2. Connect the control cable to the shift control lever assembly.
3. Tighten the control cable adjusting nut.
Tighten the control cable adjusting nut to 8 N.m (71 lb in).
4. Connect the harness connector.
5. Adjust the control cable. Refer to Range Selector Lever Cable Adjustment (Adjustments).
6. Install the floor console. Refer to Front Floor Console Replacement (Notchback) (Service and Repair)Front Floor Console Replacement (Hatchback) (Service and Repair).
7. Connect the negative battery cable.