Rear
BRAKE PADS/SHOES REARREMOVAL
NOTE: Before proceeding, Refer to WARNING and CAUTION in Service Precautions.
1. Raise and support vehicle.
2. Remove both rear tire and wheel assemblies from vehicle.
NOTE: Perform Step 3 through Step 7 on each side of vehicle to complete shoe set removal.
NOTE: In some cases, it may be necessary to retract caliper piston in its bore a small amount in order to provide sufficient clearance between shoes and rotor to easily remove caliper from knuckle. This can usually be accomplished before guide pin bolts are removed, by grasping rear of caliper and pulling outward working with guide pins, thus retracting piston. Never push on piston directly as it may get damaged.
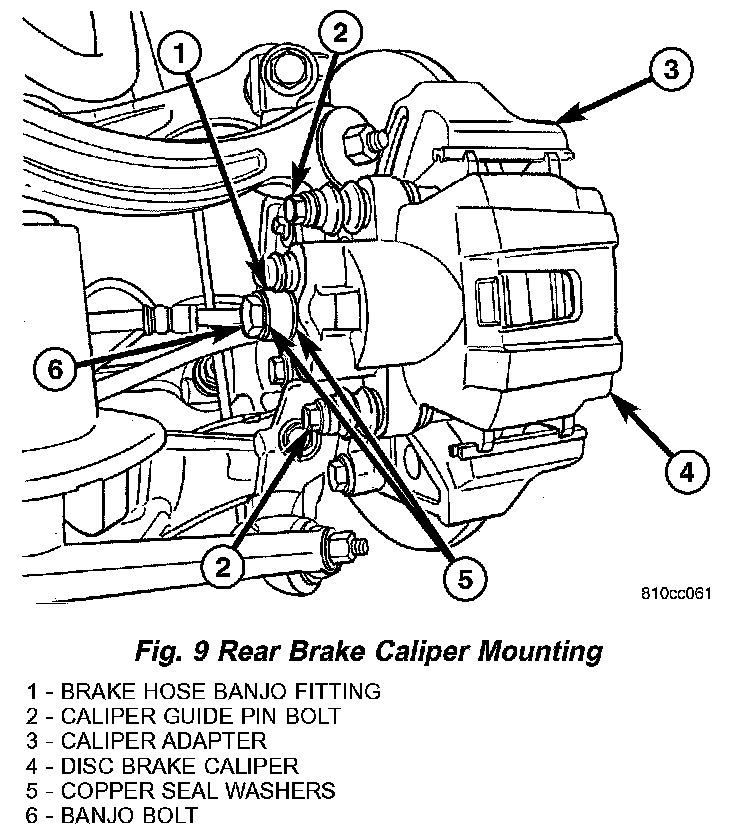
3. Remove two caliper guide pin bolts (Fig. 9).
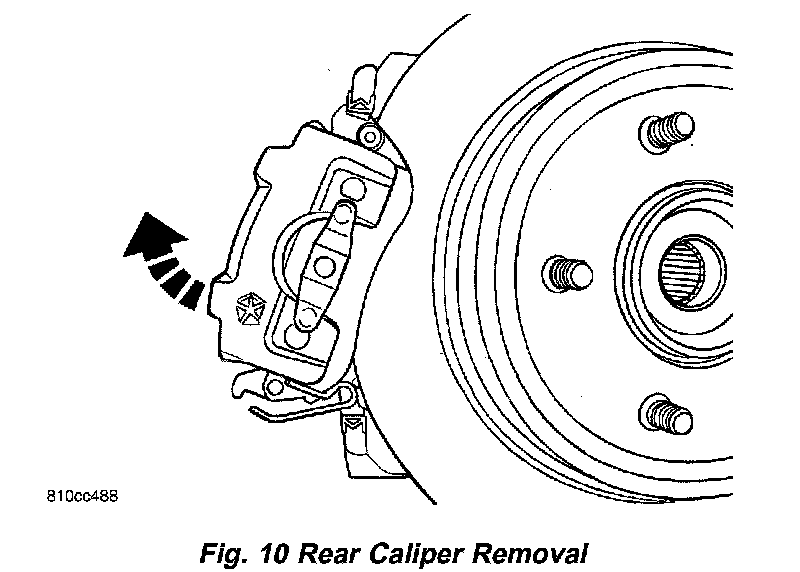
4. Remove caliper assembly from brake adapter by first rotating bottom of caliper away from rotor, then lifting caliper (with shoes) away from upper adapter abutment (Fig. 10).
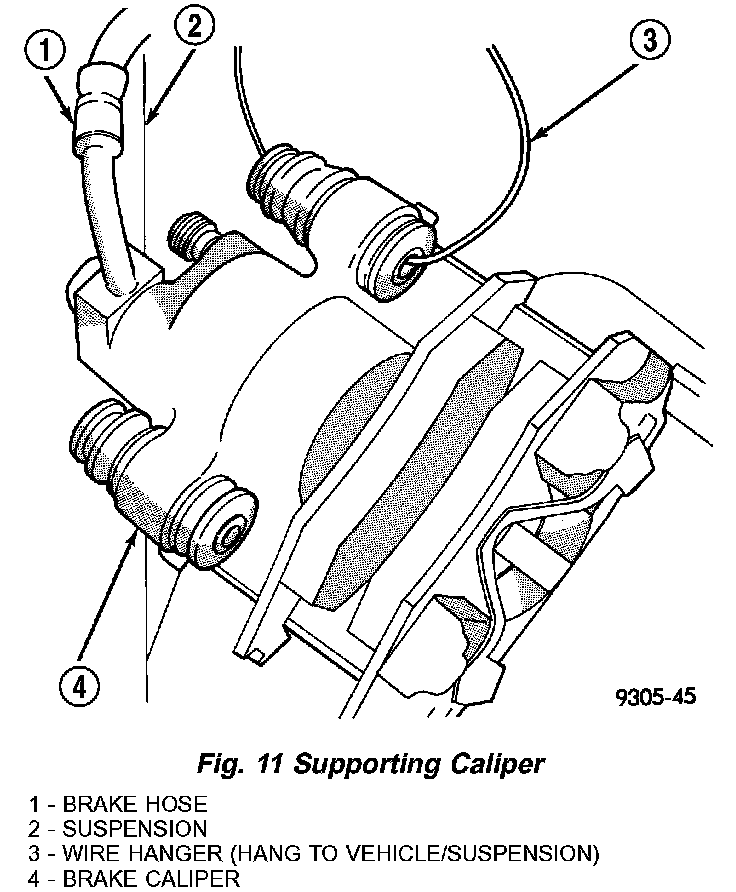
5. To prevent weight of caliper from overextending and damaging brake hose while caliper is off mount, hang brake caliper from vehicle using wire or cord (Fig. 11).
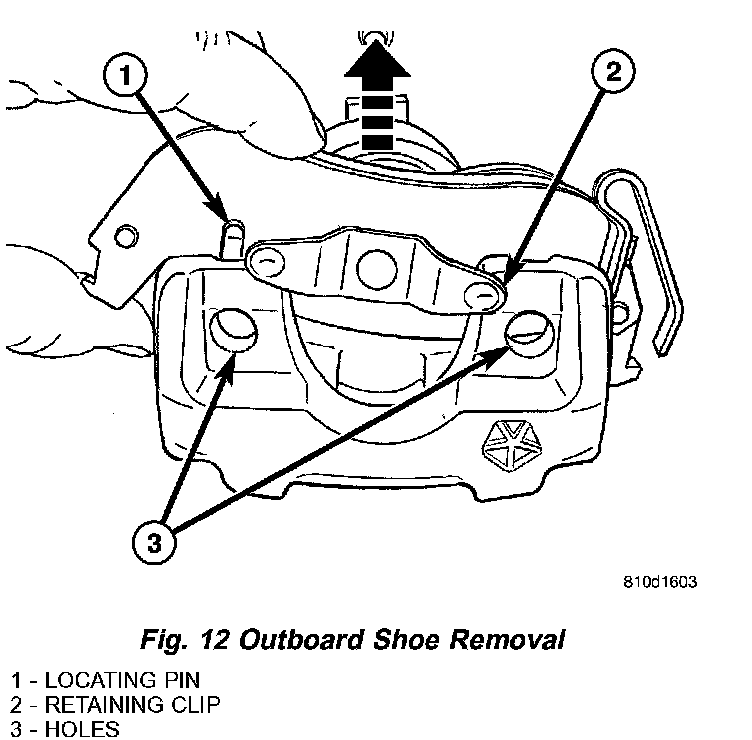
6. Remove outboard brake shoe by pushing shoe away from caliper fingers, dislocating locating pins built into shoe backing plate from holes in caliper fingers, then sliding brake shoe down and off of brake caliper (Fig. 12).
7. Pull inboard brake shoe away from caliper piston, dislocating retaining clip from cavity in piston. Remove inboard shoe.
INSTALLATION
NOTE: Perform Step 1 through Step 8 on each side of vehicle to complete shoe set installation, then proceed to Step 9.
1. Completely retract caliper piston back into caliper piston bore. This is required to gain necessary shoe-to-rotor clearance for caliper installation onto knuckle.
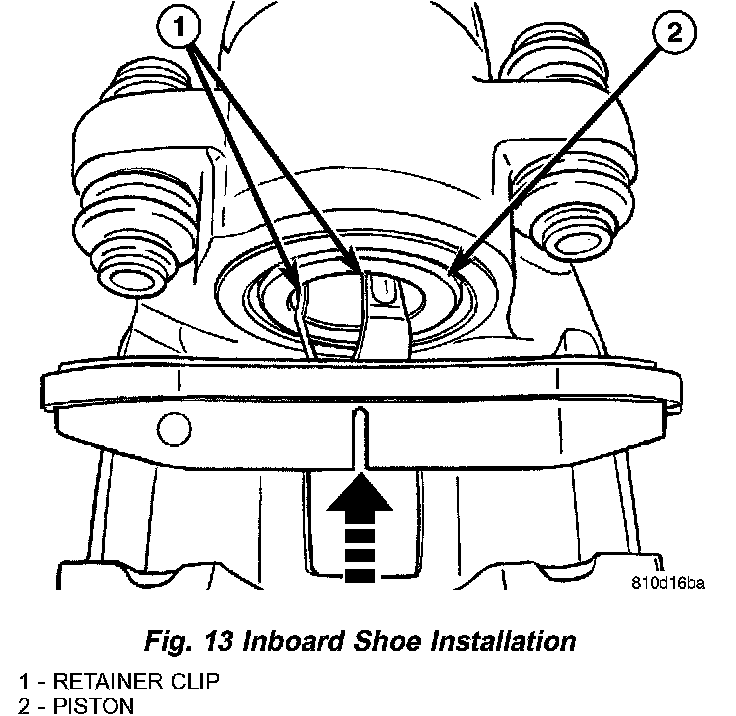
2. Position inboard shoe retainer clip against piston cavity (Fig. 13). Firmly press against shoe lining by hand until retainer clip seats itself in piston cavity groove. Be sure inboard brake shoe backing plate is flush against caliper piston.
CAUTION: Outboard brake shoes are side oriented. Make sure spring clip on each shoe is installed so it is positioned downward once caliper is installed.
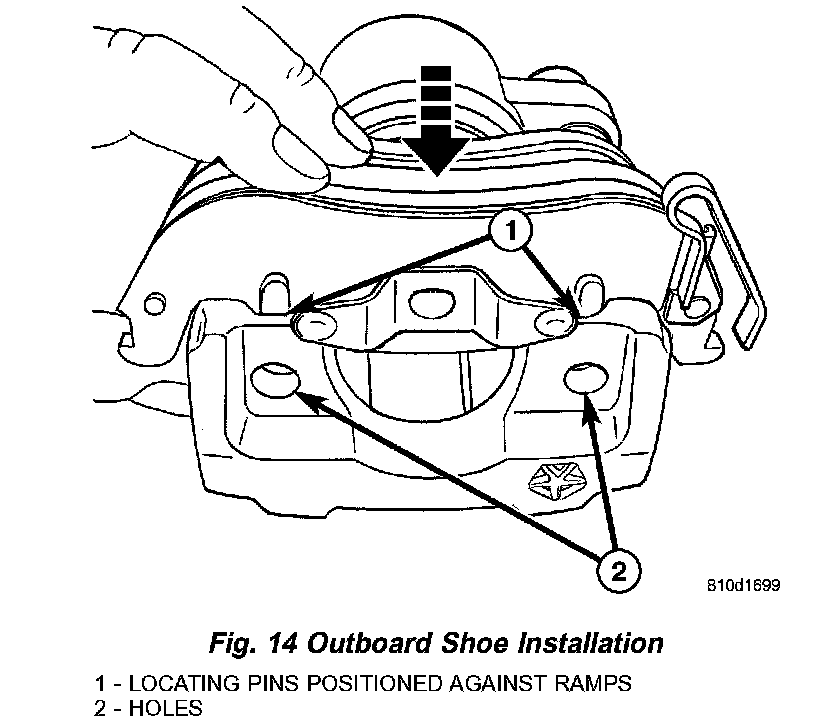
3. Position outboard brake shoe locating pins against ramps built into caliper fingers (Fig. 14). Slide shoe onto caliper. Be sure locating pins on rear of shoe are squarely seated into holes in caliper and shoe is flat against caliper fingers.
4. Make sure abutment shims are in place on both slide abutments of caliper adapter.
CAUTION: Use care when installing caliper assembly onto adapter so guide pin bushings and sleeves do not get damaged by mounting bosses on adapter.
5. Retract caliper guide pins to clear mounting bosses on caliper adapter when installing caliper.
6. Install brake caliper in opposite way it was removed. Starting with upper end, carefully position caliper and brake shoes over brake rotor and align outboard shoe's upper edge with caliper slide abutment. Rotate lower end of caliper into mounting position on adapter.
CAUTION: Extreme caution should be taken not to cross thread caliper guide pin bolts when they are installed.
7. Carefully install caliper guide pin bolts (Fig. 9). Tighten bolts to 23 Nm (200 inch lbs.) torque.
8. Install tire and wheel assembly. Tighten wheel mounting nuts to a torque of 135 Nm (100 ft. lbs.).
9. Lower vehicle.
10. Pump brake pedal several times to ensure vehicle has a firm brake pedal before moving vehicle.
11. Road test vehicle and make several stops to wear off any foreign material on brakes and to seat brake shoes.