Timing Cover: Service and Repair
REMOVAL
1. Remove idler pulley and bracket assembly.
2. Remove drive and accessory belts.
3. Remove water pump.
4. Remove crankshaft pulley and damper.
5. Remove lower radiator hose.
6. Remove oil pan-to-timing cover bolts.
7. Unbolt front cover and remove.
8. Remove crankshaft seal from front cover.
INSTALLATION
1. Install new crankshaft seal in front cover.
Timing Chain Cover And Gasket Installation:
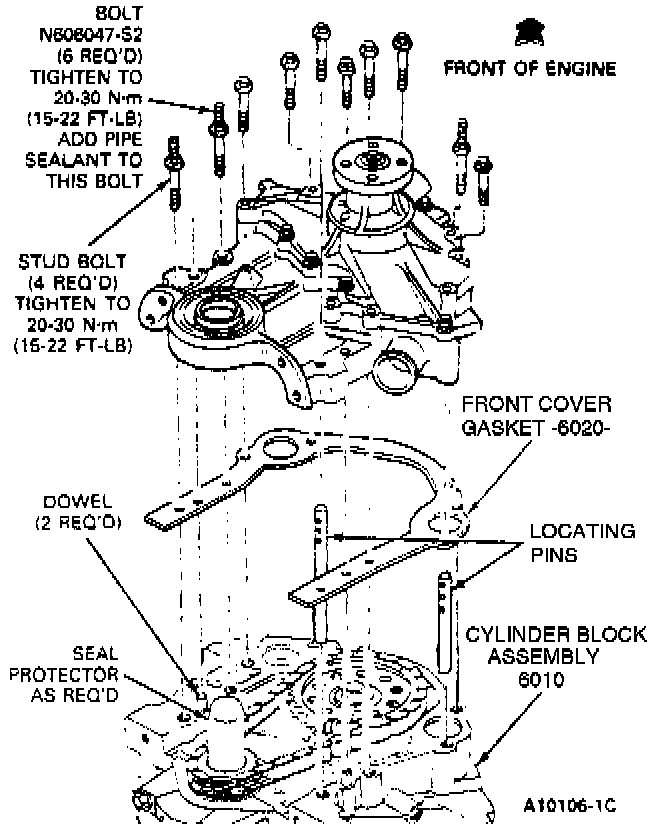
2. Carefully cut and remove exposed portion of oil pan gasket. To install, coat the gasket surface of the oil pan with Sealing Compound B5A-19554-A or equivalent, then cut and position the required sections of a new gasket on the oil pan and apply Sealing Compound B5A-19554-A or equivalent at the corners. Coat the gasket surfaces of the block and cover with Sealing Compound B5A-19554-A or equivalent, and position cover on block.
Front Cover/Water Pump Fastener Chart:
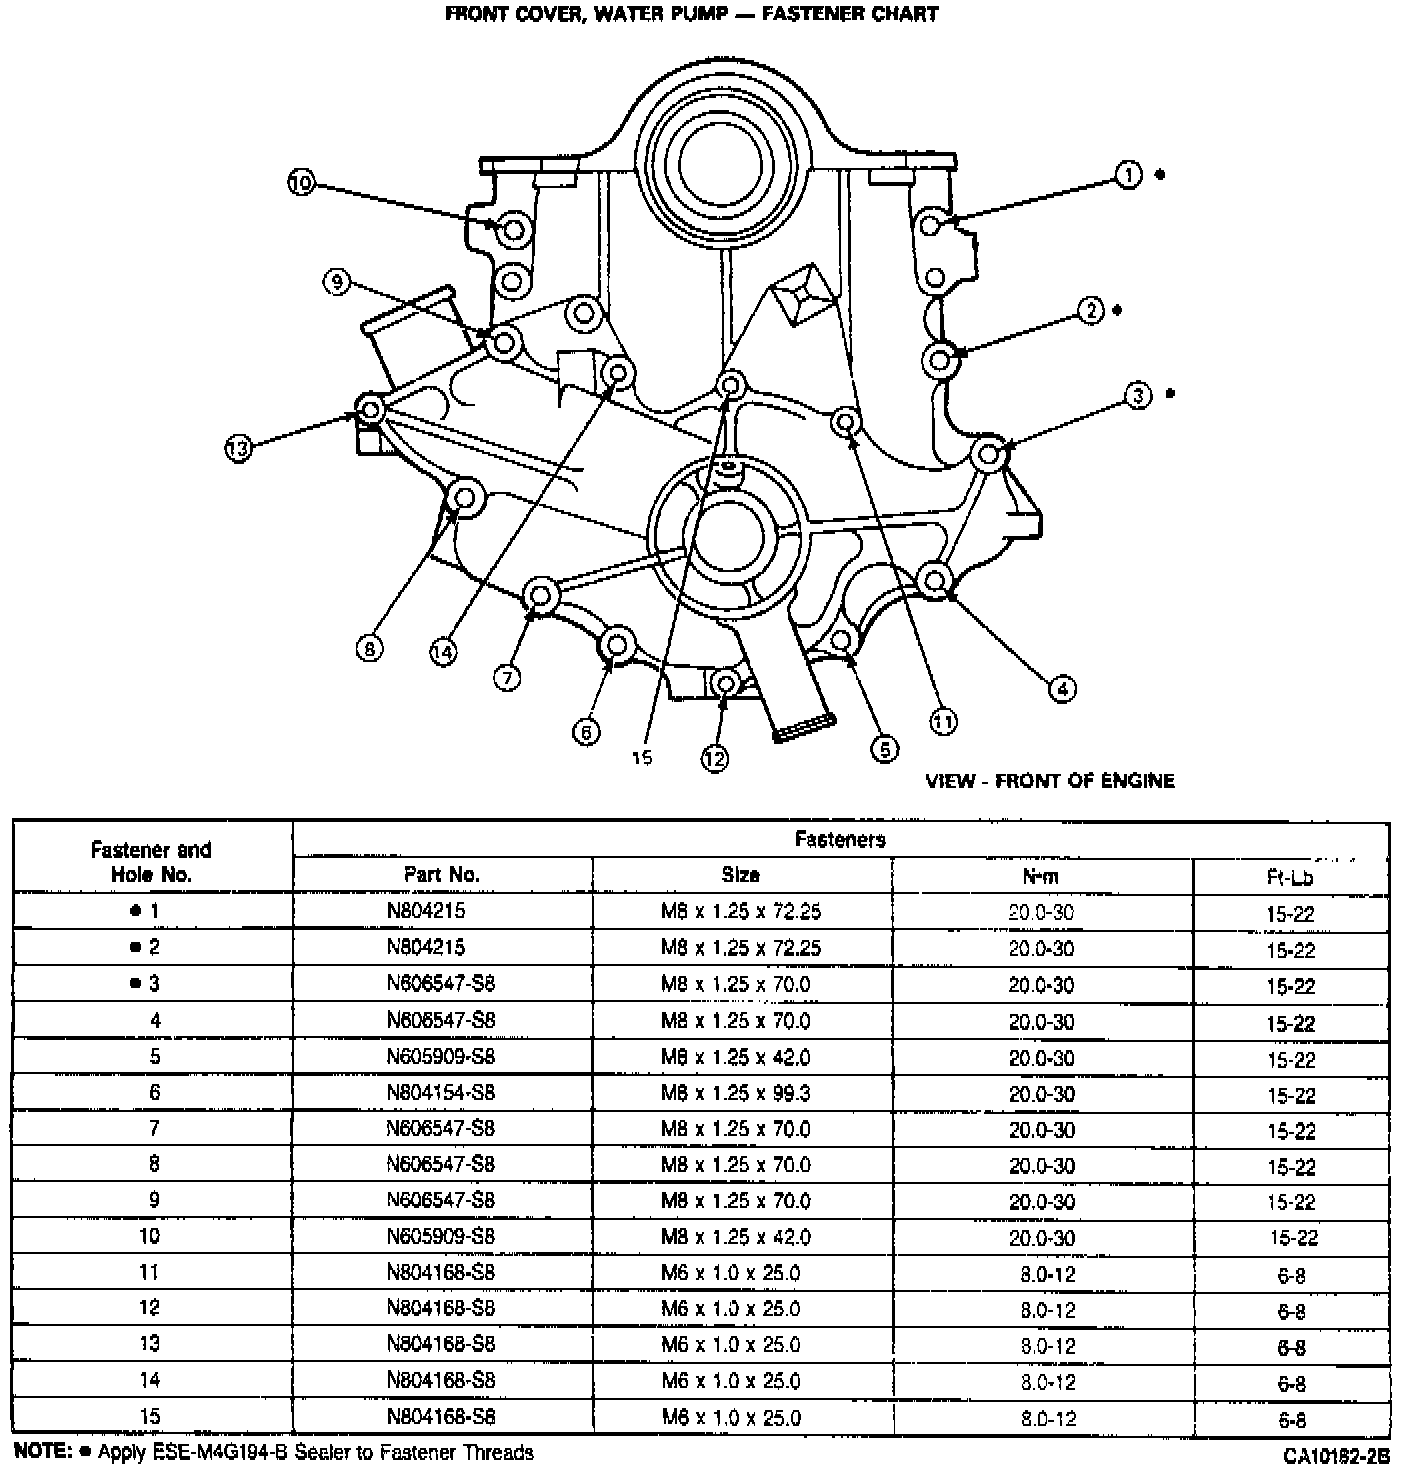
NOTE: Use sealant for front cover bolt which goes into water jacket of block.
Timing Cover Bolts:

3. Install front cover and tighten bolts: number 1, 2 and 3 20-30 Nm (15-22 ft lb).
4. Install oil pan-to-timing cover bolts and tighten to 8-12 Nm (6-8 ft lbs).
5. Install lower radiator hose.
6. Install crankshaft pulley to crankshaft damper and tighten to 26-38 Nm (20-28 ft lb).
7. Install crankshaft damper to crankshaft and tighten bolt to 190-230 Nm (141-169 ft lb).
8. Install water pump and tighten bolts: number 3 through 9 to 20-30 Nm (15-22 ft lb) and bolts: number 11 through 15 to 8-12 Nm (6-8 ft lb).
9. Install drive and accessory belts.
10. Install idler pulley and bracket assembly.