Flex Plate: Service and Repair
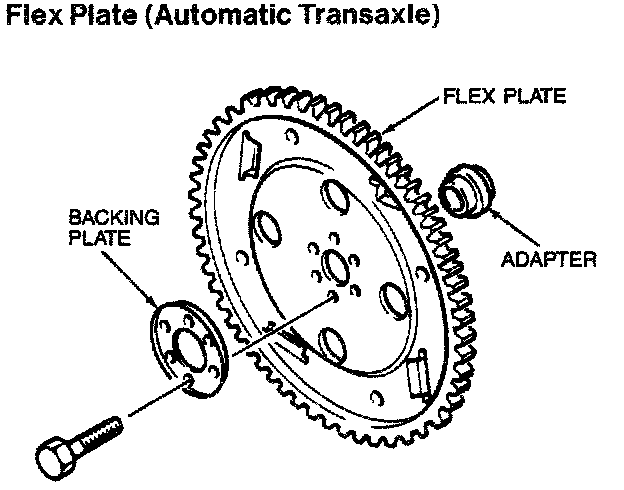
Removal
1. Remove the transaxle.
2. Remove the flex plate mounting bolts.
3. Remove the backing plate, flex plate, and adapter.
Installation
1. Remove the sealant from the flex plate mounting bolts and the bolt holes.
NOTE: If the sealant on the previously used flex plate bolts cannot be removed, install new flex plate bolts. Do not apply sealant to the new flex plate bolts. They come with sealant on them.
2. Install the adapter.
3. Install the flex plate.
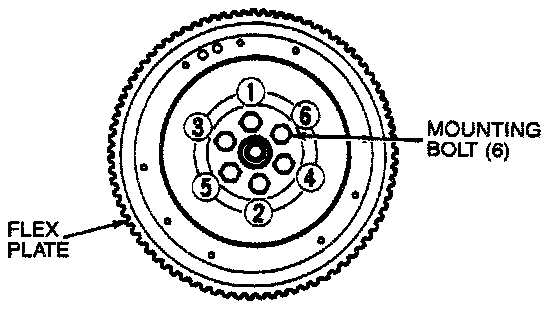
4. Install the backing plate and flex plate mounting bolts. Tighten the bolts to 96-103 N.m (71-76 lb-ft) in the order shown.
5. Install the transaxle.