Installation
1 Place transaxle assembly on jack and raise to engine.
2. Position transaxle to engine and align torque converter bolts to flywheel.
3. Install lower transaxle housing bolts. Tighten to 55-68 Nm (41-50 ft-lb).
4. Install four torque converter bolts through starter drive hole by rotating engine at the crankshaft pulley bolt with a 7/8-inch deep well socket and 1/2-inch drive ratchet. Tighten to 31-53 Nm (23-39 ft-lb).
5. Remove Rotunda Hi-Lift Jack or equivalent 014-00210.
6. Install halfshaft assemblies.
7. Install dust cover. Tighten to 9-12 Nm (7-9 ft-lb).
8. Install starter. Tighten to 41-54 Nm (30-40 ft-lb).
9. Position Subframe Removal Kit 014-00751, raise subframe and install retaining bolts. Tighten to 75-102 Nm (55-75 ft-lb).
10. Remove subframe removal kit.
LH Engine Support:
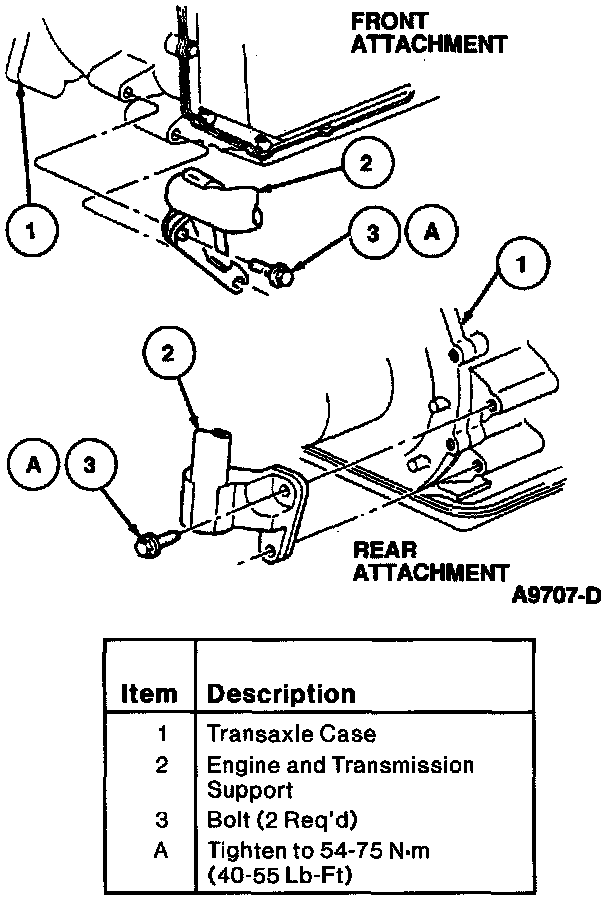
11. Install LH engine support. Tighten four bolts to 54-75 Nm (40-55 ft-lb).
Engine Mount:
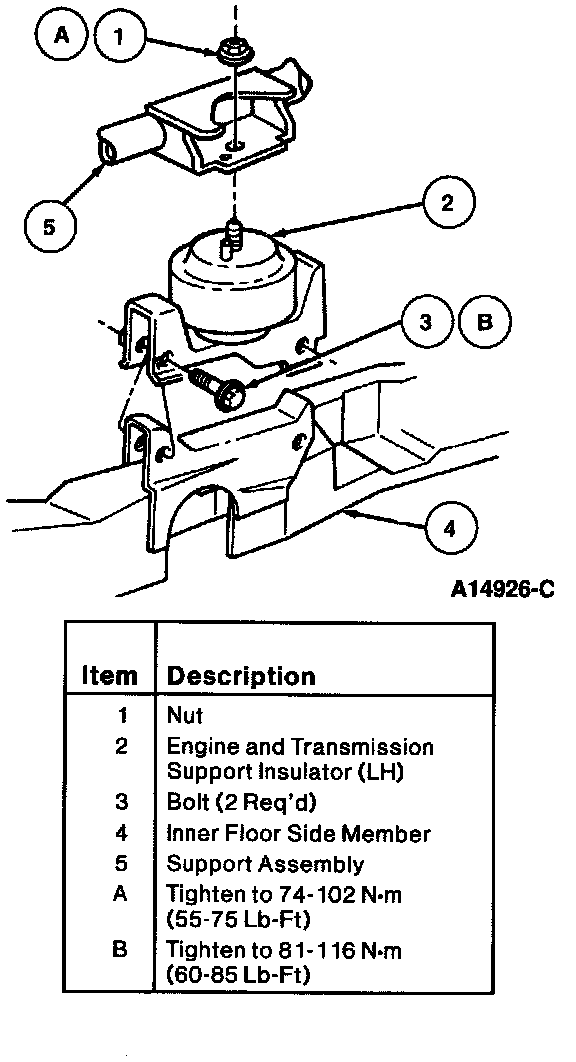
12. Install engine mount and tighten to 81-116 Nm (60-85 ft-lb).
13. Install ball joints at steering knuckle.
14. Install tie rod ends at steering knuckle. Tighten to 31-47 Nm (23-35 ft-lb).
NOTE: Tighten tie rod retaining nuts to minimum 63-47 Nm (46-35 ft-lb), continue tightening to nearest cotter pin slot and insert cotter pin.
15. Install stabilizer bar link at stabilizer bar. Tighten to 30-40 Nm (23-29 ft-lb).
16. Install power steering fluid lines at steering gear.
Steering Gear:
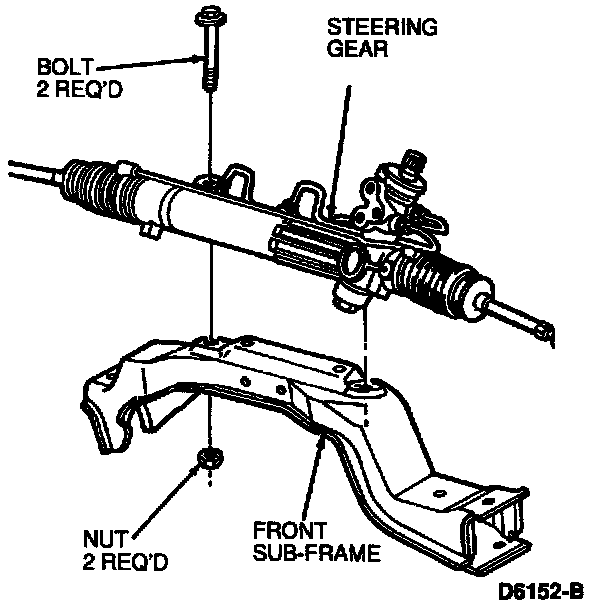
17. Install steering shaft and pinch bolt. Tighten to 41-51 Nm (30-38 ft-lb).
18. Install flex tube support or equivalent.
NOTE: Make sure wheels are in the straight-ahead position.
19. Install catalytic converters and Y-pipe assembly. Tighten to 34-46 Nm (26-33 ft-lb).
20. Install front wheel and tire assemblies. Tighten lug nuts to 115-142 Nm (85-105 ft-lb).
21. Lower vehicle.
22. Install remaining torque converter housing bolts. Tighten to 55-68 Nm (41-50 ft-lb).
23. Remove engine support equipment.
24. Install filler tube and fluid level indicator.
25. Install shift cable and shift cable bracket.
26. Install main wiring harness bracket.
27. Install electrical connectors to engine.
28. Connect battery.
NOTE: When the battery has been disconnected and reconnected, some abnormal drive symptoms may occur while the Powertrain Control Module (PCM) relearns its adaptive strategy. The vehicle may need to be driven 10 miles or more to relearn the strategy.
29. Install air cleaner assembly, hoses and tubes.
30. Install cowl top vent panel.
31. Fill transaxle with specified quantity and quality of fluid.
32. Start engine. Move transaxle selector lever through all ranges. Check for leaks.
33. Place the air suspension switch to the ON position (if equipped).