Removal
1. Position the vehicle on a hoist.NOTE: If vehicle is equipped with an air suspension system, the switch must be placed in the OFF position before raising the vehicle.
2. Place a drain pan under transaxle.
3. Loosen transaxle fluid pan retaining bolts and drain fluid from transaxle.
4. When fluid has drained to level of transaxle pan flange, remove rest of transaxle pan bolts working from the RH side and allow it to drop and drain slowly.
5. When fluid has drained completely, reinstall transaxle pan bolts.
6. Disconnect battery.
NOTE: When the battery has been disconnected and reconnected, some abnormal drive symptoms may occur while the Powertrain Control Module (PCM) relearns its adaptive strategy. The vehicle may need to be driven 10 miles or more to relearn the strategy.
7. Remove air cleaner assembly, hoses and tubes.
8. Remove cowl top vent panel.
9. Disconnect electrical connectors from engine.
10. Remove bolt retaining main wiring harness bracket and position wiring harness out of way.
11. Disconnect shift cable from transaxle.
12. Remove shift cable from bracket.
NOTE: Install engine lifting eyes to LH front exhaust manifold stud and RH rear exhaust manifold stud.
Three Bar Engine Support:
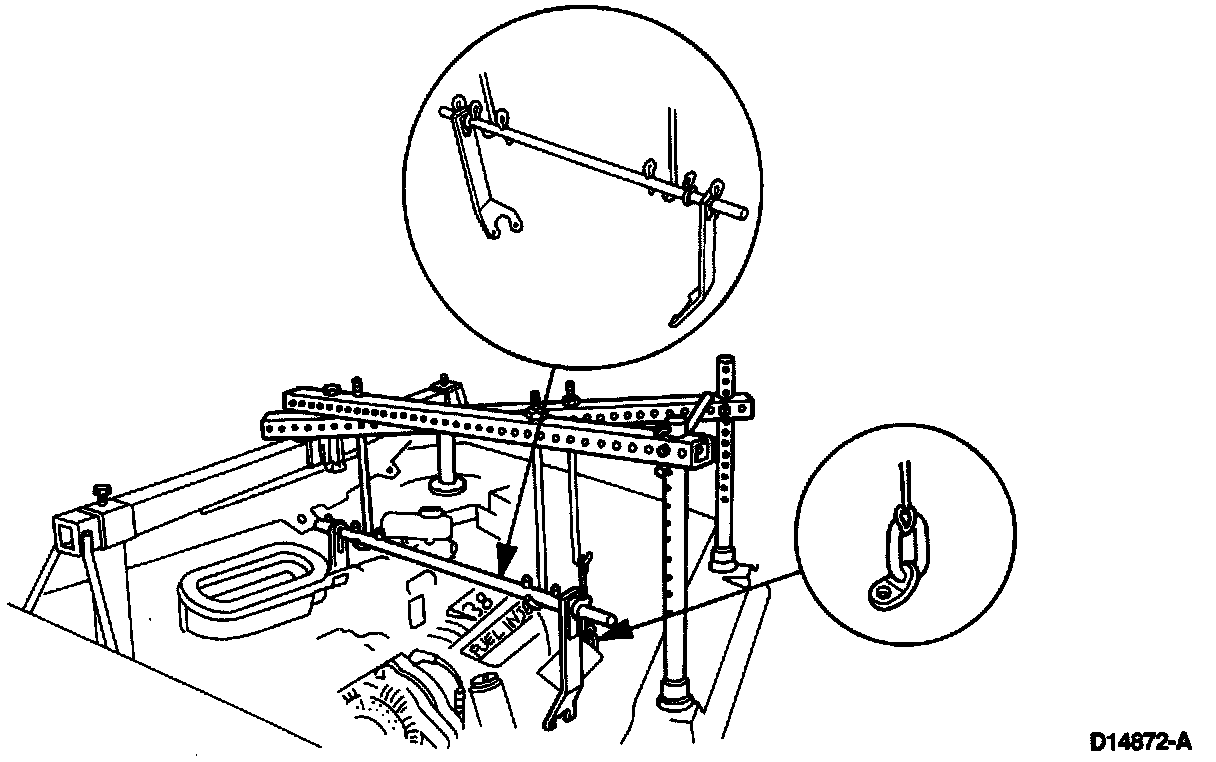
13. Assemble Rotunda Three Bar Engine Support 014-00794 with Rotunda Engine Support Fixture Adapter Kit 014-00792 and Rotunda Three Bar Support 014-00750 or equivalents.
14. Remove transaxle dipstick and tube.
Torque Converter Housing Bolts:

15. Remove four 15mm torque converter housing bolts from top of transaxle.
16. Raise vehicle on hoist.
NOTE: If vehicle is equipped with an air suspension system, the switch must be placed in the OFF position before raising the vehicle.
17. Remove front wheel and tire assemblies.
18 Disconnect Heated Oxygen Sensor (HEGO).
Exhaust Connector Holder Tool:

19. Install Exhaust Connector Holder Tool T94T-6000-AH or equivalent.
20. Remove the catalytic converters and Y-pipe assembly.
NOTE: Make sure wheels are in the straight-ahead position.
Steering Gear:
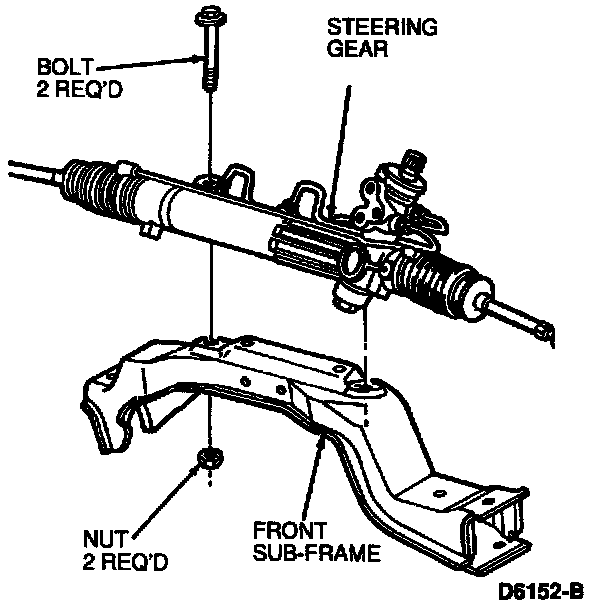
21. Disconnect steering shaft from steering gear assembly.
22. Disconnect the power steering fluid lines at steering gear. Drain fluid into suitable container.
23. Disconnect stabilizer bar link at stabilizer bar.
24. Disconnect tie rod ends at both steering knuckles.
25. Disconnect ball joints at both steering knuckles.
Engine Mount:
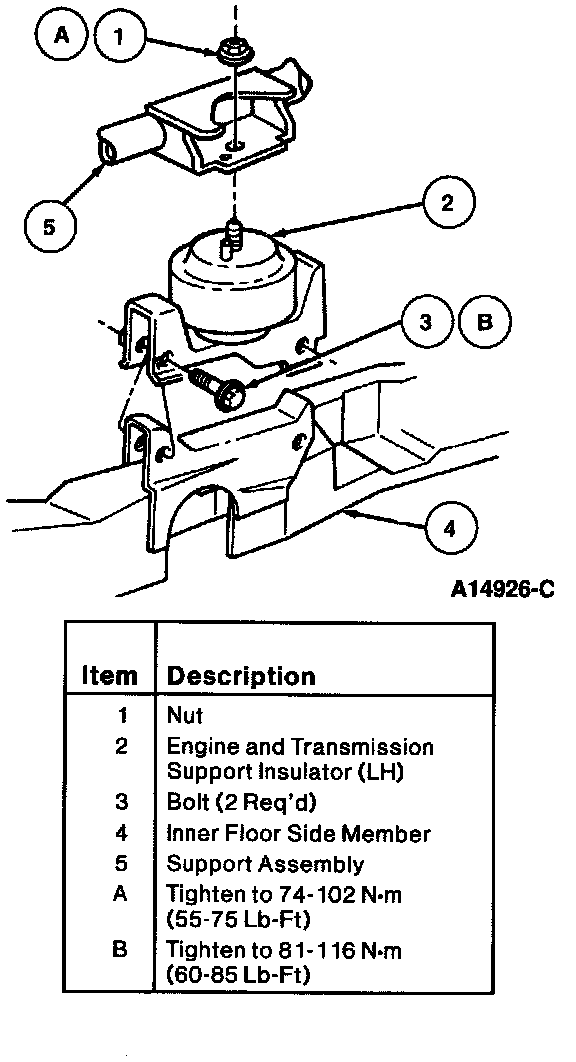
26. Remove two 15mm bolts from engine and transmission support insulator.
LH Engine Support:
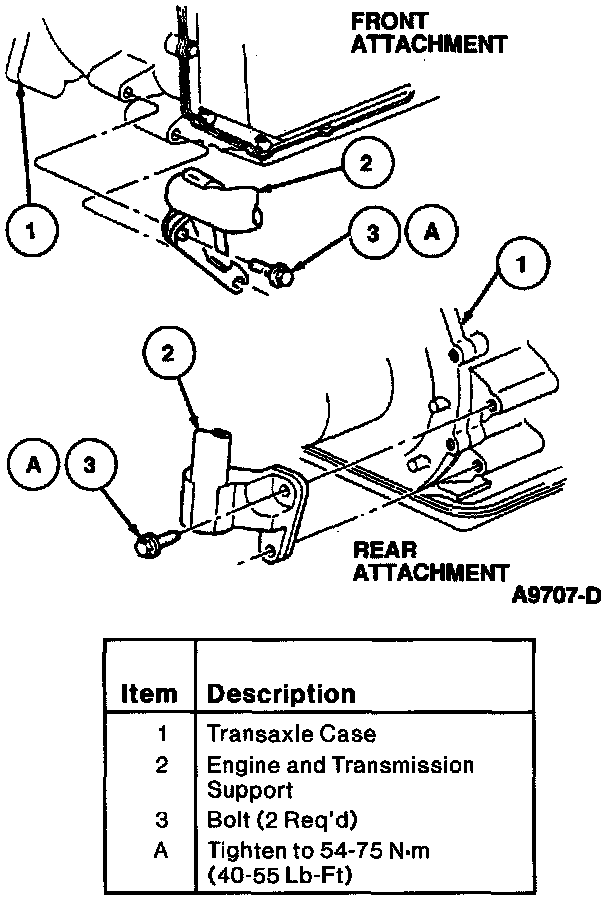
27. Remove four 15mm bolts from LH engine and transmission support.
28. Remove LH engine and transmission support.
29. Position Rotunda Subframe Removal Kit 014-00751 or equivalent.
30. Remove subframe-to-body retaining bolts and lower subframe.
31. Disconnect starter wire harness, low oil sensor and Vehicle Speed Sensor (VSS).
32. Remove two starter retaining bolts and position starter out of the way.
33. Remove bolt from dust cover and remove dust cover.
34. Rotate engine with 1/2-inch drive ratchet and 7/8-inch deep well socket on crankshaft pulley bolt to align torque converter bolts with starter drive hole. Then, remove four 15mm torque converter-to-flywheel retaining nuts.
35. Remove engine-to-transaxle retaining bolts.
CV Joint Tools:

Halfshaft Removal:

36. Remove halfshafts as follows:
a. Screw CV Joint Puller Extension T86P-3514-A2 (part of T86P-3514-A) into CV Joint Puller T86P-3514-A1 (part of T86P-3514-A) and install Impact Slide Hammer D79P-100-A or equivalent into extension.
CAUTION: Make sure puller does not contact transaxle speed sensor or damage will result.
CAUTION: Do not pry against case.
b. Position puller behind CV joint and remove joint.
c. Install shipping plugs.
d. Position drive axles out of way.
37. Remove three transaxle oil pan bolts and install Rotunda Transmission Adapter 014-00763 or equivalent.
38. Use Rotunda Hi-Lift Jack 014-00210 or equivalent to support transaxle.
39. Remove the last two 15mm torque converter housing bolts.
40. Separate transaxle from engine and carefully lower transaxle out of vehicle.