Power Window Switch
Master Switch, AerostarTesting of the power window multiple switch should be performed with the switch removed from the vehicle. Refer to the appropriate procedures in this section. Use a self-powered test lamp or an ohmmeter such as Rotunda Digital Volt-Ohmmeter 014-00407 or equivalent.
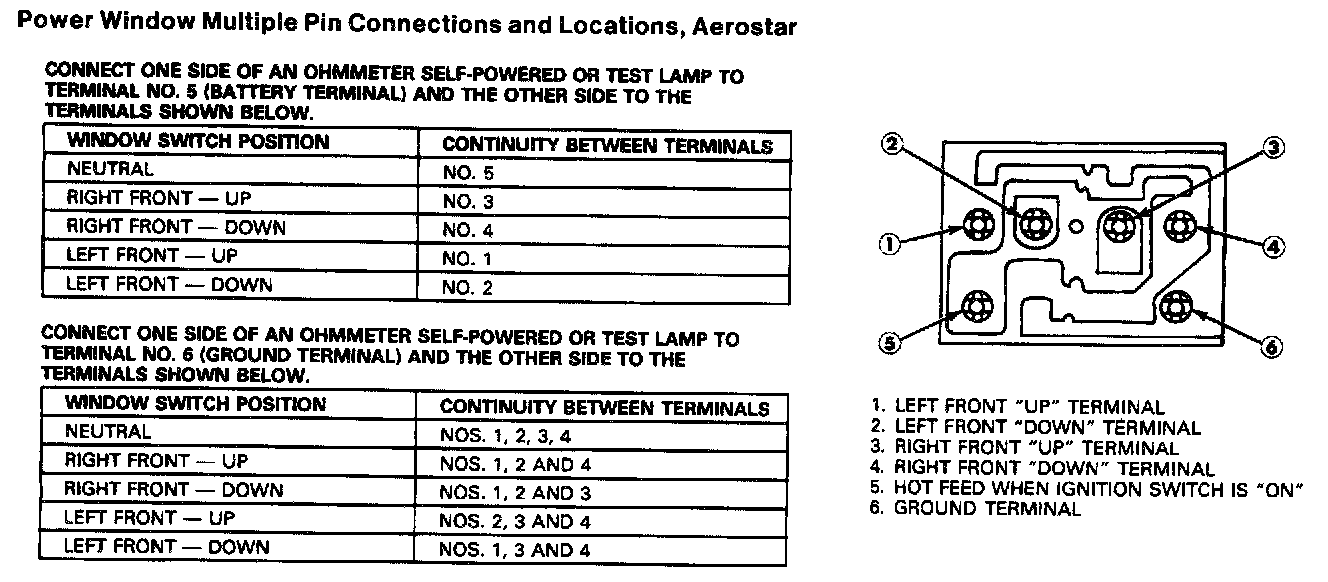
1. Clip one test lead probe on Pin No. 6 which is grounded.
2. With both switches in the neutral position, Pins No. 1 through 4 should have continuity to Pin No. 6.
3. Push both window switches upward (toward window when in installed position). Both Pins No. 1 and 3 should have no continuity to Pin No. 6.
4. Push both window switches downward (away from window when in installed position). Both Pins No.2 and 4 should have no continuity to Pin No. 6.
5. Remove the test lead from Pin No. 6 and connect to Pin No.5 (hot feed pin). With both switches in the neutral position, Pin No. 5 should have continuity only with itself.
6. Push both window switches upward (toward the window when in installed position). Both Pins No. 1 and 3 should have continuity to Pin No. 5.
7. Push both window switches downward (away from the window when in installed position). Both Pins No. 2 and 4 should have continuity to Pin No. 5.
8. If any one switch does not test as stated, replace the complete switch assembly.