Wiper Motor Linkage: Service and Repair
1. Disconnect the battery ground cable, then raise the windshield wiper pivot arm nut covers.2. Loosen the windshield wiper pivot arm nuts approximately two turns, then lift the pivot arms from the wiper linkage.
3. Pull the hood weatherstrip from the cowl top extension, then remove the upper fastener caps and screws.
4. Remove the cowl vent screen lower screws.
5. Lift the righthand cowl vent screen away from the upper cowl panel, then remove the vent screen.
6. Lift the lefthand cowl vent screen away from the upper cowl panel, then remove the vent screen.
Fig. 9 Wiper pivot arm position marking:
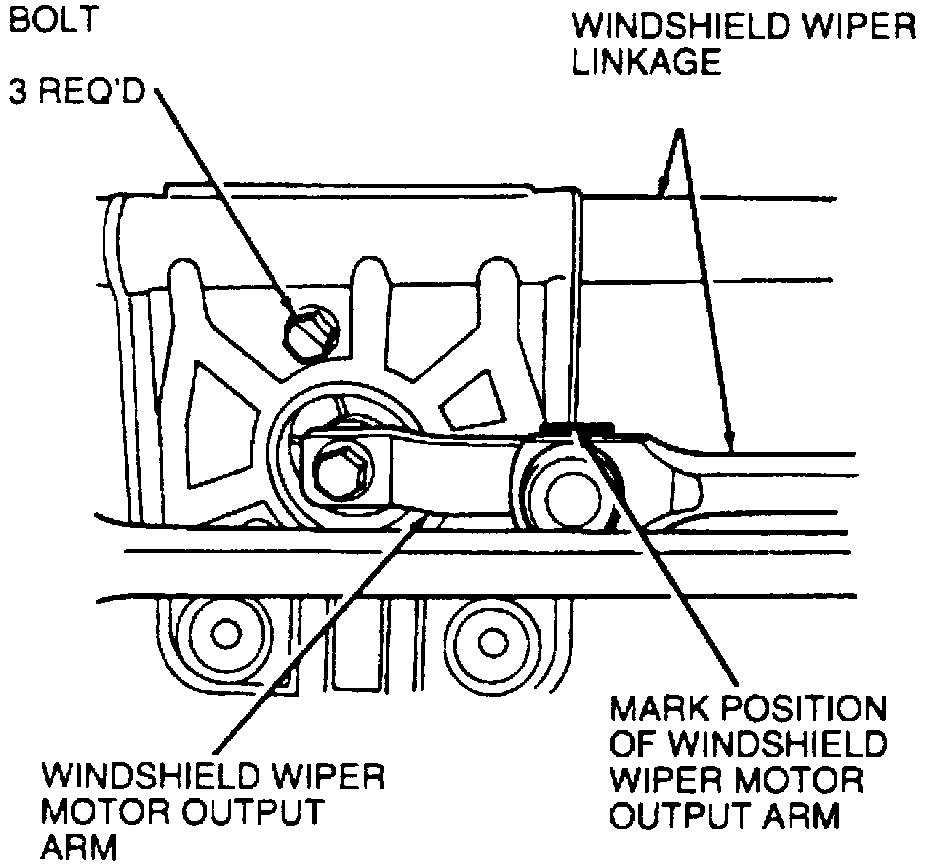
7. Mark the position of the wiper pivot arm in relation to the wiper motor mounting bracket, remove the windshield wiper linkage to the upper cowl panel bolts.
8. Remove the wiper motor bolts, then the wiper linkage.
9. Reverse the procedure to install, noting the following:
a. Torque the wiper linkage bolts to 5.9 ft lb.
b. Torque the wiper pivot arm nuts to 18 ft lb.
c. Torque the wiper motor bolts to 5.9-8.8 ft lb.