Removal and Installation
REMOVAL1. Raise vehicle on hoist.
2. Remove wheel and tire assembly from rotor mounting face. Do not damage bleeder screw fitting during removal.
3. Mark disc brake caliper to make sure it is installed on correct side during installation.
Caliper:
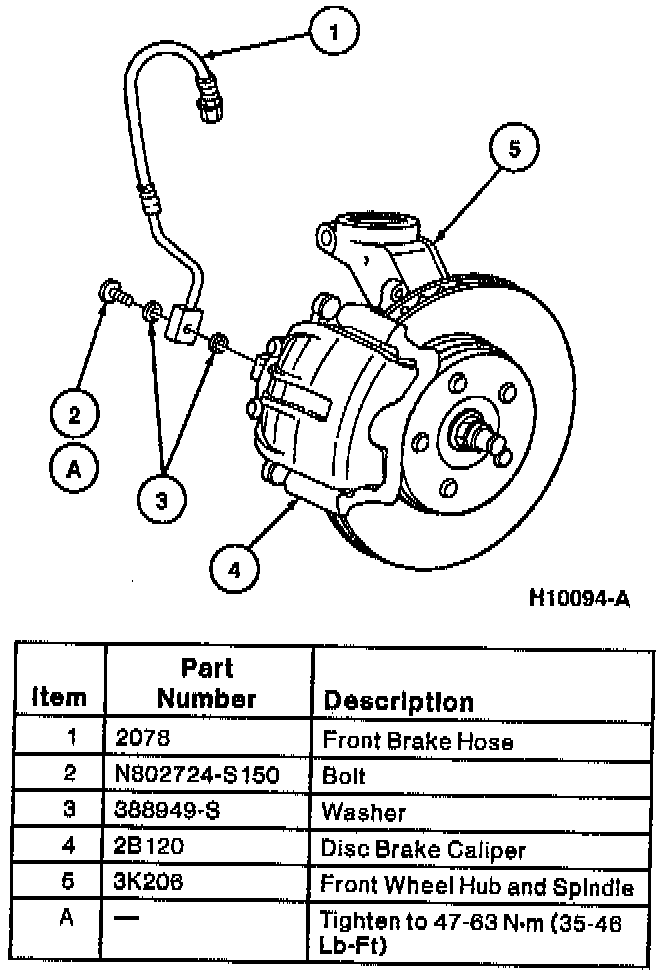
4. Disconnect front brake hose from disc brake caliper. Remove hollow retaining bolt that connects hose fitting to disc brake caliper. Remove hose assembly from disc brake caliper and plug hose. Discard copper washers.
5. Remove two rear brake pin retainer.
6. Lift disc brake caliper off front disc brake rotor using rotating motion.
INSTALLATION
1. Retract caliper piston fully in piston bore. Make sure inner and outer shoes are properly positioned. Make sure lining material is facing rotor and that clip-on front wheel disc brake shoe insulators are attached to brake shoe plate. Position disc brake caliper over front disc brake rotor.
CAUTION: Do not pry directly against metal piston. Damage to piston will occur.
2. Install guide pin bolts through front disc brake caliper holes into disc brake caliper locating pins and hand start.
3. Make sure correct disc brake caliper, as marked during removal, is installed on correct side. The front disc brake caliper bleed screw should be positioned on top of disc brake caliper when assembled on vehicle.
4. Tighten two rear brake pin retainers to 31-38 Nm (23-28 ft. lbs.).
5. Remove plug and install brake hose on disc brake caliper with new copper washer on each side of fitting outlet. Insert retaining bolt through washers and fittings. Tighten to 47-63 Nm (35-46 ft. lbs.).
6. Bleed brake system. Always replace rubber bleed screw cap after bleeding.
7. Install wheel and tire assembly. Tighten lug nut to 113-153 Nm (83-112 ft. lbs.). Use torque wrench instead of an impact tool.
CAUTION: Failure to tighten wheel hub bolt nuts with torque wrench in star pattern may result in high rotor runout, which will speed up the development of brake roughness/shudder/vibration.
8. Lower vehicle.
9. Road test vehicle.