With Air Conditioning
NOTE: Whenever an A/C evaporator housing is removed, it will be necessary to replace the suction accumulator/drier.REMOVAL
1. Disconnect battery ground cable.
2. Remove cowl top vent panel assembly for clearance.
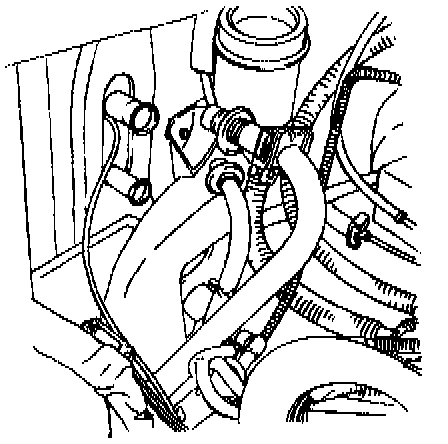
3. Disconnect A/C vacuum tank hose from the A/C vacuum reservoir tank and bracket which is mounted on the side of the A/C air inlet duct.
4. Remove the upper screw and two lower nuts and remove the A/C air inlet duct.
5. Drain radiator and disconnect heater water hose at the heater core in the engine compartment.
6. Remove ground strap attachment (if present) from heater core tube.
7. Recover refrigerant from the A/C system and disconnect the refrigerant lines at the A/C evaporator core in the engine compartment. Discharging and Recovery
8. Remove instrument panel. Service and Repair
9. Disconnect electrical harness connectors from heater blower motor switch resistor, blower motor and A/C electronic door actuator motor.
10. Disconnect A/C plenum vacuum harness.
11. Remove nut and bolt from the support bracket at left side of A/C evaporator housing.
12. Remove four nuts retaining A/C evaporator housing which are located in the engine compartment.
13. Remove A/C evaporator housing assembly.
INSTALLATION
1. To install, reverse Removal procedure.
2. Fill the engine coolant system.
3. Charge the A/C refrigerant system.