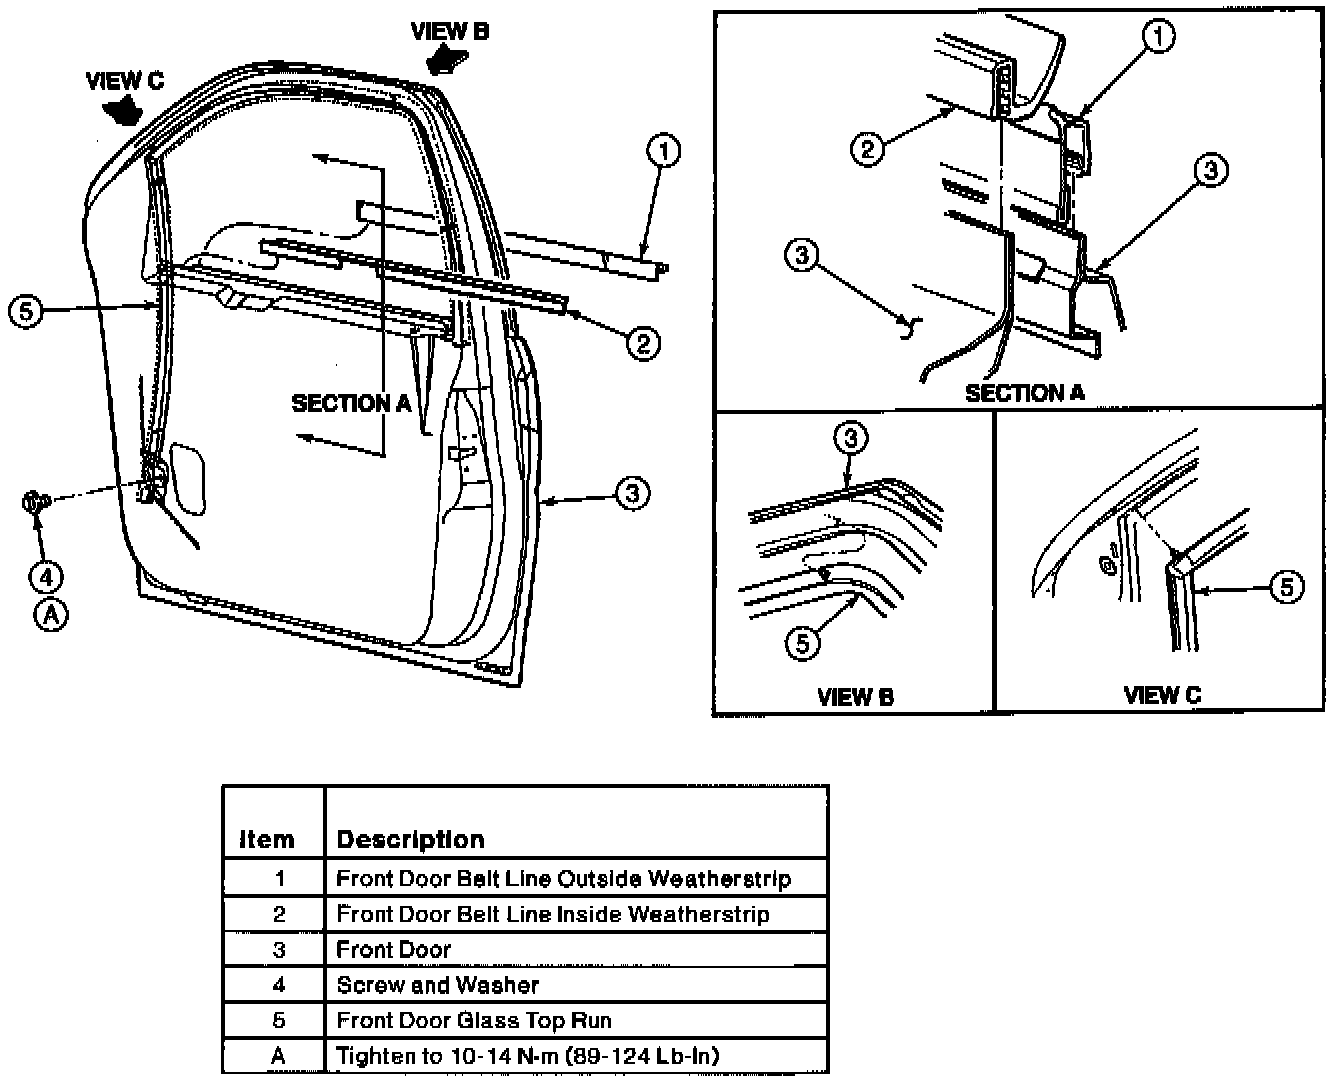
Front Door Glass Top Run
REMOVAL
CAUTION:
- Removal of the front door glass top run is recommended only if damage occurs to the front door glass top run. Due to the fragile make-up of the component, unnecessary removal may cause damage and/or breaks in the aluminum or the light-gauge steel carrier insert within the rubber seal of the front door glass top run.
- The front door glass top run requires very CRITICAL AND SPECIAL HANDLING. The front door glass top run must be handled by the center section only - NEVER FROM FRONT OR REAR LEGS.
1. Remove the following components as outlined:
- front door belt line outside weatherstrip
- front door glass run latch side retainer
- front door glass top run retaining screw
- front door window glass
2. To remove front door glass top run, carefully pull front door glass top run off window opening pinch weld and remove through window opening.
CAUTION: The front door glass top run requires very critical and special handling. The front door glass top run must be handled by the center section ONLY-never from front or rear legs.
INSTALLATION
NOTE: This procedure requires two people, one inserting the front leg and another person holding the remainder of front door glass top run at center section to prevent bending. After the front section and the rear section of the front door glass top run is inserted into the front door, the front door glass top run is installed by using the following procedure:
1. Locate moulded rear corner of front door glass top run from pinch weld flange to rear upper corner of door frame.
2. Apply hand pressure to front door glass top run from belt line area and push front door glass top run upward (vertically) into rear corner. Make sure front door glass top run is fully flush with sheet metal.
3. While applying upward pressure along rear portion of front door glass top run, install front door glass top run onto door frame pinch weld along rear portion of door glass starting from top and moving downward. Use hand pressure to make sure front door glass top run is flush with outer door panel sheet metal.
4. Use hand pressure from center of upper door frame area, and push front door glass top run rearward along pinch weld flange into rear upper corner. Make sure front door glass top run is flush with outer door panel sheet metal at corner.
5. While applying hand pressure rearward, install front door glass top run onto door frame pinch weld along upper door frame starting from rear upper corner and working forward.
6. Use hand pressure from front lower leg of front door glass top run and push front door glass top run upward (vertically) into front upper corner. Make sure front door glass top run is fully flush with outside sheet metal.
7. While applying upward hand pressure along front portion of front door glass top run, install front door glass top run onto door frame pinch weld. Use hand pressure to fully seat front door glass top run. Make sure front door glass top run leg is fully seated.
8. Install front door glass top run to door inner panel with screw and washer assembly. Tighten to 10-14 Nm (89-124 lb-in).
9. Insert front door glass top run leg at B-pillar into rear retainer and install front door glass run latch side retainer by telescoping upper end into door reinforcement. Install front door glass run latch side retaining screw and tighten to 10-14 Nm (89-124 lb-in).