Heater Core: Testing and Inspection
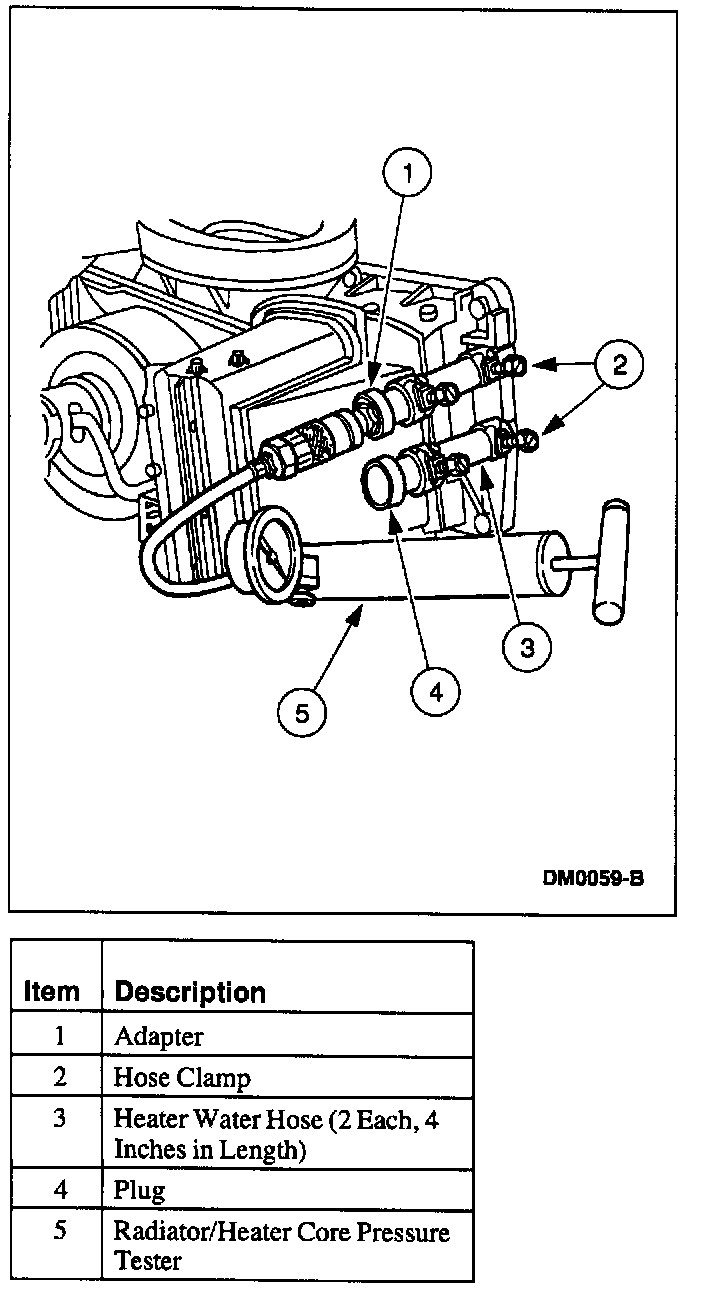
HEATER CORE PRESSURE TEST - IN-VEHICLE
Due to space limitations, an on-bench pressure test may be required.
1. Drain the engine coolant system.
2. Disconnect the inlet and outlet beater water hoses.
3. Install a short piece of heater water hose, approximately 4 inches long, on each heater core tube.
4. Fill the heater core and heater core water hoses with water.
5. Install a plug and adapter, from the Radiator/Heater Core Pressure Tester, in the ends of the heater hoses. Secure the heater hoses, plug, and adapter with hose clamps.
6. Attach the Radiator/Heater Core Pressure Tester to the adapter. Close the bleed valve at the base of the gauge and pump 206 kPa (30 psi) of air pressure into the heater core.
7. Observe the pressure gauge for a minimum of three minutes. The pressure should not drop.
8. If the pressure does not drop, no leaks are indicated.
NOTE: Severe distortion of the heater core tubes can cause leakage at the coupling connection. Repair or replace as necessary.
If the pressure drops, check the coupling and hose connections to the heater core tubes for leaks. If the couplings and hose connections do not leak, perform the following bench test.
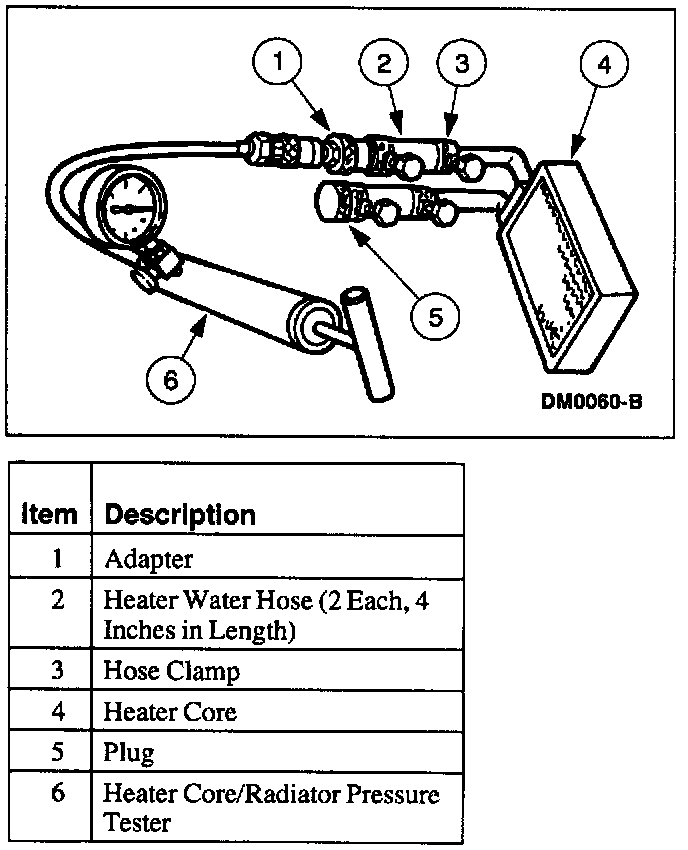
HEATER CORE PRESSURE TEST - ON-BENCH
1. Drain the engine cooling system.
2. Remove the heater core.
3. Connect the four-inch test heater water hoses to the heater core.
4. Install the plug and adapter.
5. Connect the Radiator/Heater Core Pressure Tester to the adapter.
6. Apply 206 kPa (30 psi) of air pressure to the heater core.
7. Submerge the heater core in water.
8. If a leak is observed, repair or replace the heater core.