Compressor Clutch: Service and Repair
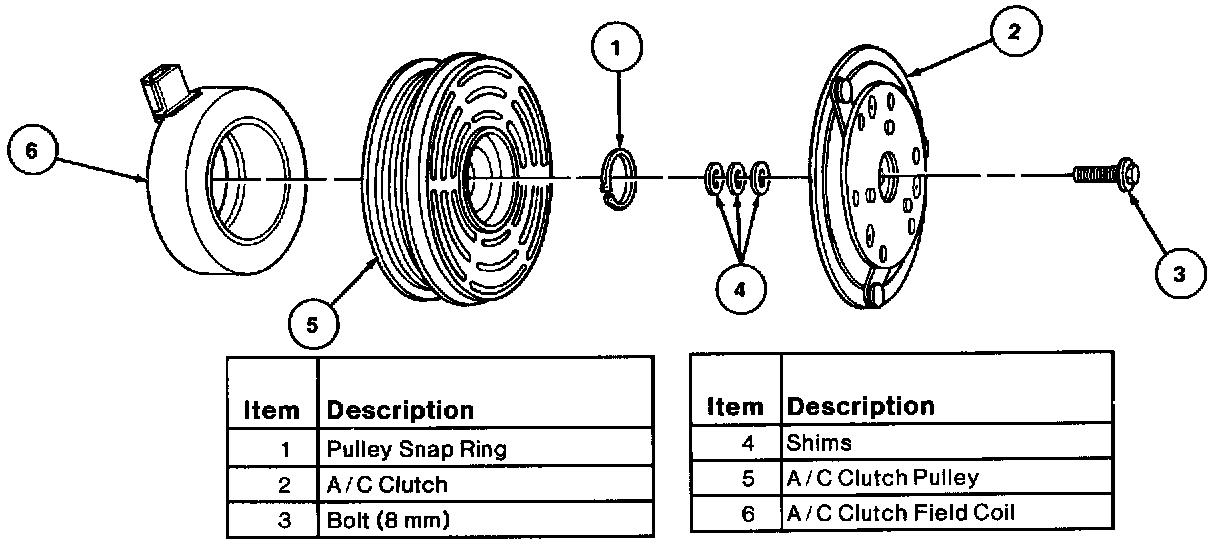
Disassembled View Of The A/C Clutch And Related Parts:
SPECIAL SERVICE TOOL(S) REQUIRED
Description Tool Number
Spanner Wrench:

Spanner Wrench T70P-4067-A
REMOVAL
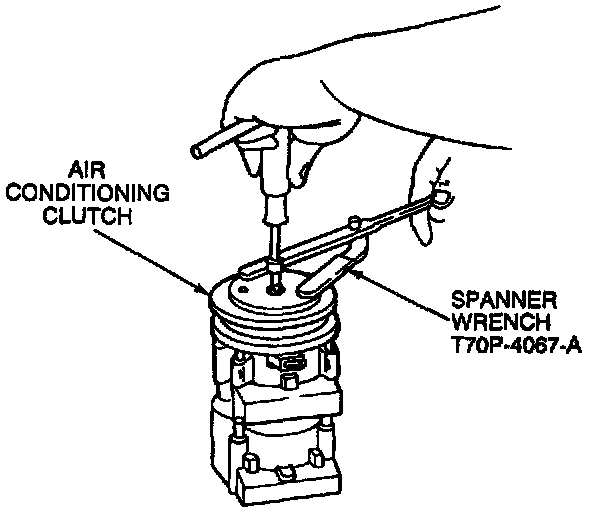
1. Remove the clutch hub retaining bolt using Spanner Wrench T70P-4067-A to hold the A/C clutch hub steady during bolt removal.

2. Pull clutch hub and shims from compressor shaft. If hub cannot be pulled from compressor shaft, screw an 8 mm bolt into the shaft hole of the clutch hub to force the hub from the shaft.
3. Remove pulley retaining snap ring.

4. Pull the A/C clutch pulley and A/C compressor pulley bearing from A/C compressor.
INSTALLATION
1. Clean A/C compressor pulley bearing surface of compressor head to remove any dirt or corrosion.
2. Install A/C clutch pulley and A/C compressor pulley bearing on A/C compressor. The bearing is a slip-fit on the compressor head and, if properly aligned, it should slip on easily.
3. Install pulley retaining snap ring with bevel side of snap ring out.
4. Place one nominal thickness spacer shim inside the hub spline opening and slide the hub on the end of the compressor shaft. Adjust air gap to 0.35-0.85 mm (0.014-0.033 inch).
5. Thread a new 8 mm hub retaining bolt into end of compressor shaft. Tighten hub retaining bolt to 11-13 Nm (8-10 lb-ft).
CAUTION: Do not use air tools.