Outside Window Moulding
REMOVAL
1. Remove the windshield outside moulding from the windshield glass perimeter.
- Pry up the end of the windshield outside moulding, twist and pull out of the urethane sealant.
INSTALLATION

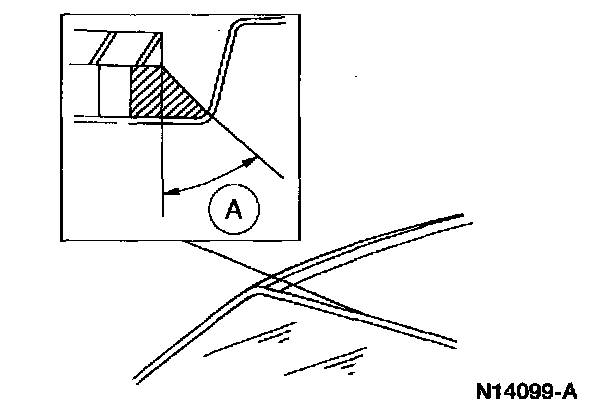
1. Trim the Urethane Sealant.
- Apply tape to protect the surrounding painted surface.
- Use a razor blade knife to vertically trim the Urethane Sealant.
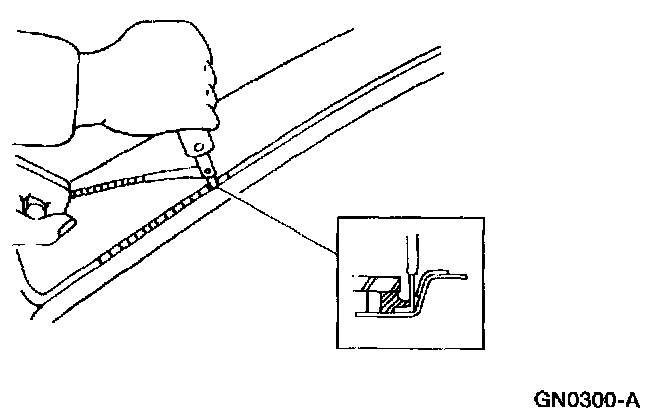
2. Use a two handle moulding removal tool to cut the Urethane Sealant along the pinch weld.

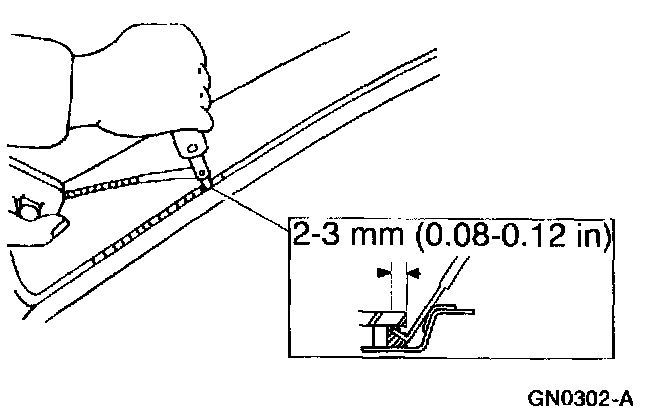
3. Insert the blade to specification; use a two handle moulding removal tool to cut the urethane sealant along the windshield glass.
4. Cut at an angle; use a two handle moulding removal tool to remove as much Urethane Sealant as possible.
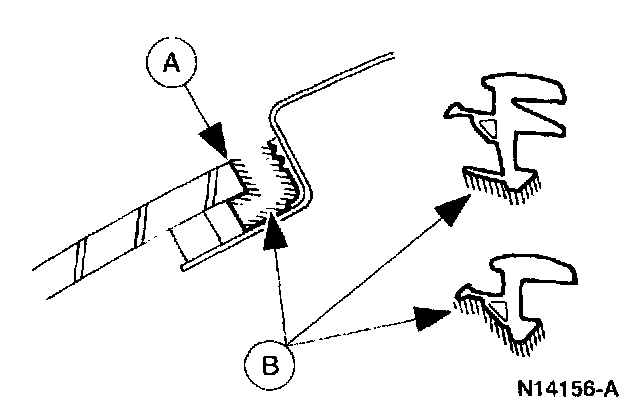
5. Use an alcohol-free cleaner to carefully clean the pinch weld and the inside edge of the windshield glass. Apply the primer.
- Apply (A) Urethane Glass Primer to the windshield glass.
- Apply (B) Urethane Metal Primer to the pinch weld and windshield outside moulding. Allow ten minutes drying time.
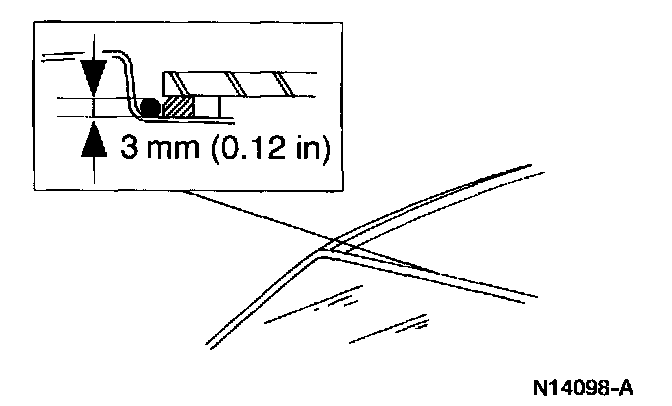
6. Lay a bead of Urethane Sealant in the pinch weld to specification.
CAUTION:
- Use only Urethane Sealant, to repair water and air leaks in the urethane sealant.
- After replacing the urethane installed glass, the vehicle should not be driven until the urethane has cured. The curing times at temperatures above 13°C (55°F) and relative humidity above 50% curing time is 12-24 hours (decreasing at higher temperatures and lower humidities). Refer to the detailed instructions provided by the manufacturer in the kit. Inadequate curing of the urethane may adversely affect the strength of the urethane sealant bond.
7. Reshape the (A) bead of Urethane Sealant.

8. Install the windshield outside moulding.
1 Align the marks on the windshield outside moulding.
2 Install the top part of the windshield outside moulding.
3 Install the corners of the windshield outside moulding.
4 Install the sides of the windshield outside moulding from the top down.
9. Check for water leaks; if any leaks are found, repeat the procedure.