Rear
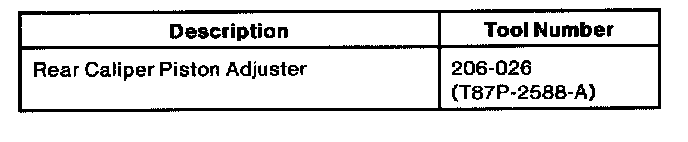
Special Tools:
Removal
1. Raise vehicle on a hoist.
2. Remove wheel and tire assembly.
3. Remove upper rear brake pin retainer.
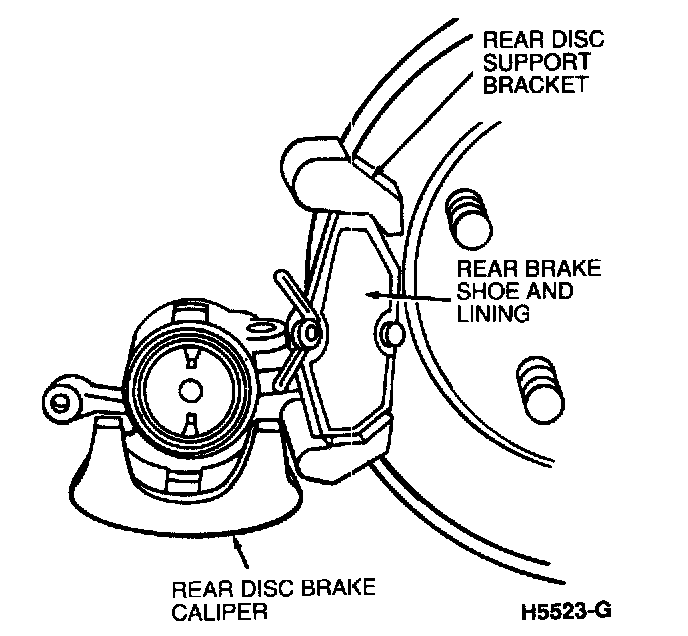
4. Rotate rear disc brake caliper away from rear disc brake rotor.
5. Remove inner and outer rear brake shoe and lining assemblies from rear disc support bracket.
Installation

1. NOTE: Make sure that one of the two slots in rear disc brake piston and adjuster face is positioned so it will engage nib on rear brake shoe and lining.
Using Rear Caliper Piston Adjuster 206-026 (T87P-2588-A) rotate rear disc brake piston and adjuster clockwise until it is fully seated.
2. Install inner and outer rear brake shoes and linings in rear disc support bracket.
3. Rotate rear disc brake caliper assembly over rear disc brake rotor into position on rear disc support bracket. Make sure rear brake shoe and lining assemblies are installed correctly.
4. Remove residue from the rear brake pin retainer threads and apply one drop of Threadlock and Sealer EOAZ-19554-AA or equivalent meeting Ford specification WSK-M2G315-A5. Install and tighten rear brake pin retainers to 31 - 35 Nm (23 - 25 ft. lbs.).
5. CAUTION: Failure to tighten lug nuts in a star pattern may result in high rotor runout, which will speed up the development of brake roughness, shudder and vibration.
Install wheel and tire assembly on vehicle. Tighten lug nuts to 115 - 142 Nm (85 - 104 ft. lbs.) using Rotunda Accutorq Lug Nut Socket 164-R0303 or equivalent on a 1/2 inch air impact wrench or use a torque wrench.
6. Lower vehicle.