Compressor Clutch: Service and Repair

SPECIAL TOOLS(S)
REMOVAL
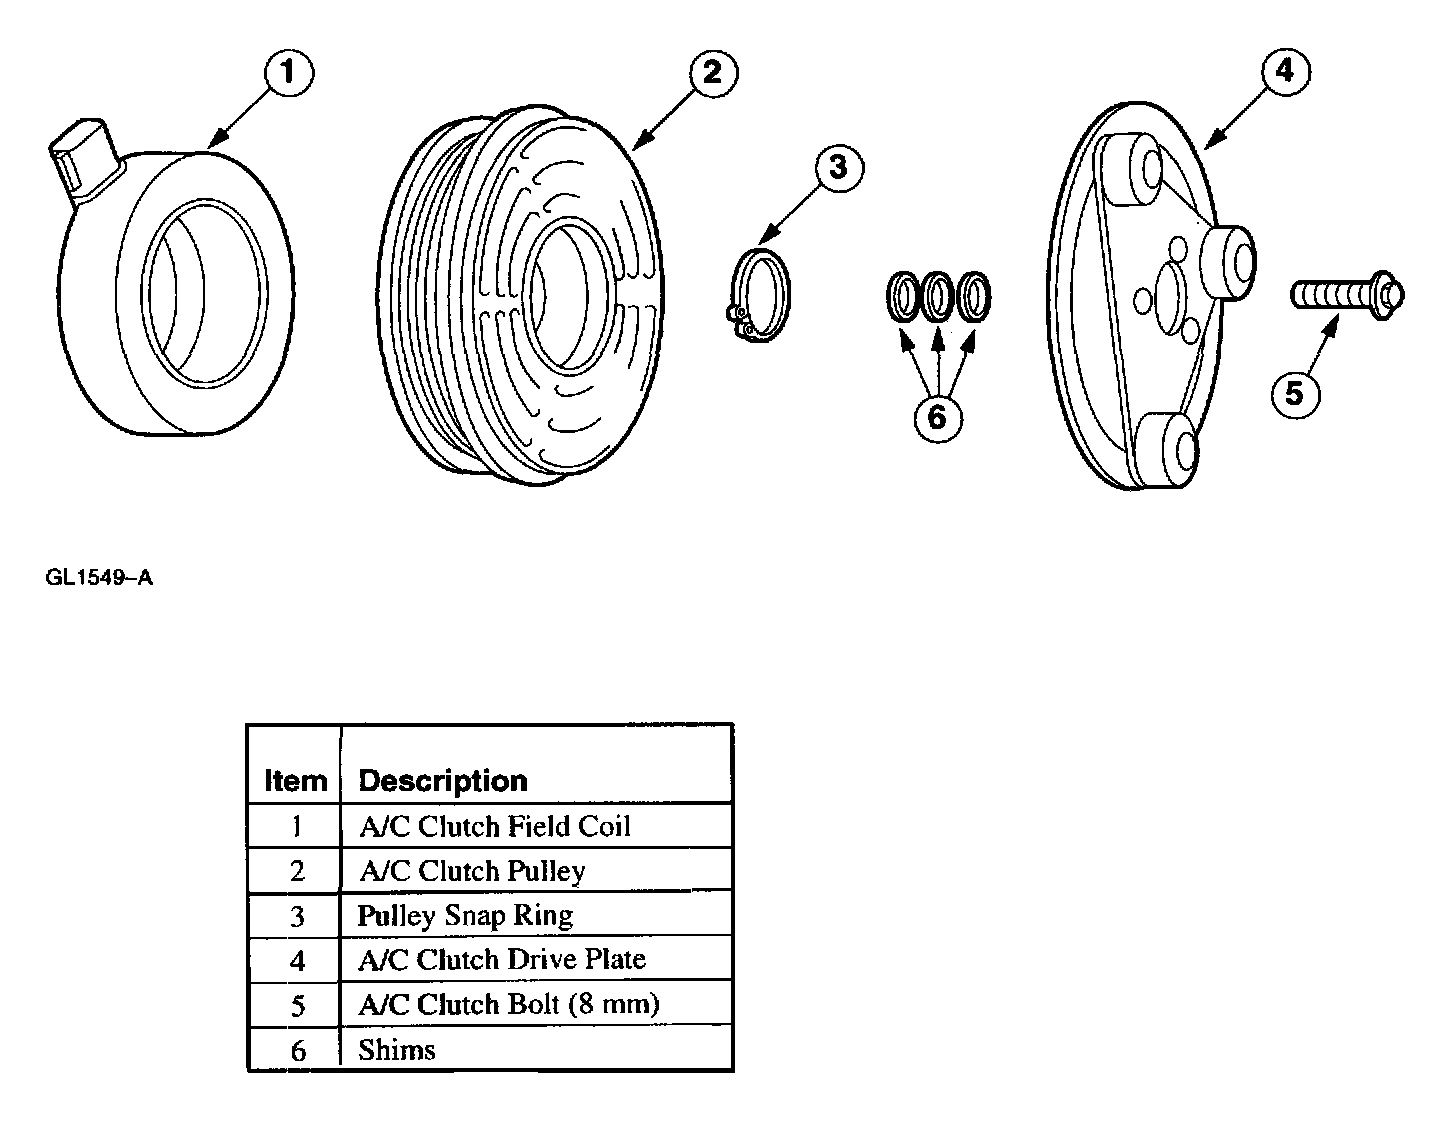
NOTE: Before disassembling the A/C compressor, check the A/C clutch air gap.
1. Remove the air conditioning (A/C) compressor. For additional information, refer to Compressor - A/C.
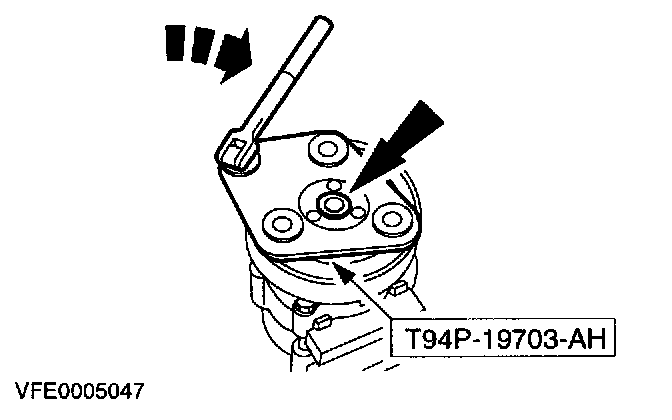
2. Using the special tool, remove the A/C clutch bolt and drive plate.

3. Remove the A/C clutch pulley and the A/C compressor pulley bearing.
- Remove the pulley snap ring.
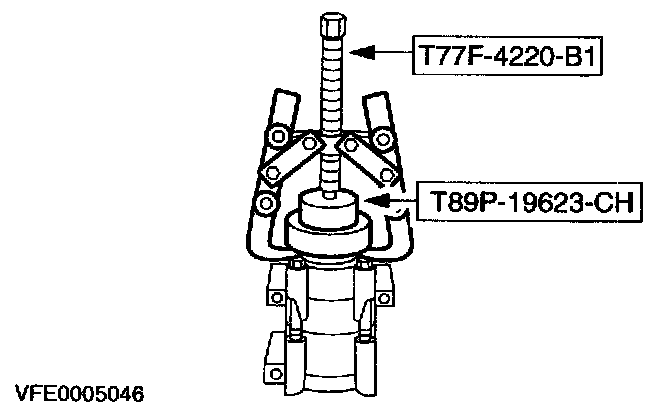
4. Remove the A/C clutch field coil.
- Position the special tool on the nose opening of the compressor.
- Using the special tools, remove the field coil.
CAUTION: Do not use air tools.
INSTALLATION
1. Clean the A/C clutch field coil mounting surface head.
NOTE: Check that the A/C clutch field coil outer diameter bottoms completely against the head. Ensure that the coil electrical connector is correctly positioned.
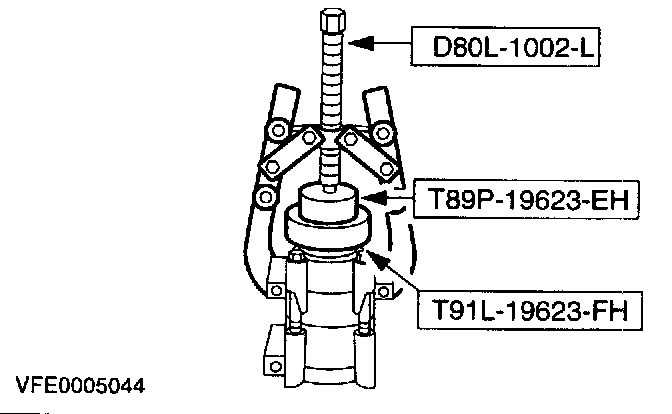
2. Using the special tools, install the clutch field coil.

3. Install the A/C compressor pulley bearing and the A/C pulley.
4. Install the pulley snap ring with the bevel side out.
5. Place one nominal thickness shim inside the hub spline opening.

6. Slide the drive plate onto the compressor shaft.
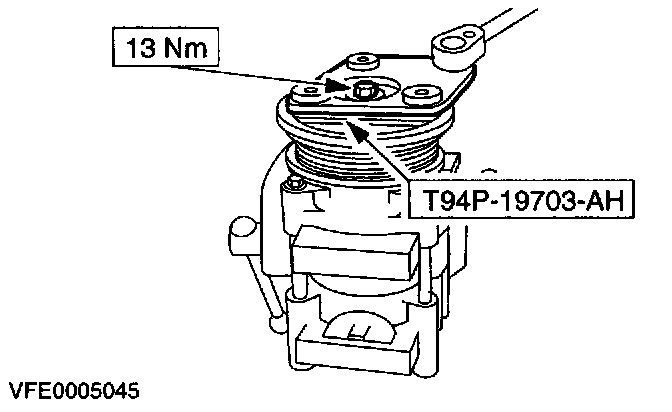
7. Using the special tool, install a new A/C clutch bolt.
- Adjust the air gap.
8. Install the A/C compressor. For additional information, refer to Compressor.