Installation
Special Tools:

Installation
1. CAUTION: Prior to the installation of the transmission the fluid coolers, cooler lines and the cooler bypass valve will need to be cleaned.
Inspect the wiring harness and the connectors for damage, terminal condition, corrosion and seal integrity Repair or replace as required.
2. CAUTION: Prior to installation of the transmission assembly, the torque converter pilot hub must be properly lubricated.
Lubricate the torque converter pilot hub.
- Use Ford Multipurpose Grease D0AZ-19584-AA or equivalent meeting Ford specification ESB-M1C93-B.
3. If not installed during assembly install the Torque Converter Holding Tool.

4. CAUTION: Do not use the cooler bypass valve as a handle. Damage to the cooler bypass valve assembly may occur or damage to the case may result.
CAUTION: If a safety strap is being used to hold the transmission to the High Lift Transmission Jack, place the strap behind the Cooler Bypass Valve (CBV) to prevent damage to the cooler bypass valve.
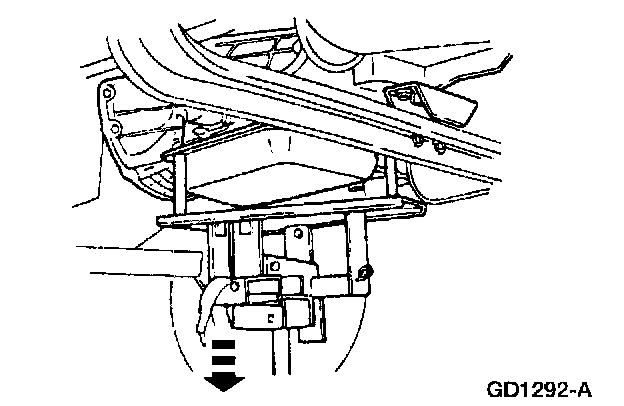
Position the transmission
- Raise the rear of the transmission to clear the crossmember.
5. Remove the Torque Converter Holding Tool.

6. CAUTION: Do not allow the torque converter drive flats to disengage from the pump gear. Use care not to damage the flexplate and the converter pilot. The torque converter must rest squarely against the flexplate, indicating the converter pilot is not binding in the crankshaft.
Note: The torque converter drain plug cover can be removed to aid in the alignment of the converter studs.
Align the (A) torque converter studs with the mounting holes in the (B) flexplate. Install the (C) transmission to the (D) engine.

7. Install and alternately snug the four transmission-to-engine retaining bolts.
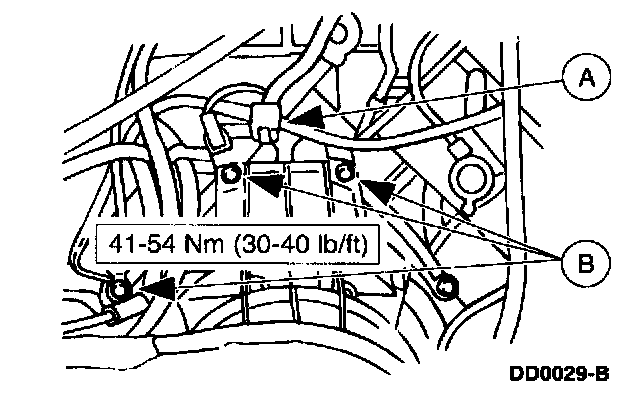
8. Position the (A) fuel and electrical harness bracket for installation. Install and alternately snug, then tighten, the (B) transmission-to-engine retaining bolts.
9. Install the exhaust and crossmember.
10. Remove the E40D Transmission Jack Adapter and the High lift Transmission Jack.

11. Install the transmission fluid pan bolts.

12. Install the flexplate inspection cover bolts.

13. Install new torque converter-to-flexplate nuts.
- Rotate flexplate to gain access to the nuts.

14. Install the cylinder block opening cover.
15. Install the starter.
16. If equipped, install the transfer case assembly.
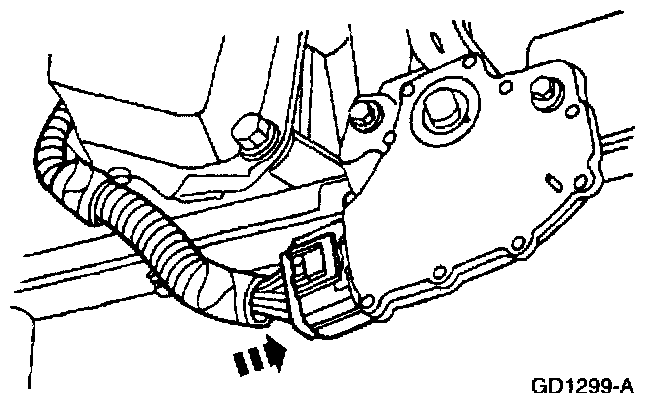
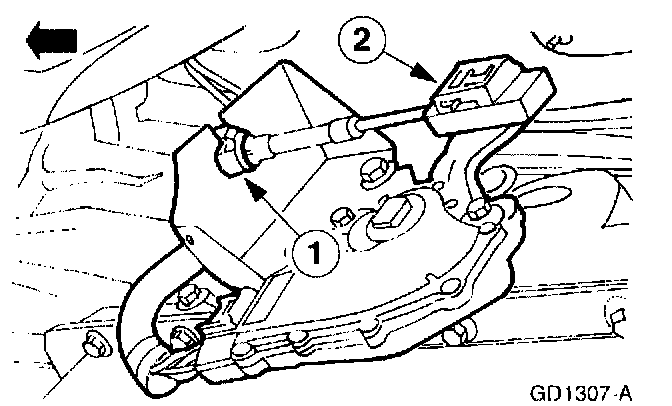
17. Connect the solenoid pack electrical connector.
18. Connect the Digital Transmission (TR) sensor connector.
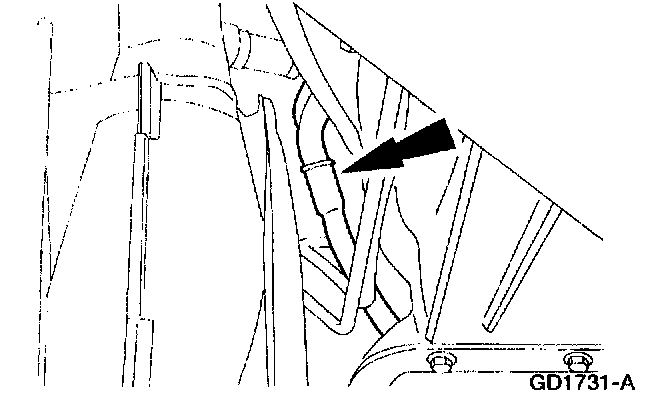
19. Connect the shift cable.
1 Install the cable housing to the bracket.
2 Install the shift cable to the manual lever.
20. Note: To maintain initial driveshaft balance, align the driveshaft yoke and axle flange that was marked during removal.
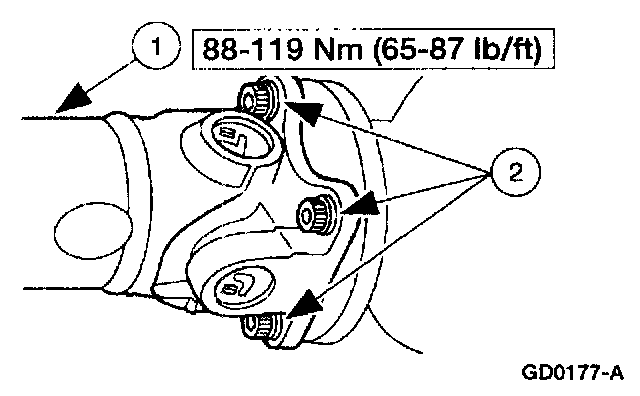
Install the driveshaft.
1 Position the driveshaft.
2 Install bolts.
21. Note: If the transmission fluid cooler, cooler tubes, or cooler bypass valve have not been flushed it would be necessary to do so at this time.
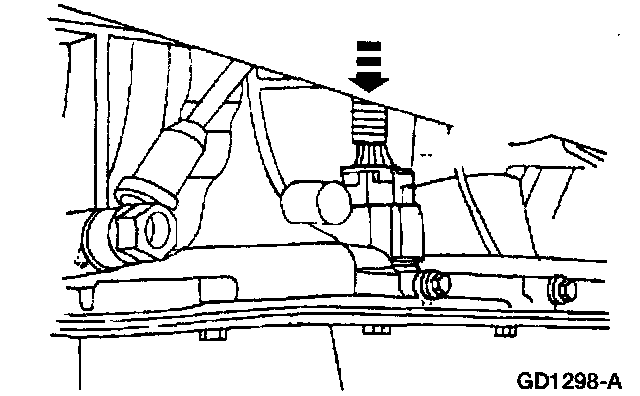
Install the transmission fluid cooler tubes to the cooler bypass valve.
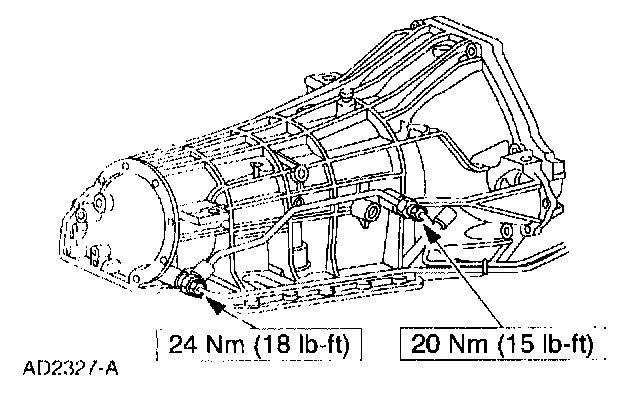
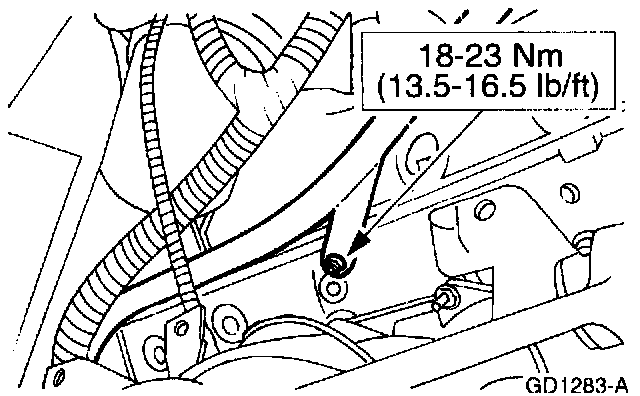
22. Install the upper transmission fluid fill tube.
23. Install the transmission oil filler tube bolt.
24. Lower the vehicle.
25. Note: All gasoline vehicles will have new adaptive shift strategies. Whenever the vehicle's battery has been disconnected for any type of service or repair the strategy parameters that are stored in the Keep Alive Memory (KAM) will be lost. The strategy will start to relearn once the battery is reconnected and the vehicle is driven. This is a temporary condition and will return to normal operating condition once the Powertrain Control Module (PCM) relearns all the parameters from the driving conditions. There is no set time frame for this process. If this concern is present during downshifts or converter clutch apply, it is not the fault of the shift strategy and will require diagnosis.
The customer needs to be notified that they may experience slightly different upshifts either soft or firm and that this is a temporary condition and will eventually return to normal operating condition.
Connect the battery ground cable.
26. Fill to correct level with MERCON Multipurpose (ATF) Transmission Fluid X1-2-QDX or equivalent meeting Ford specification MERCON. MERCON(R) automatic Transmission Fluid is being replaced by MERCON(R) V as a service fluid, as per TSB 06-14-4.