Front
Removal1. Loosen the wheel nuts.
2. Raise and support the vehicle.
3. Remove the wheel.

4. CAUTION: Protect the ball joint seal using a soft cloth to prevent damage.
Remove the lower arm ball joint.
1. Remove the bolt.
2. Remove the lower arm ball joint.

5. Remove the lower arm bolts.
1. Remove the front bolt.
2. Remove the rear clamp bolts.
6. Remove the lower arm.
Installation
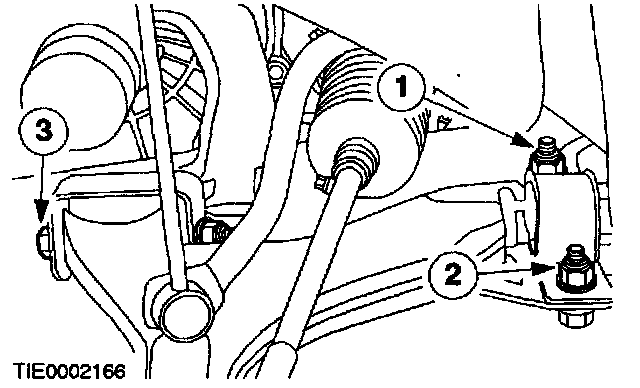
1. NOTE: Bolts 1 and 3 are torque-to-yield. New nuts, bolts and ball bearing washers must be installed.
Install the lower arm bolts.
- Tighten the bolts in the sequence shown in five stages.
- Stage 1: Tighten nut 1 to 100 Nm.
- Stage 2: Tighten nut 1 an additional 60°.
- Stage 3: Tighten nut 2 to 120 Nm.
- Stage 4: Tighten bolt 3 to 120 Nm.
- Stage 5: Tighten bolt 3 to an additional 90°. After 90°, check bolt 3 torque is between 170 - 230 Nm.
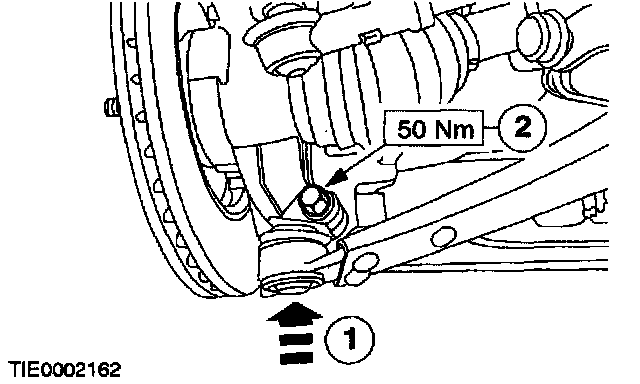

2. CAUTION: Make sure the heat shield is installed to prevent damage to the ball joint.
Install the lower arm ball joint.
1. Install the lower arm ball joint.
2. Install the bolt.