Valve Body: Service and Repair
Removal1. Remove the transaxle fluid pan.

2. Remove the Transmission Fluid Temperature (TFT) sensor.

3. Remove the fluid filter.
4. NOTE: It is necessary to note the location of the main control wire harness connectors so they can be connected in the same positions. Connector color letters are casted into the solenoid body.

Remove the ground wire bolt. Disconnect the electrical connectors and remove the wire harness.
1. Solenoid SSC; Color N (Neutral/White)
2. Solenoid SSE; Color G (Green)
3. Solenoid SSD; Color L (Blue)
4. Solenoid EPC; Color B (Black)
5. Solenoid SSA; Color N (Neutral)
6. Solenoid SSB; Color B (Black)
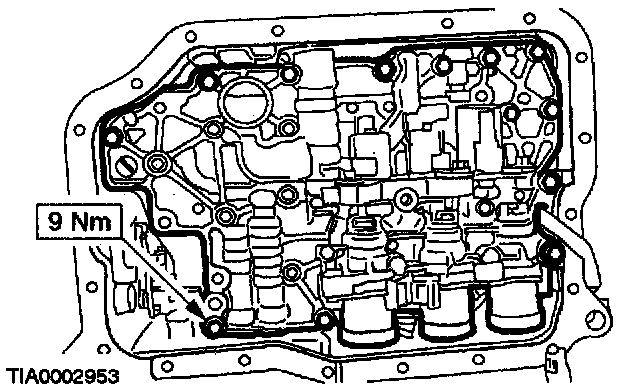
5. Remove the main control valve body.
6. NOTE:
- Each of the two accumulators have two springs in it. All four springs are different sizes.
- Note the size and location of the accumulator springs for assembly.
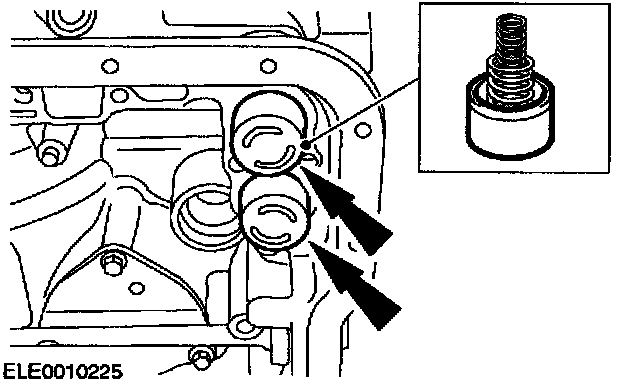
Remove the accumulator pistons and springs.
Installation
1. NOTE: The thinner and longer springs are for the neutral/drive accumulator.
Install the accumulator pistons and springs.
2. NOTE: Make sure that the manual valve is in the manual control valve shift lever.
Install the main control valve body.
3. NOTE: It is necessary to connect the connectors in the same positions as noted in disassembly. Connector color letters are casted into the solenoid body.
Install the main control wire harness, connect the electrical connectors and tighten the ground bolt.
Install the main control valve body.
1. Solenoid SSC; Color N (Neutral/White)
2. Solenoid SSE; Color G (Green)
3. Solenoid SSD; Color L (Blue)
4. Solenoid EPC; Color B (Black)
5. Solenoid SSA; Color N (Neutral)
6. Solenoid SSB; Color B (Black)
4. Install the fluid filter.
5. Install the Transmission Fluid Temperature (TFT) sensor.
6. Install the transaxle fluid pan.