Timing Cover: Service and Repair
Engine Front Cover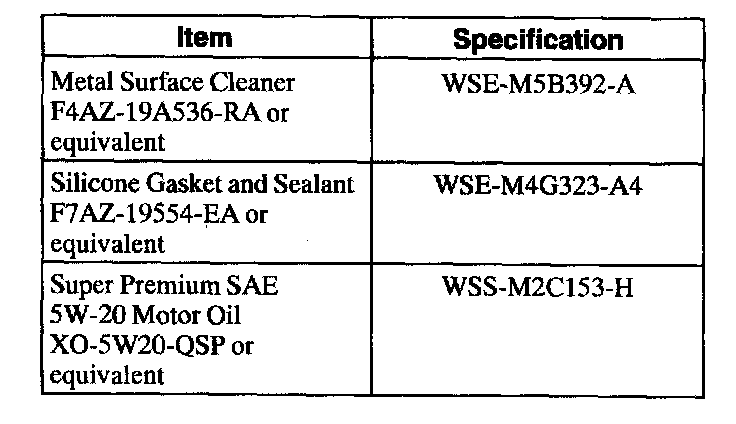
Materials
Removal
1. Disconnect the battery ground cable.
2. Remove the water pump.
3. Raise and support the vehicle.
4. Remove the crankshaft pulley.
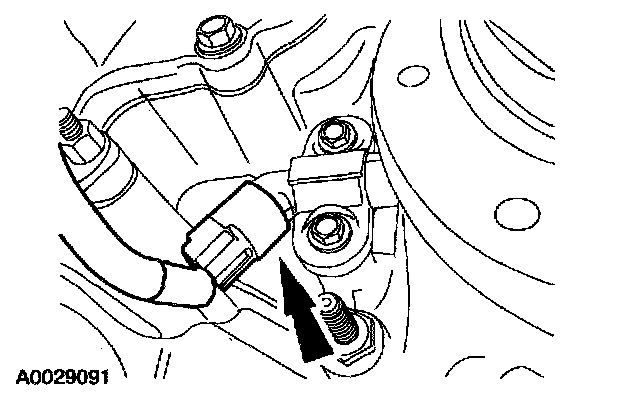
5. Disconnect the wiring at the Crankshaft Position (CKP) sensor.
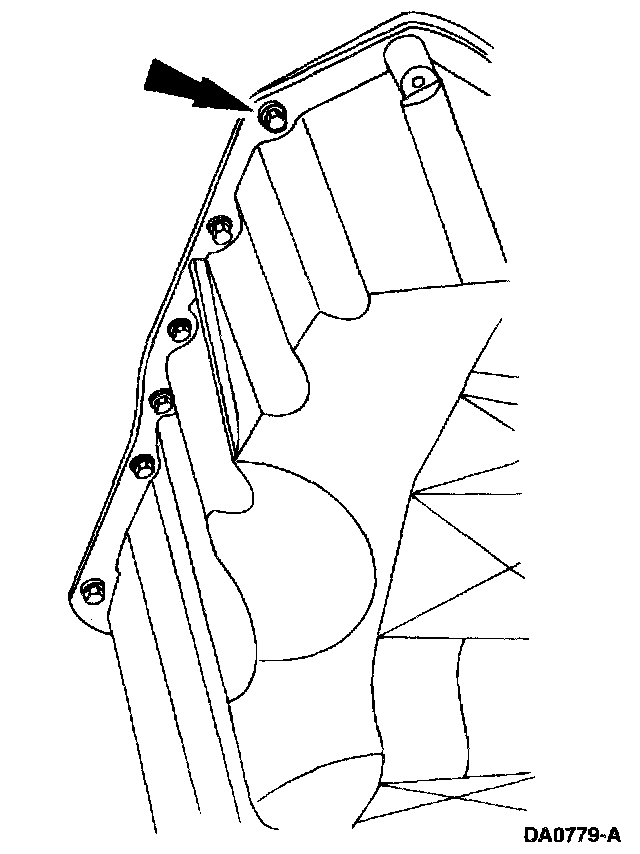
6. At the front of the oil pan, remove a bolt from the left and right side of the oil pan.
7. Lower the vehicle.
8. Remove the camshaft synchronizer.
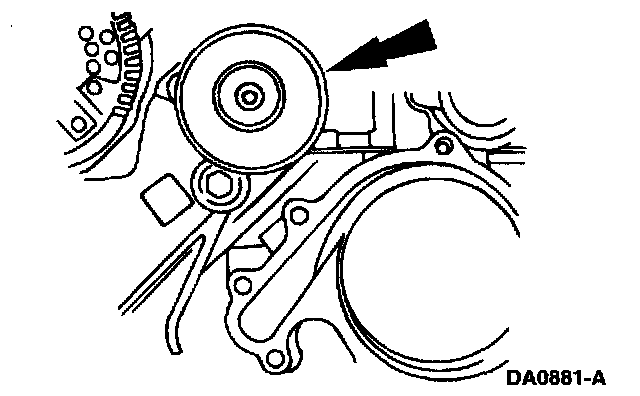
9. Remove the accessory drive belt idler pulley.
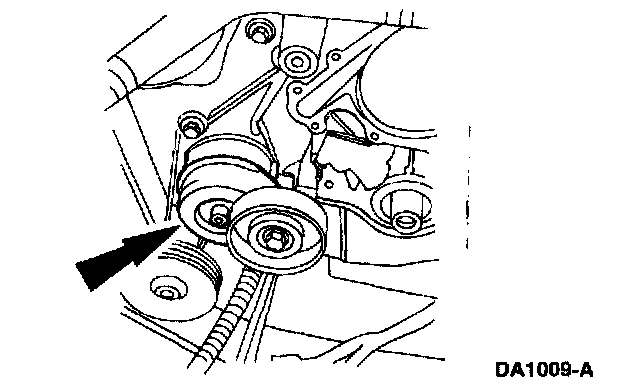
10. Remove the accessory drive belt tensioner.
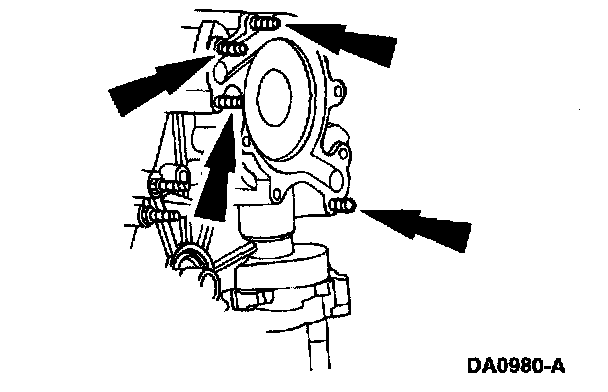
11. Remove and discard the water pump mounting studs.
12. Remove the crankshaft front oil seal.
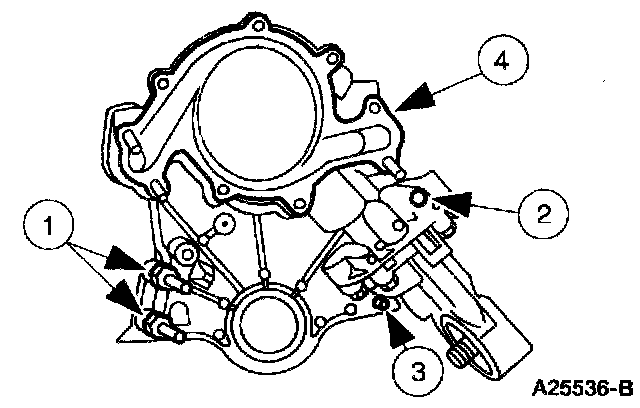
13. Remove the front cover and the front cover gasket.
1 Remove the stud bolts.
2 Remove the bolt.
3 CAUTION: The cap screw is hidden; make sure to remove it or the front cover will be damaged.
Remove the cap screw.
4 Slide the front cover and the front cover gasket off the dowels. Discard the engine front cover gasket.
14. CAUTION: Do not use a fiber disk to clean this surface. Fibers from the disk could get into the oil pan and oil, and clog the oil bypass valve.
Clean all gasket mating surfaces.
- Pack the exposed portion of the oil pan with shop towels.
- Clean and inspect the gasket surface of the front cover.
- Clean all gasket surfaces that require RTV with metal surface cleaner.
- Clean and inspect the water pump gasket surfaces.
Installation
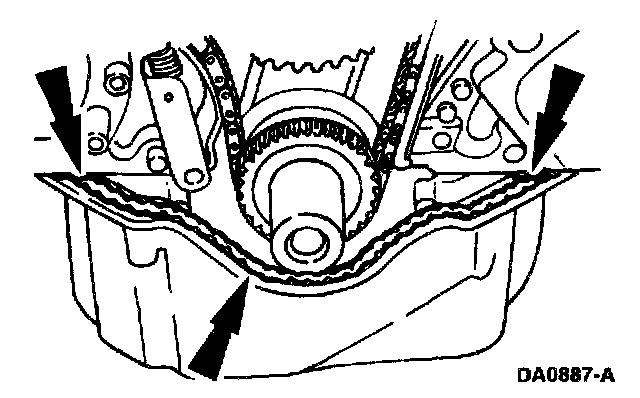
1. NOTE: If the engine front cover is not installed within seven minutes, remove sealant and reapply.
Install the engine front cover.
- Apply a bead of silicone gasket and sealant at the oil pan to block seam.
- Install the engine front cover gasket.
- Apply a second bead of sealant along the edge of the engine front cover gasket at the oil pan-to-block seam.
- Apply a bead of sealant on the oil pan flange.
- Install the engine front cover. Position the lower edge of the cover on the oil pan and tip upward into position.
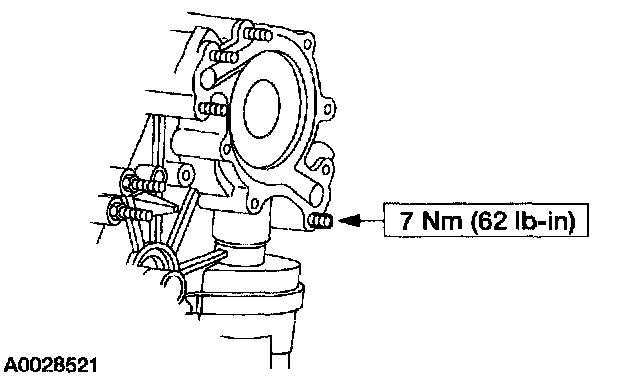
2. Install the new water pump mounting studs. The correct stud will be supplied with pre-applied Loctite(R). Make sure the Loctite(R) end of the stud is installed in the engine.
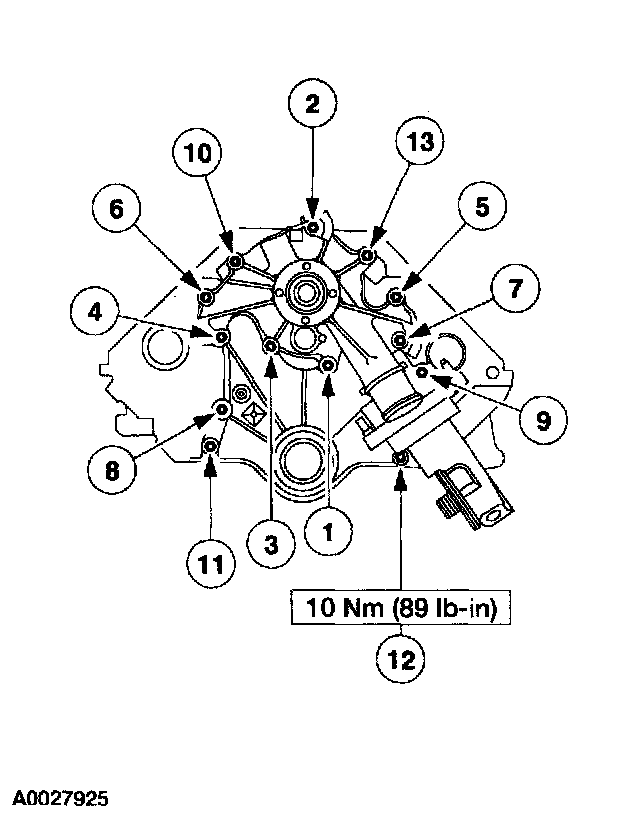
3. Tighten the engine front cover nuts and bolts in sequence in three stages.
- Tighten bolts 1-11 and 13 to 22 Nm (16 ft. lbs.).
- Tighten bolt 12 to 25 Nm (89 inch lbs.).
- Tighten bolts 1-11 and 13 an additional 90 degrees.
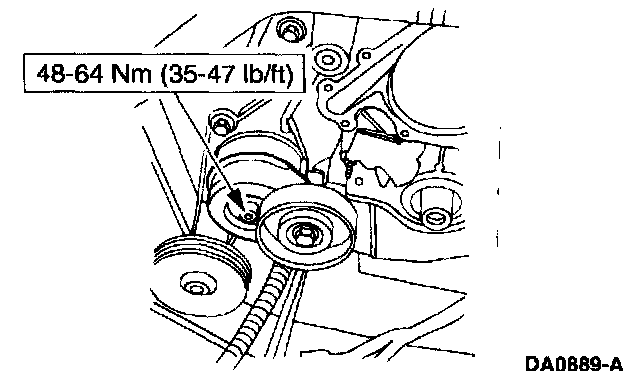
4. Install the accessory drive belt tensioner.
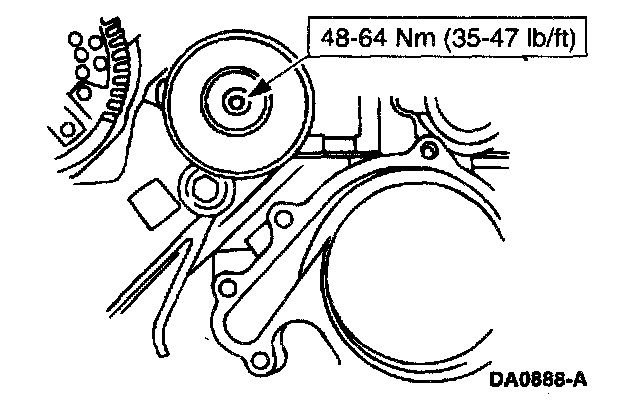
5. Install the accessory drive belt idler pulley.
6. Raise the vehicle.
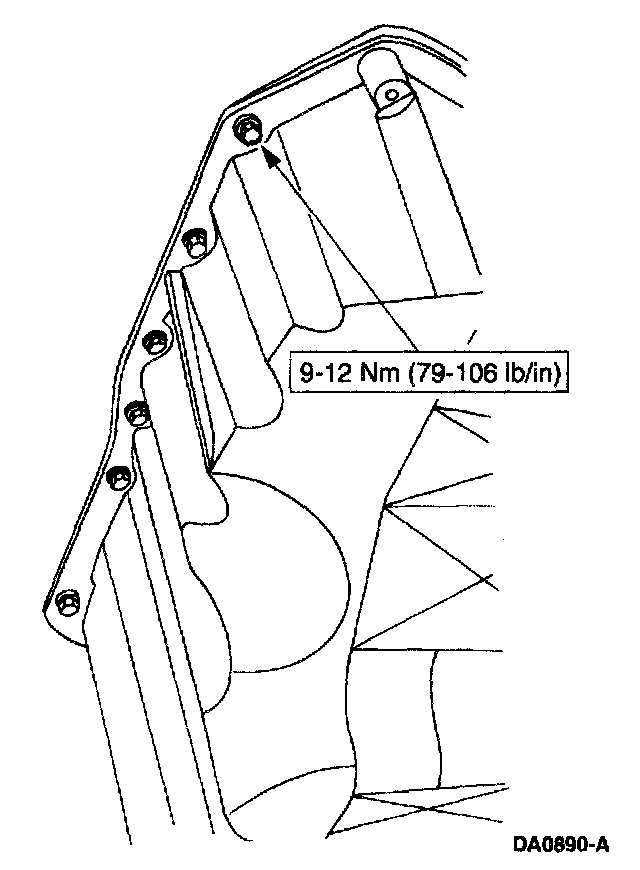
7. Install the bolts.
8. Drain the engine oil.
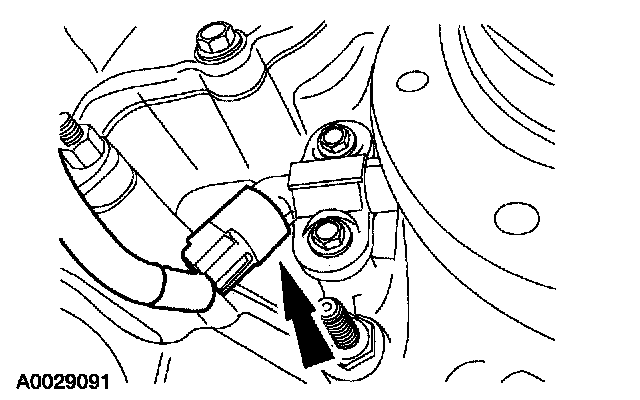
9. Connect the wiring at the Crankshaft Position (CMP) sensor.
10. Install the crankshaft front oil seal.
11. Install the crankshaft pulley.
12. Lower the vehicle.
13. Install the camshaft synchronizer.
14. Install the water pump.
15. Connect the battery ground cable.
16. Fill the engine with clean engine oil.