Extension Housing: Service and Repair
Extension Housing Gasket 4x2Removal
1. Raise and support the vehicle.

2. NOTE: To maintain initial driveshaft balance, mark the rear driveshaft yoke and axle flange so they may be installed in their original alignment.
Mark the rear driveshaft.

3. Remove the rear driveshaft.
1. Remove the bolts.
2. Remove the rear driveshaft.

4. Remove the nuts.
5. Raise and support the transmission.

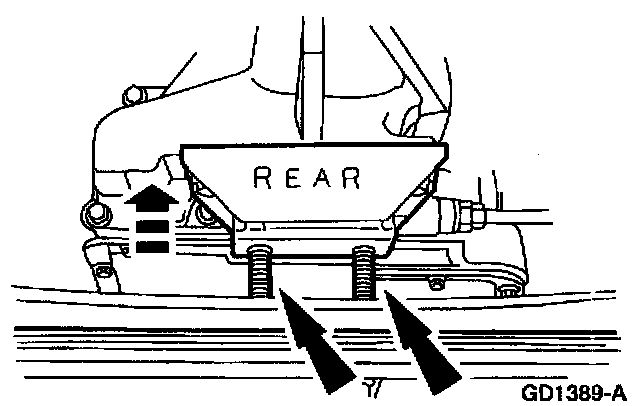
6. Remove the transmission mount.
1. Remove the screws.
2. Remove the transmission mount.

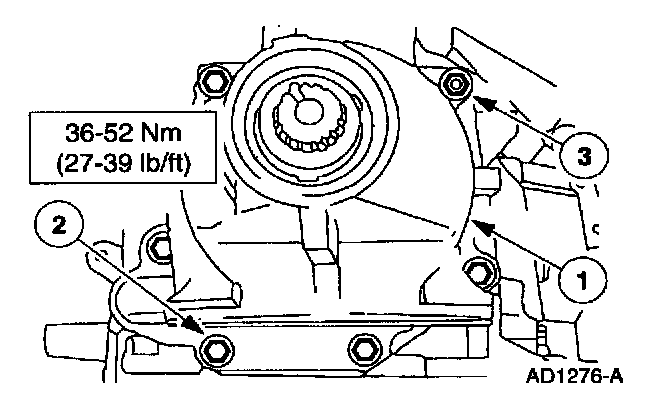
7. Remove the extension housing screws and studs.

8. CAUTION: The parking pawl, parking pawl return spring and parking pawl shaft could fall out during removal of the extension housing.
Remove the extension housing. Discard the extension housing gasket.
Installation

1. Clean the extension housing and install new extension housing gasket. Make sure that the parking pawl, spring and shaft are correctly installed.
2. CAUTION: Make sure the parking lever actuating rod is correctly seated into the case parking rod guide cup.
Install the extension housing.
1. Position the extension housing.
2. Install the extension housing screws.
3. Install the extension housing studs.

3. Install the transmission mount.
1. Position the transmission mount on the extension housing.
2. Install the transmission mount-to-extension housing screws.

4. Install the transmission mount into the crossmember and tighten the transmission mount nuts.
5. NOTE: Align the driveshaft with the marks made during removal to ensure correct balance.
Align and install the rear driveshaft.

6. Install the bolts.
7. Lower the vehicle.
8. Fill the transmission to the correct fluid level and check for correct transmission operation.
^ Use MERCON(R) V Automatic Transmission Fluid XI-5-QM or equivalent meeting MERCON(R) V specification.