Front Strut / Shock Tower: Service and Repair
Strut and Spring AssemblyRemoval
1. CAUTION: Suspension fasteners are critical parts because they affect performance of vital components and systems and their failure can result in major service expense. They must be exchanged with the same part number or an equivalent part if an exchange is necessary. Do not use an alternative part of lesser quality or substitute design. Torque values must be used as specified during reassembly to make sure these parts are properly retained.
NOTE: Make sure the steering wheel is in the unlocked position
Raise and support the vehicle.
2. Remove the wheel and tire assembly.
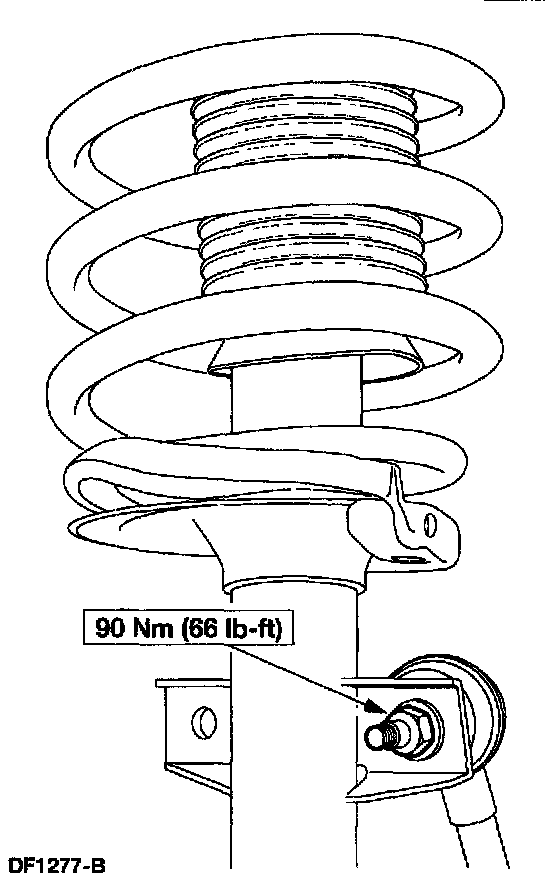
3. Remove and discard the front stabilizer bar link retaining nut
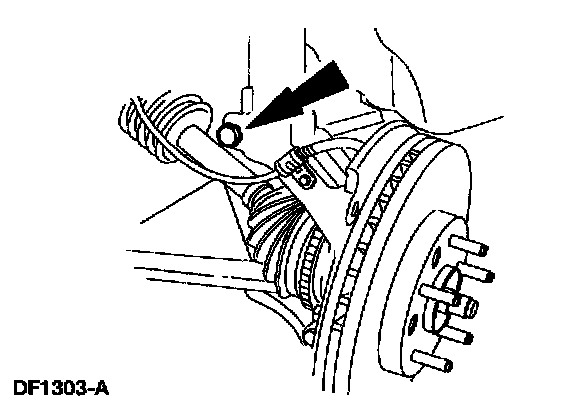
4. Remove and discard the strut and spring retaining bolt.
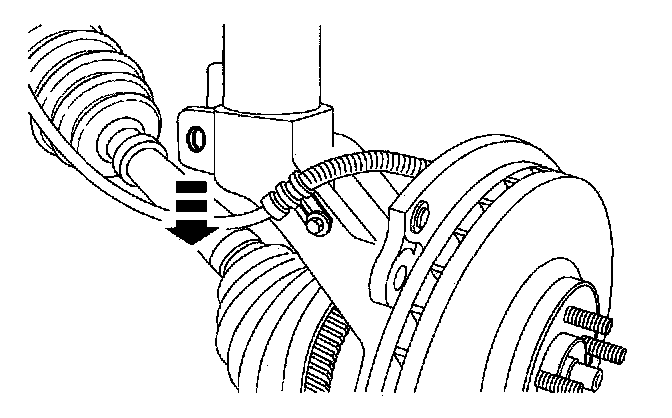
5. CAUTION: Do not allow the halfshaft to move outboard. Over-extension of the tripod CV joint can result in separation of internal parts, causing failure of the halfshaft.
Push down on the front wheel knuckle until the strut and spring assembly is free of the front wheel knuckle.
^ Support the front wheel knuckle to prevent the front axle shaft from moving outboard.
6. Partially lower the vehicle.
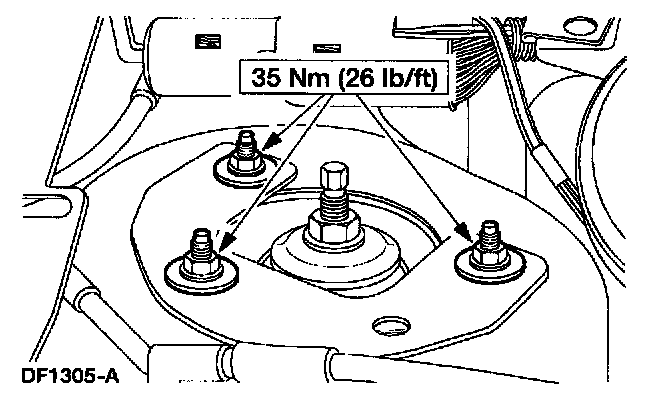
7. Remove the strut and spring assembly.
^ Remove and discard the three strut and spring mounting bracket retaining nuts.
^ Remove the strut and spring assembly.
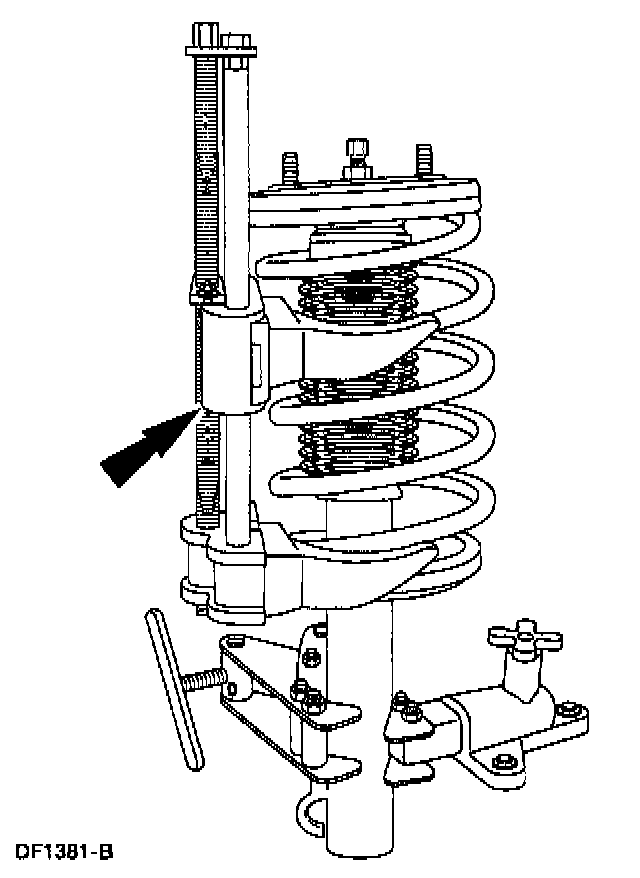
8. CAUTION: The strut assembly is under spring tension. Attempting to disassemble the strut without properly compressing the spring can result in injury.
Using a suitable spring compressing tool, compress the coil spring to relieve spring tension on the spring seat and bearing assembly.
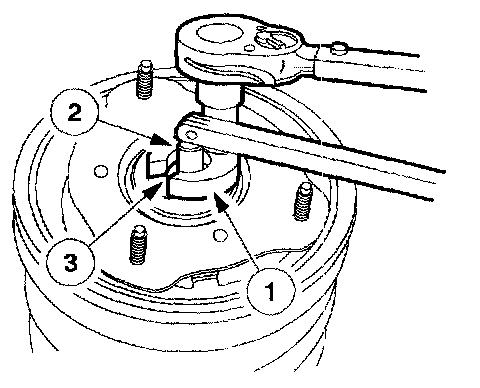
9. Remove the strut and spring assembly top shaft retaining nut.
1 Position a suitable crows-foot wrench onto the strut shaft top retaining nut.
2 Place a 10-mm six point deep well socket on top of the strut shaft.
3 Remove the strut shaft top retaining nut while preventing the strut shaft from turning.
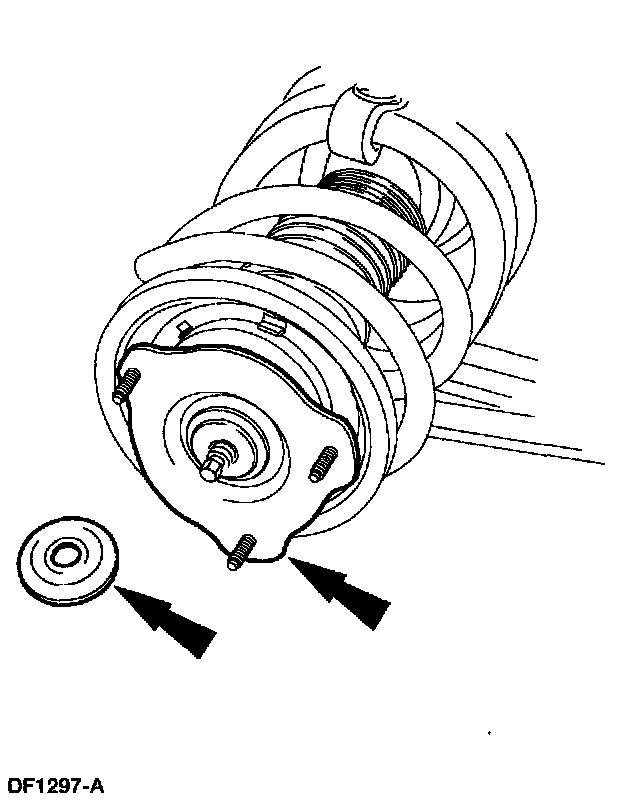
10. Remove the upper washer and strut mounting bracket.
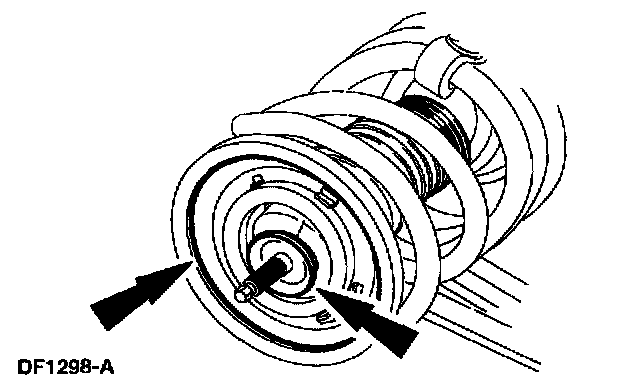
11. CAUTION: The spring seat and bearing assembly is press-fit onto the upper mount. The mount washers must be installed in the correct orientation.
Remove the lower washer, spring seat and bearing assembly.
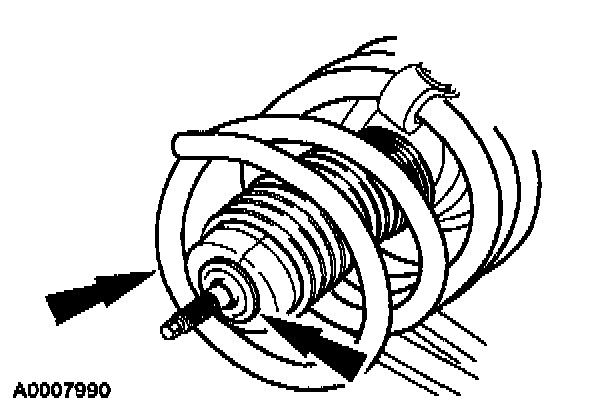
12. Remove the spring compressing tool, coil spring and dust boot.
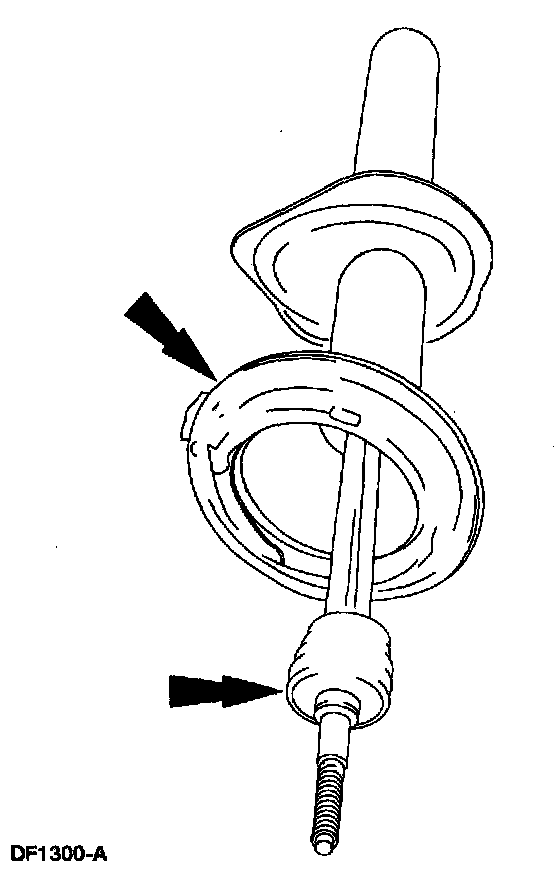
13. Remove the jounce bumper and lower spring insulator.
Installation
1. CAUTION: Do not over tighten the lock nut; damage to the lock nut or piston rod can result.
NOTE: Be sure to check the spring insulator for damage before assembly.
NOTE: Make sure the correct assembly sequence and correct positioning of the seat and bearing assembly and the lower spring insulator are followed.
Install the lower spring insulator and jounce bumper.
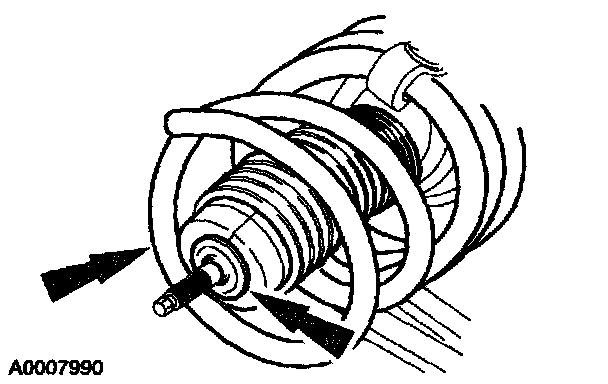
2. Install the spring compressing tool, coil spring and dust boot.
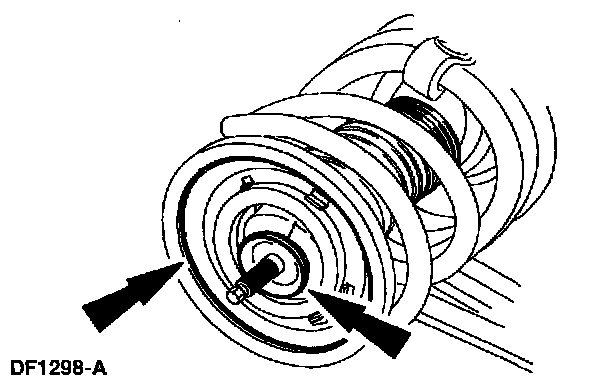
3. Install the spring seat and bearing assembly and the lower washer.
4. Install the strut mounting bracket and upper washer.

5. Install a new strut and spring assembly top shaft retaining nut.
6. Remove the spring compressing tool.
7. Position the strut and spring assembly into the vehicle and install new mounting bracket nuts.
8. Partially raise the vehicle.
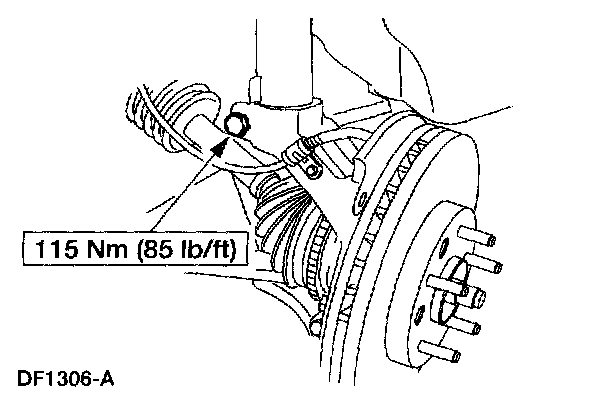
9. Position the strut and spring assembly to the steering knuckle and install a new pinch bolt.
10. Position the stabilizer link to the strut and spring assembly and install a new nut.
11. Install the wheel and tire assembly.
12. Lower the vehicle.