Compressor HVAC: Service and Repair
AIR CONDITIONING (A/C) COMPRESSORSpecial Tool(s):
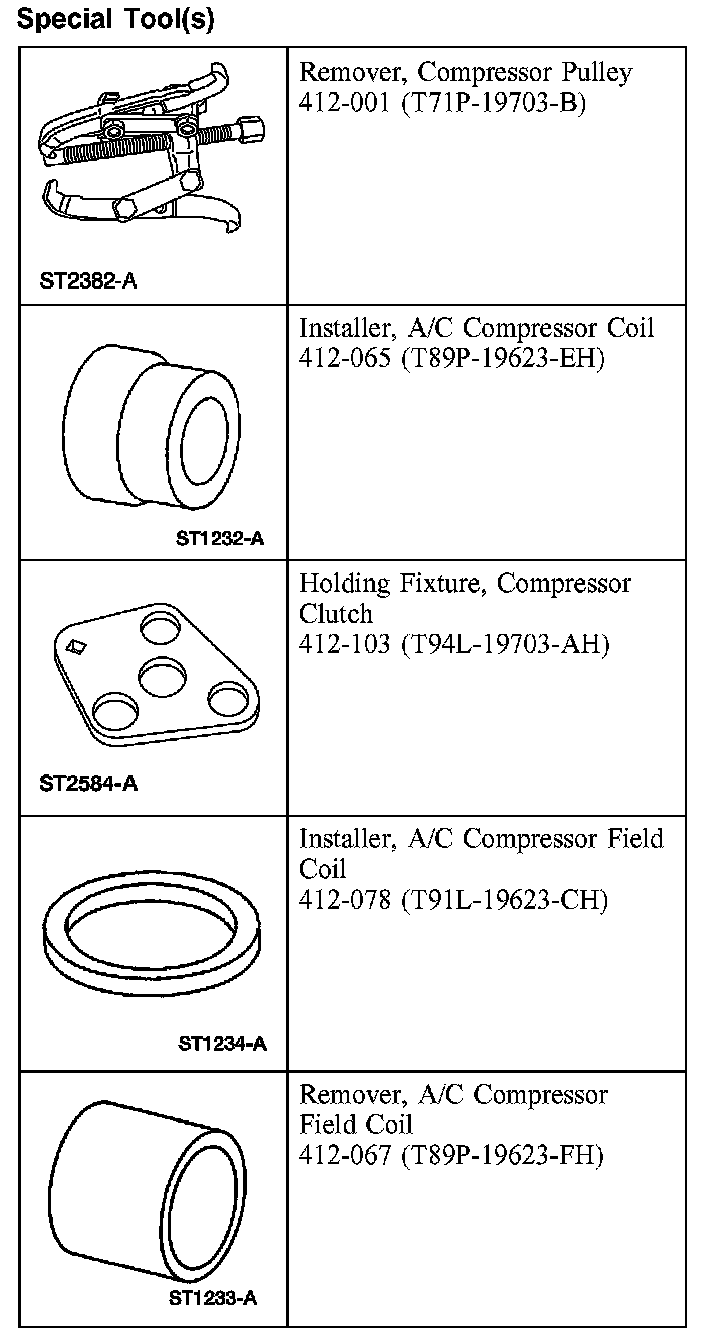
SPECIAL TOOL(S)
CAUTION:
- Refrigerant Compressor Oil (Mineral Oil) F73Z-19577-AA (Motorcraft YN-9-A) should be used to lubricate R-134a refrigerant system O-ring seals only and should not be added to R-134a refrigerant systems as an A/C compressor lubricant. PAG Refrigerant Compressor Oil F7AZ-19D589-DA (Motorcraft YN-12-C) or equivalent meeting Ford specification WSH-M1C231-B only should be used as an A/C compressor lubricant.
- If installing a new air conditioning compressor due to an internal failure of the old unit, you must carry out the following procedures to remove contamination from the air conditioning system.
- If A/C flushing equipment is available, carry out flushing of the air conditioning system prior to installing a new air conditioning compressor.
- If A/C flushing equipment is not available, carry out filtering of the air conditioning system after a new air conditioning compressor has been installed.
- Install a new evaporator core orifice, as directed by the A/C flushing or filtering procedure.
- Install a new suction accumulator, as directed by the A/C flushing or filtering procedure.
NOTE:
- Installation of a new suction accumulator is not required when repairing the air conditioning system except when there is physical evidence of system contamination from a failed A/C compressor or damage to the suction accumulator.
- New O-ring seals, lubricated in clean mineral oil, must be installed before reconnecting any A/C fitting which has been disconnected.
REMOVAL
1. Position the vehicle on a hoist with the gear selector in NEUTRAL.
2. Remove the drive belt from the A/C compressor pulley.
3. If flushing of the air conditioning system has not been carried out, recover the refrigerant.
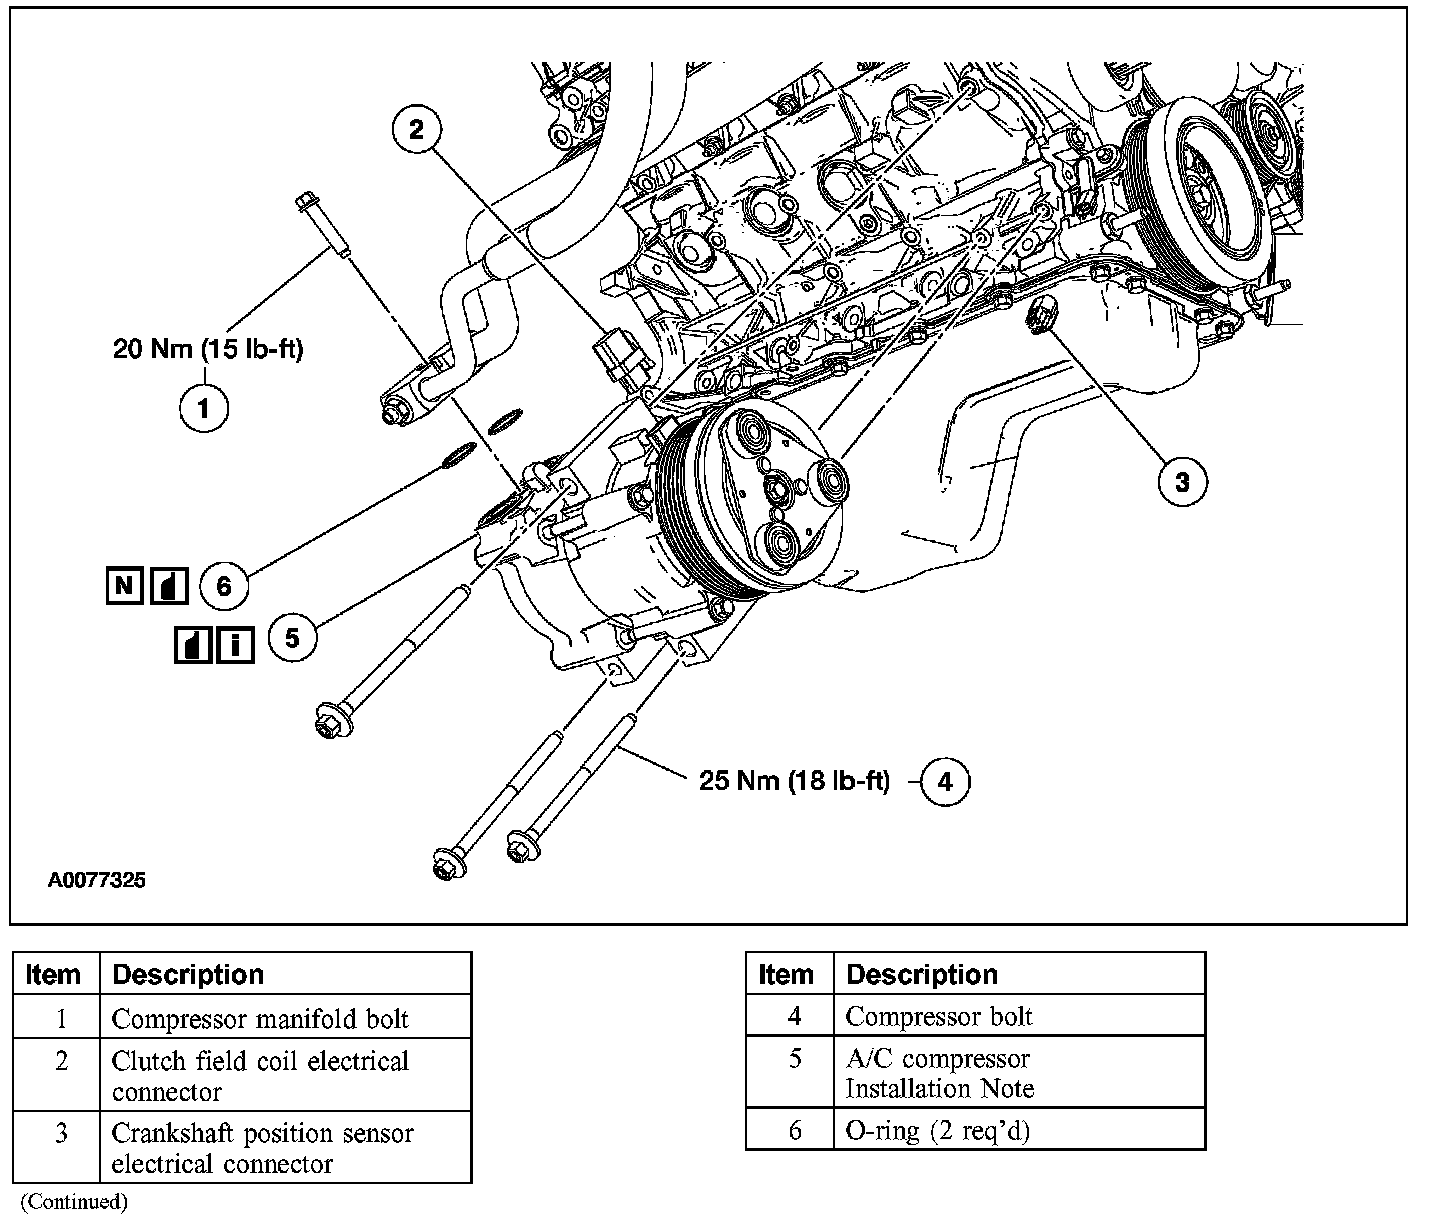
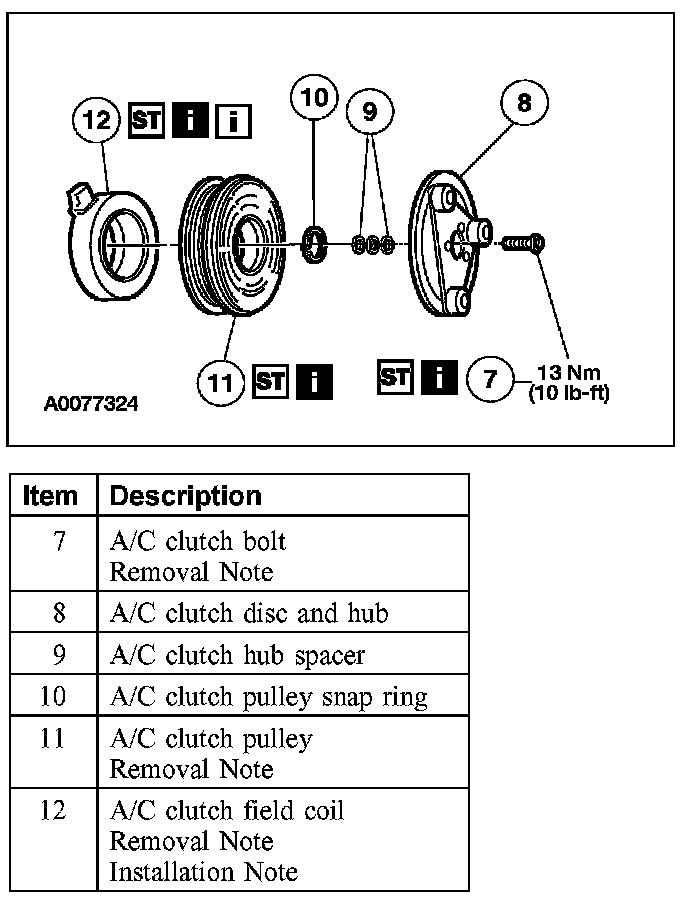
4. Remove the parts in the order indicated in the illustrations and tables.
Item 7: A/C Clutch Bolt Removal Note
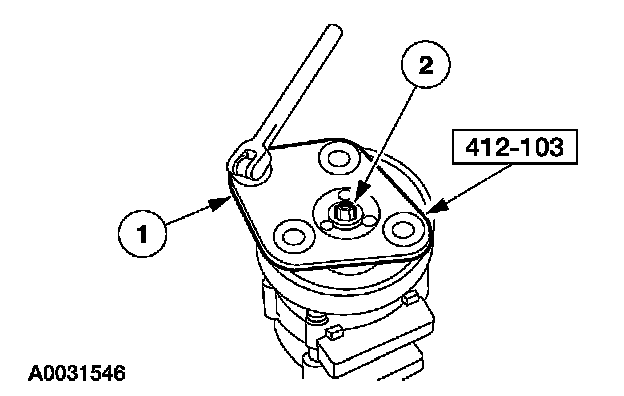
1. Remove the A/C clutch bolt.
1 Using the special tool, hold the clutch plate.
2 Remove the bolt.
Item 11: A/C Clutch Pulley Removal Note
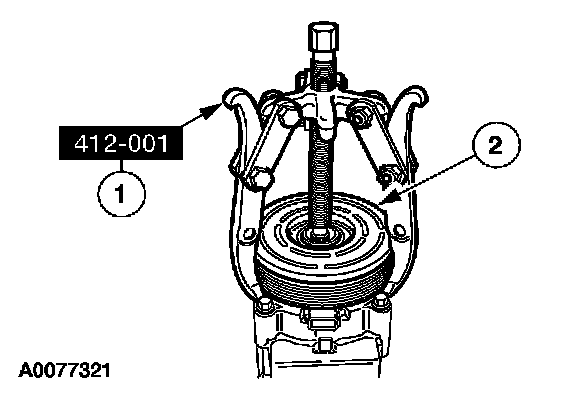
1. Remove the A/C clutch pulley.
1 Install the special tool.
2 Remove the A/C clutch pulley.
Item 12: A/C Clutch Field Coil Removal Note
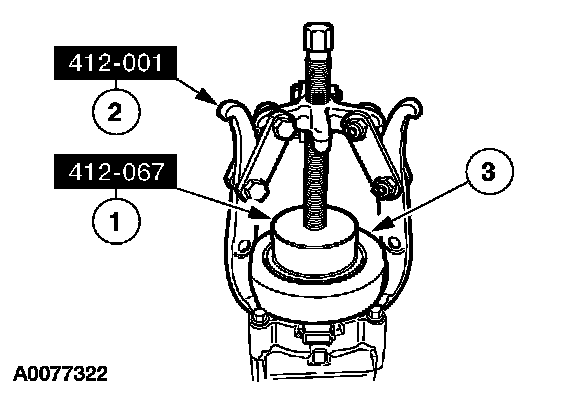
1. CAUTION: Do not use air tools. Damage to the A/C clutch pulley or A/C compressor may result.
Remove the A/C clutch field coil.
1 Install the special tool.
2 Install the special tool.
3 Remove the A/C clutch field coil.
INSTALLATION
1. To install, reverse the removal procedure.
2. If filtering of the air conditioning system is not to be carried out, evacuate, leak test and charge the refrigerant system.
Item 12: A/C Clutch Field Coil Installation Note
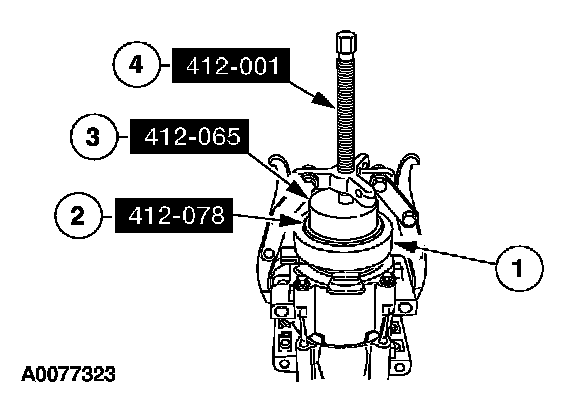
1. CAUTION: Do not use air tools. Damage to the A/C clutch pulley or A/C compressor may result.
Install the A/C clutch field coil.
1 Place the A/C clutch field coil on the A/C compressor with the A/C clutch field coil electrical connector correctly positioned.
2 Place the special tool on the A/C clutch field coil.
3 Place the special tool 412-065 on the special tool 412-078.
4 Use the special tool to install the A/C clutch field coil.
Item 5: A/C Compressor Installation Note
1. Lubricate the A/C compressor with the correct amount of clean PAG oil prior to installing it on the vehicle.