Evaporator Case: Service and Repair
EVAPORATOR CORE HOUSINGREMOVAL
CAUTION: Refrigerant Compressor Oil (mineral oil) F73Z-19577-AA (Motorcraft YN-9-A) should be used to lubricate R-134a refrigerant system O-ring seals only and should not be added to the R-134a refrigerant system as an A/C compressor lubricant. PAG Refrigerant Compressor Oil F7AZ-19589-DA (Motorcraft YN-12-C) or equivalent meeting Ford specification WSH-M1C231-B only should be used as an A/C compressor lubricant.
NOTE:
- The evaporator core is not separately serviceable, it is serviced only with the evaporator core housing assembly.
- If an evaporator core leak is suspected, the evaporator core must be leak tested before it is removed from the vehicle.
- Installation of a new suction accumulator is not required when repairing the refrigerant system except when there is physical evidence of system contamination from a failed A/C compressor or damage to the suction accumulator.
All vehicles
1. Recover the refrigerant.
2. Remove the suction accumulator.
Vehicles with 2.3L engine
3. Remove the A/C compressor.
4. Remove the engine oil indicator and tube.
Vehicles with 3.0L and 4.0L engines
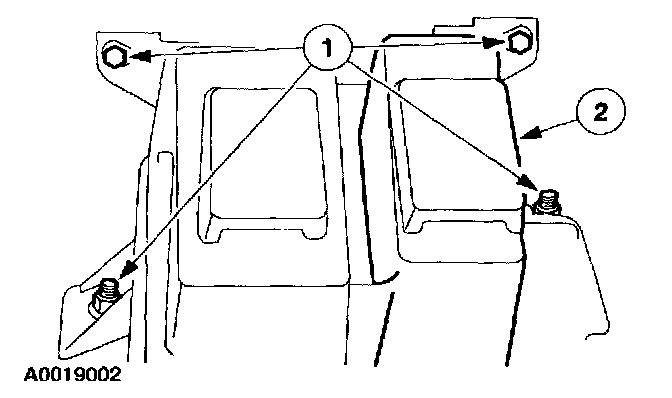
5. Position the coolant reservoir and windshield washer reservoir aside.
1 Remove the screws and nuts.
2 Position the reservoirs aside.
Vehicles with speed control
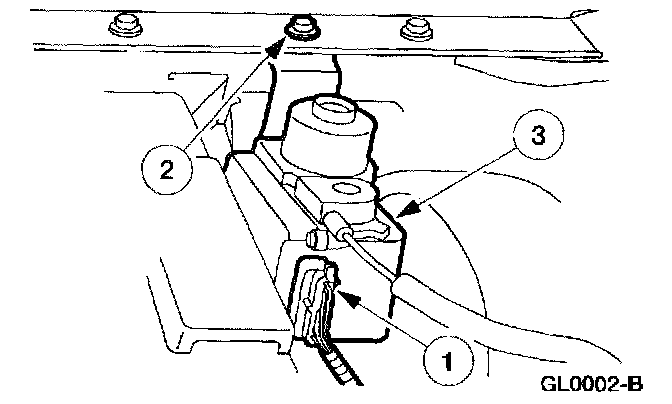
6. Detach the speed control servo.
1 Disconnect the electrical connector.
2 Remove the bolt.
3 Detach the cable from the evaporator core housing and position aside the speed control servo.
All vehicles
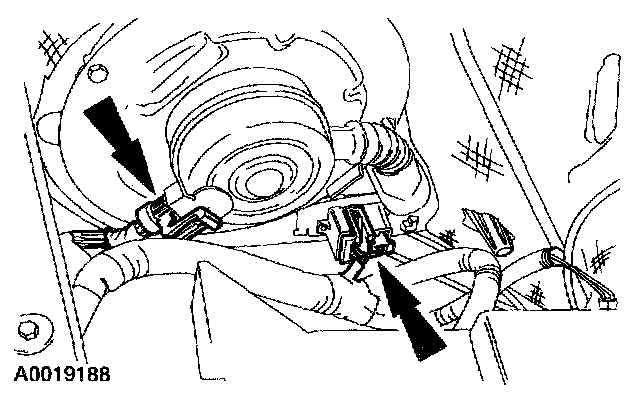
7. Disconnect the blower motor and blower motor resistor electrical connectors.
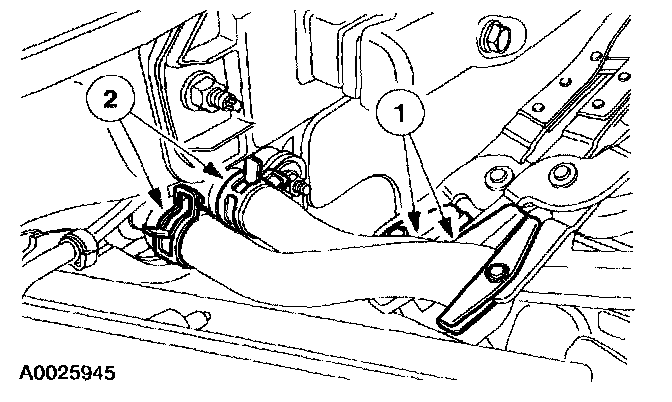
8. Disconnect the heater hoses.
1 Using suitable tools, clamp-off the heater hoses.
2 Release the clamps and disconnect the heater hoses.
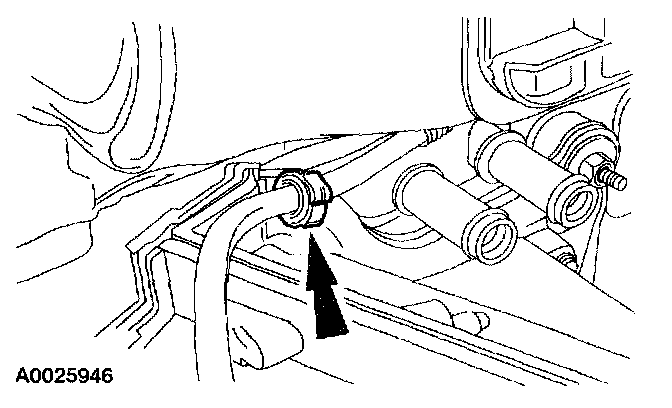
9. Detach the pin-type retainer and position aside the windshield washer hose.
10. Disconnect and detach the heater control valve vacuum hose.
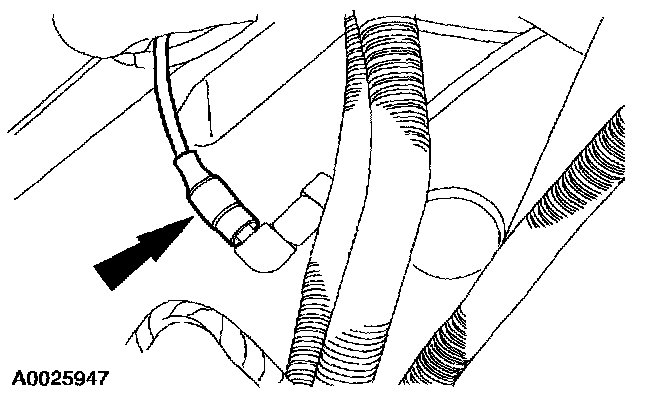
11. NOTE: 2.3L engine shown, others are similar.
Disconnect the vacuum supply hose near the evaporator core housing.
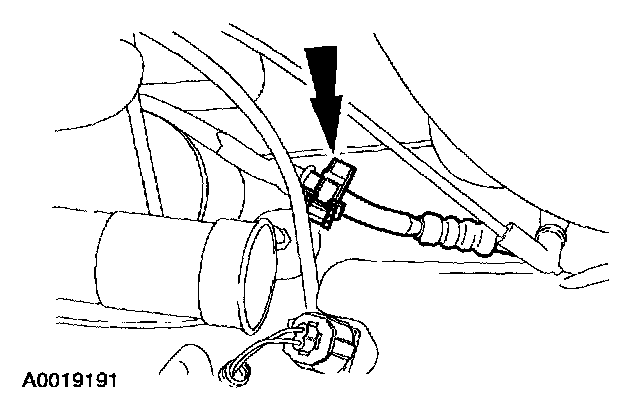
12. Disconnect the condenser to evaporator line spring lock coupling from the evaporator core inlet.
- Discard the O-ring seals.
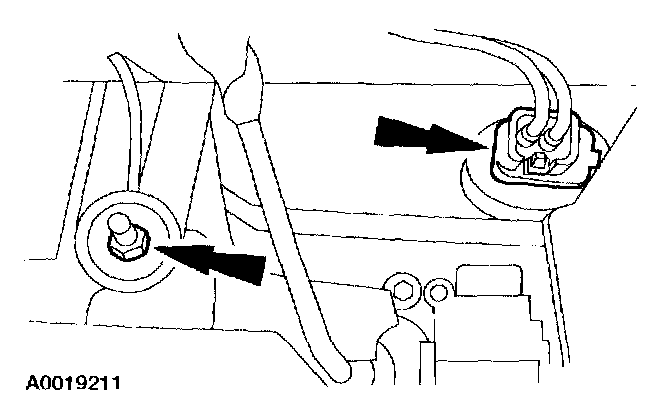
13. NOTE: The following step is carried out at the lower passenger side dash panel, inside the passenger compartment.
Disconnect the vacuum hose connector and remove the nut.
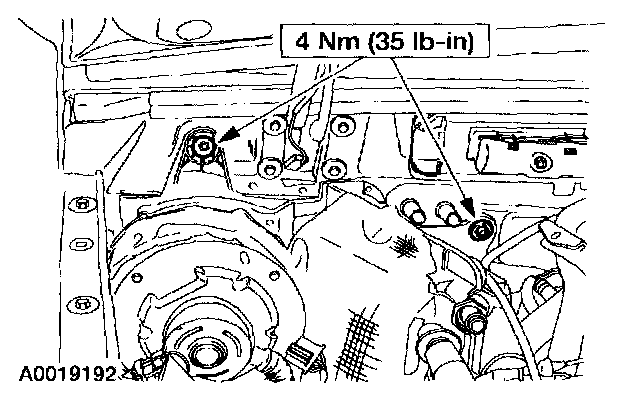
14. Remove the nuts and the evaporator core housing.
INSTALLATION
1. To install, reverse the removal procedure.
- Lubricate the refrigerant system with the correct amount of clean PAG oil or equivalent.
- Install new O-ring seals lubricated in clean mineral oil.
- Lubricate the coolant hoses with coolant hose lubricant or plain water only, if needed.
2. Evacuate, leak test, and charge the refrigerant system.