Timing Components: Service and Repair
Timing Drive Components

Special Tool(s)
1. Remove the engine front cover.

2. Remove the components in the order indicated in the illustration and table. To remove individual components, only carry out the listed steps.

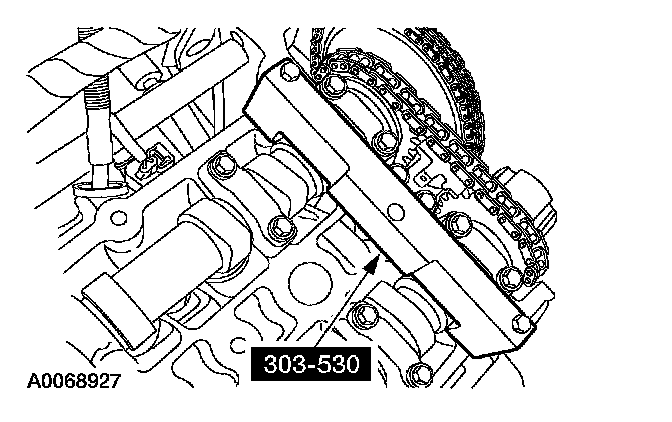
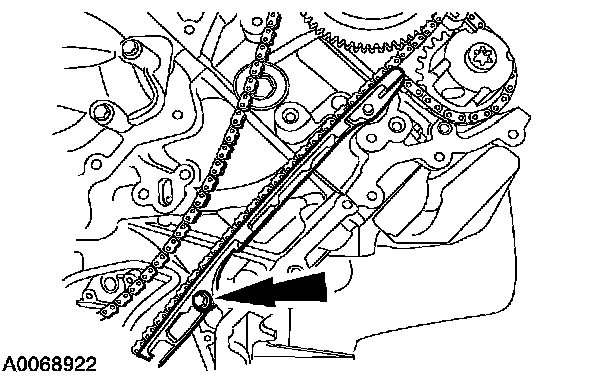
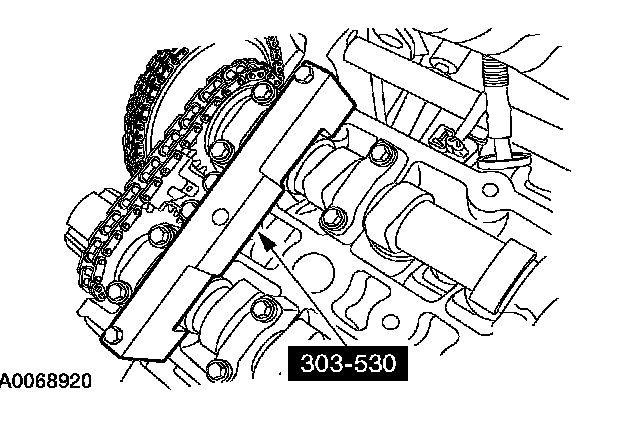
3. Illustration 1 of 4. Remove the components in the order indicated in the illustration and table.


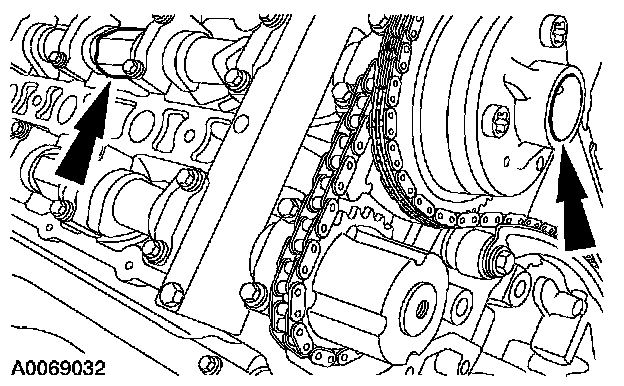
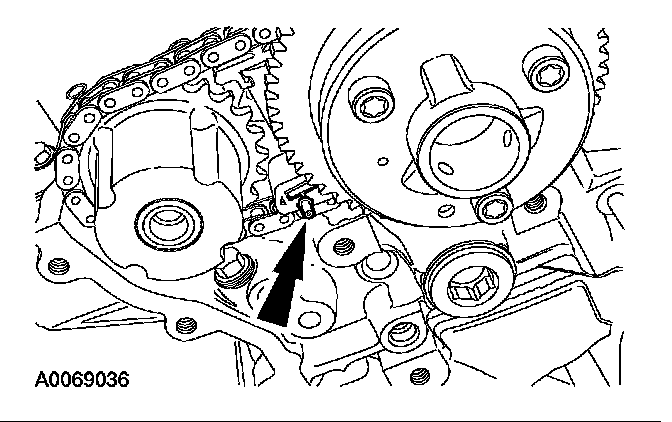
4. Illustration 2 of 4. Remove the components in the order indicated in the illustration and table.


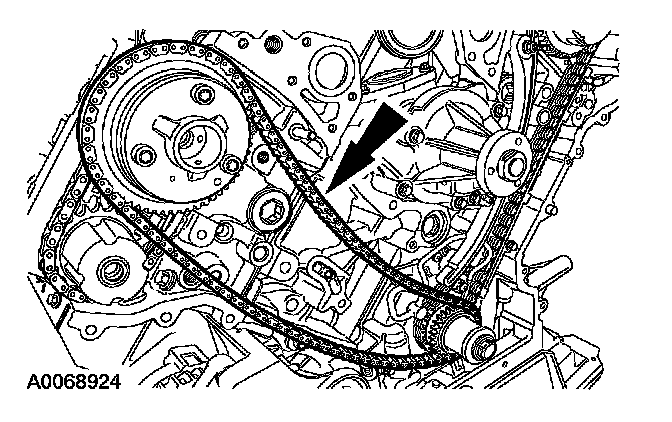
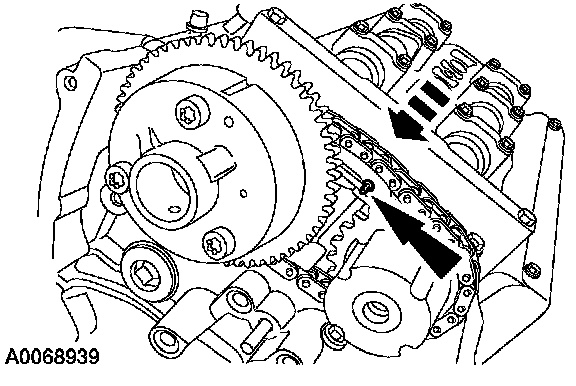
5. Illustration 3 of 4. Remove the components in the order indicated in the illustration and table.


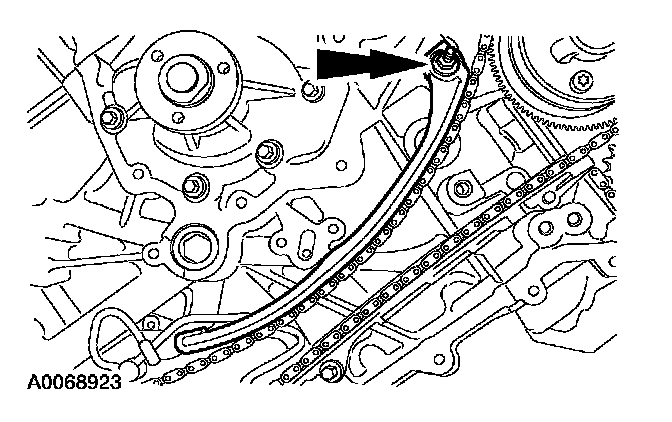
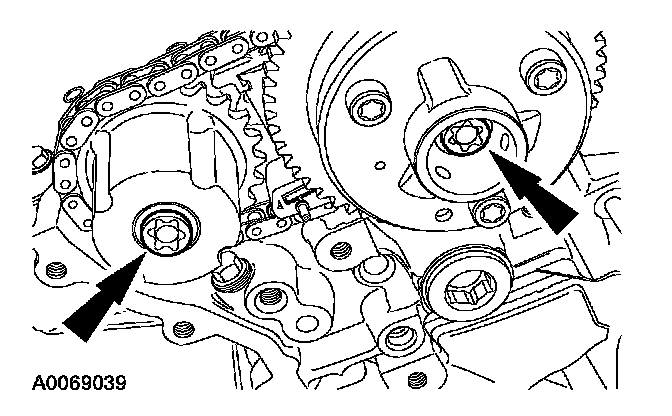
6. Illustration 4 of 4. Remove the components in the order indicated in the illustration and table.
7. To install, reverse the removal procedure.
Items 7-20: Timing Drive Components Removal Note

1. Remove the Crankshaft Position (CKP) sensor and the torque converter cover.

2. NOTE: There is one window on the ignition pulse wheel that is unique to accept the special tool.
Install the special tool.
^ Turn the crankshaft to 45 degrees ATDC. The crankshaft keyway will be in the 6 o'clock position.
^ Install the special tool.

3. Make sure the flats of the camshaft are facing upward. If not, repeat Step 2.
4. CAUTION: The flats on the camshaft must completely contact the special service tool or damage to the camshafts can occur. Slowly draw the special tool down evenly until it is fully seated on the camshaft flats.
Install the special tool on the RH cylinder head.

5. CAUTION: An open-end wrench must be used on the flats of the camshaft or damage to the camshaft will occur.
Remove and discard the RH exhaust camshaft sprocket bolt.
6. CAUTION: An open-end wrench must be used on the flats of the camshaft or damage to the camshaft will occur.
Remove and discard the RH VCT unit bolt.

7. Remove the RH timing chain tensioner.
1 Push the lever down and install a drill rod to lock the piston.
2 Remove the bolts and the tensioner.

8. Remove the RH tensioner arm.

9. Remove the RH timing chain guide.
10. Remove the RH primary timing chain.

11. Remove the special tool from the RH cylinder head.

12. CAUTION: The flats on the camshaft must completely contact the special service tool or damage to the camshafts can occur. Slowly draw the special tool down evenly until it is fully seated on the camshaft flats.
Install the special tool on the LH head.

13. CAUTION: An open-end wrench must be used on the flats of the camshaft or damage to the camshaft can occur.
Remove and discard the LH VCT unit bolt and the exhaust camshaft sprocket bolt.

14. Remove the LH timing chain tensioner.
1 Push the lever down and install a drill rod to lock the piston.
2 Remove the belt, mark the tensioner.
15. Remove the LH tensioner arm.
16. Remove the LH timing chain guide.

17. Remove the LH primary timing chain.
Items 21-25, and 27: RH Variable Camshaft Timing (VCT) Unit, Exhaust Camshaft Sprocket and Secondary Timing Chain Removal Note
1. Collapse the RH secondary timing chain tensioner and install a pin to lock the piston.

2. Remove the RH VCT unit, exhaust camshaft sprocket and timing chain as an assembly.
Items 28-32, and 34: LH Variable Camshaft Timing (VCT) Unit, Exhaust Camshaft Sprocket and Secondary Timing Chain Removal Note
1. Collapse the LH secondary timing chain tensioner and install a pin to lock the piston.

2. Remove the LH VCT unit, exhaust camshaft sprocket and timing chain as an assembly.
Items 28-32, and 34: LH Variable Camshaft Timing (VCT) Unit, Exhaust Camshaft Sprocket and Secondary Timing Chain Installation Note

1. Install the LH VCT unit, exhaust camshaft sprocket and timing chain as an assembly.

2. Using new bolts, install the LH VCT unit and exhaust camshaft sprocket bolts finger-tight.

3. Remove the locking pin from the LH secondary timing chain tensioner.
Items 21-25, and 27: RH Variable Camshaft Timing (VCT) Unit, Exhaust Camshaft Sprocket and Secondary Timing Chain Installation Note

1. Install the RH VCT unit, exhaust camshaft sprocket and timing chain as an assembly.
2. Using new bolts, install the RH VCT unit and exhaust camshaft sprocket bolts finger-tight.

3. Remove the locking pin from the RH secondary timing chain tensioner.
Items 7-20: Timing Drive Components Installation Note

1. Reset the timing chain tensioners.
1 Hold the lever toward the tensioner piston.
2 Using finger pressure, compress the tensioner until it is completely collapsed.
3 Push the lever down and install a drill rod to lock the piston.

2. CAUTION: The camshaft holding tool should still be installed on the LH cylinder head.
CAUTION: The flats on the camshaft must completely contact the special service tool or damage to the camshafts can occur. Slowly draw the special tool down evenly until it is fully seated on the camshaft flats.
Position the LH timing chain and crankshaft gear.
^ Position the timing chain over the LH intake camshaft sprocket.
^ Position the crankshaft gear in the timing chain.

3. Install the LH timing chain guide.

4. Install the LH timing chain tensioner arm.

5. Install the LH timing chain tensioner.
1 Install the timing chain tensioner and bolts.
2 Remove the drill rod.

6. CAUTION: The exhaust camshaft sprocket bolt must be fully tightened before tightening the intake camshaft sprocket bolt.
CAUTION: Using the special tool, apply 10 Nm (89 inch lbs.) counterclockwise to the LH exhaust camshaft sprocket.
Tighten the LH exhaust camshaft sprocket and VCT unit bolts in two stages:
^ Stage 1: Tighten to 35 Nm (26 ft. lbs.).
^ Stage 2: Tighten an additional 90°.
7. Remove the special tool.

8. CAUTION: The flats on the camshaft must completely contact the special service tool or damage to the camshafts can occur. Slowly draw the special tool down evenly until it is fully seated on the camshaft flats.
Install the special tool on the RH cylinder head.

9. Position the RH timing chain over the RH intake camshaft sprocket and over the crankshaft gear.

10. Install the RH timing chain guide.

11. Install the RH timing chain tensioner arm.

12. Install the RH timing chain tensioner. 1 Install the timing chain tensioner and bolts. 2 Remove the drill rod.

13. CAUTION: The exhaust camshaft sprocket bolt must be fully tightened before tightening the intake camshaft sprocket bolt.
CAUTION: Using the special tool, apply 10 Nm (89 inch lbs.) counterclockwise to the RH exhaust camshaft sprocket.
Tighten the RH exhaust camshaft sprocket and VCT unit bolts in two stages:
^ Stage 1: Tighten to 35 Nm (26 ft. lbs.).
^ Stage 2: Tighten an additional 90°.

14. Remove the special tool.

15. Remove the special tool.

16. Install the CKP sensor and the torque converter cover.