Installation
Installation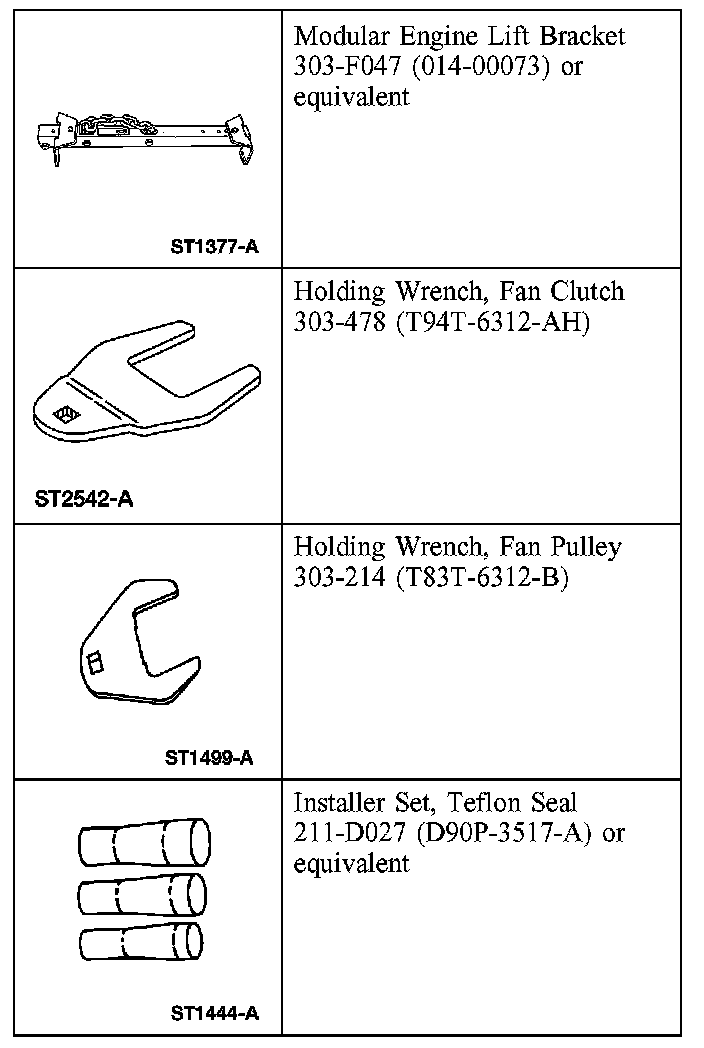
Special Tool(s)
Material
All engines
1. Position the engine in the vehicle.
2. Remove the floor crane and the jack supporting the transmission.
3. With the vehicle in NEUTRAL, position it on a hoist.
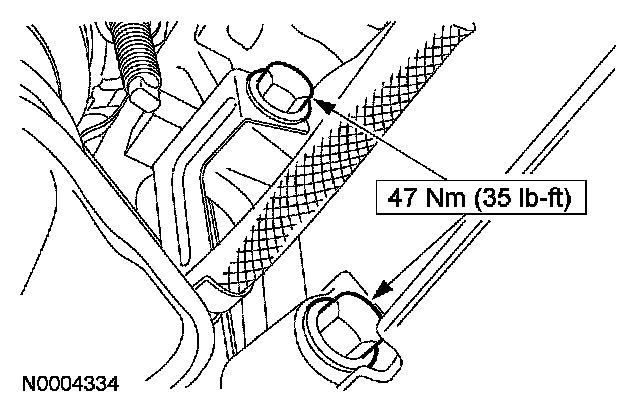
4. NOTE: Align the engine-to-transmission dowels before installing the engine-to-transmission bolts.
Position the shifter cable support bracket and install the two transmission-to-engine bolts.
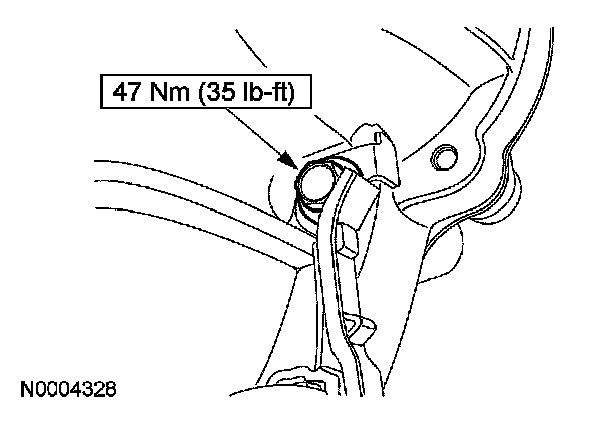
5. Install the RH lower transmission-to-engine bolt.
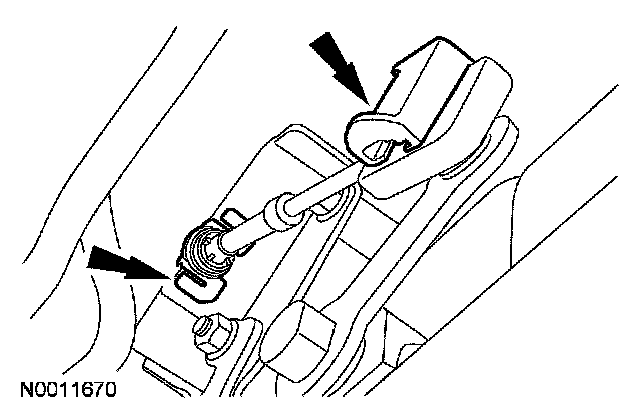
6. Install the shift cable to the mounting bracket and shift linkage.
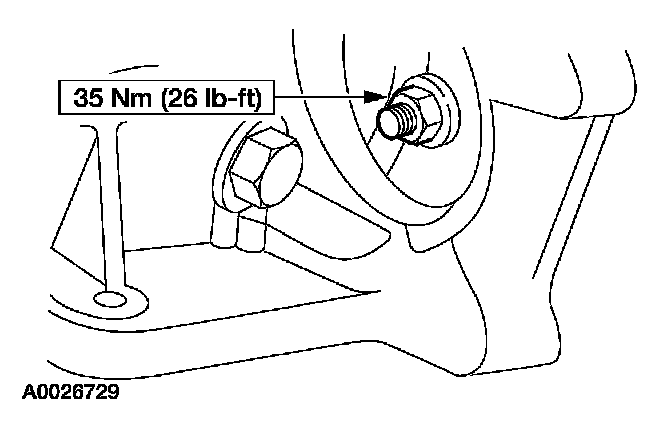
7. Install four new nuts to retain the torque converter to the flexplate.
^ Rotate the crankshaft to access all of the torque converter nuts.
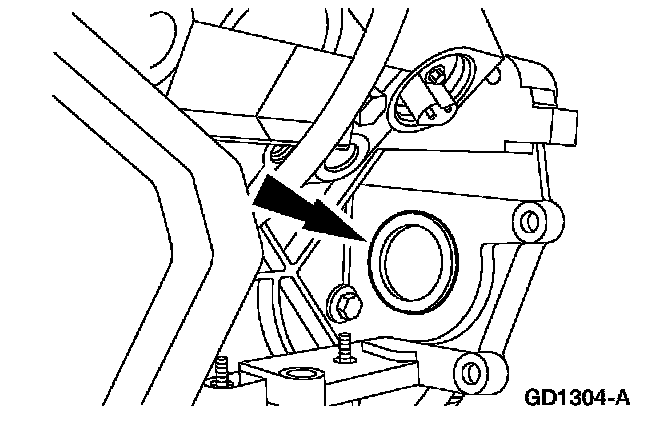
8. Install the cylinder block opening cover.
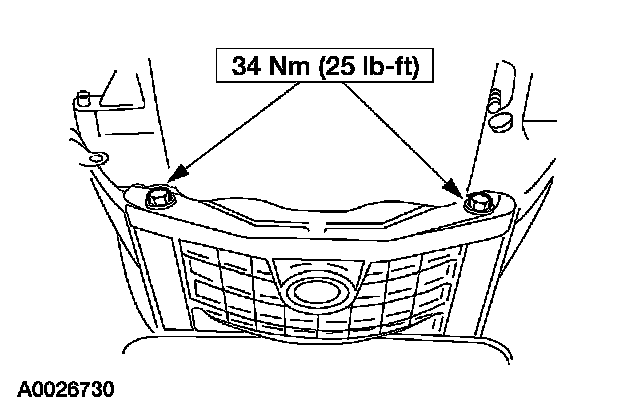
9. Install the flexplate inspection cover.
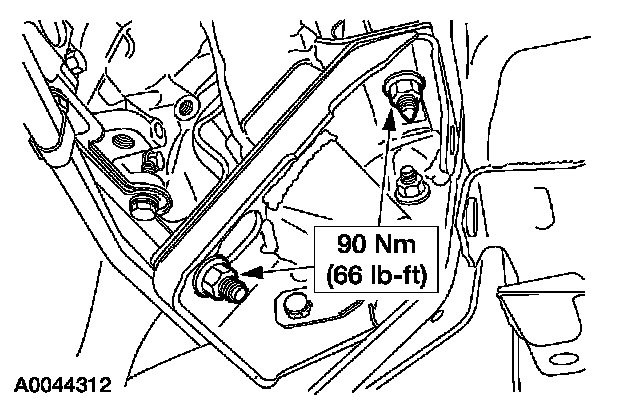
10. NOTE: RH shown, LH similar.
Install the four engine mount nuts.
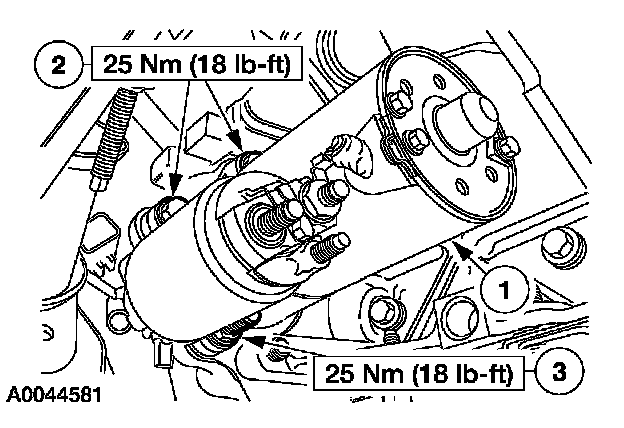
11. Install the starter motor.
1 Position the starter.
2 Install the two bolts.
3 Install the stud bolt.
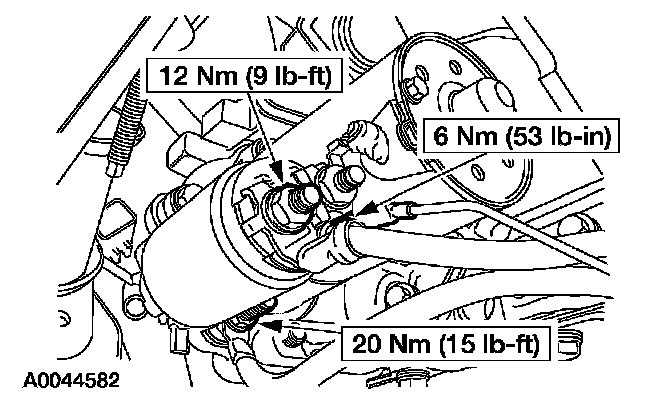
12. Connect the starter motor electrical connections.
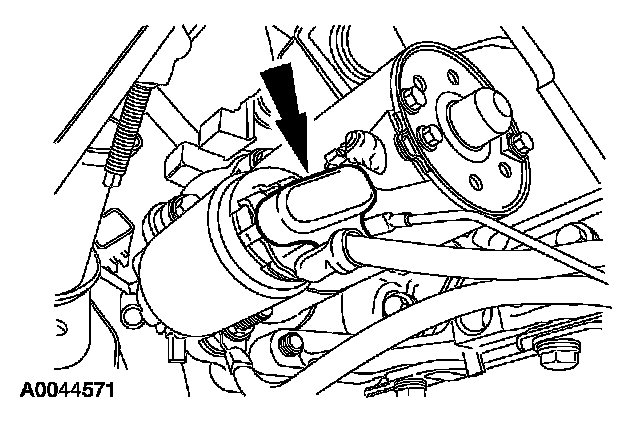
13. Install the starter motor solenoid terminal cover.
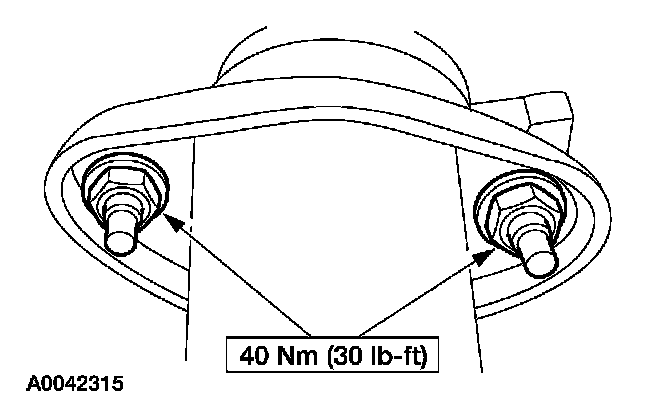
14. Mount the exhaust system to the LH and RH exhaust manifolds.
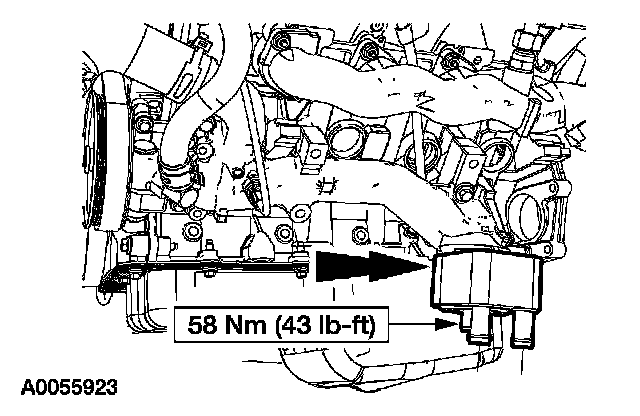
15. CAUTION: A new oil cooler must be installed or severe damage to the engine can occur.
NOTE: Make sure the tab on the oil filter adapter nests into the notch in the oil cooler.
Position a new oil cooler on the oil filter adapter and install the threaded insert.
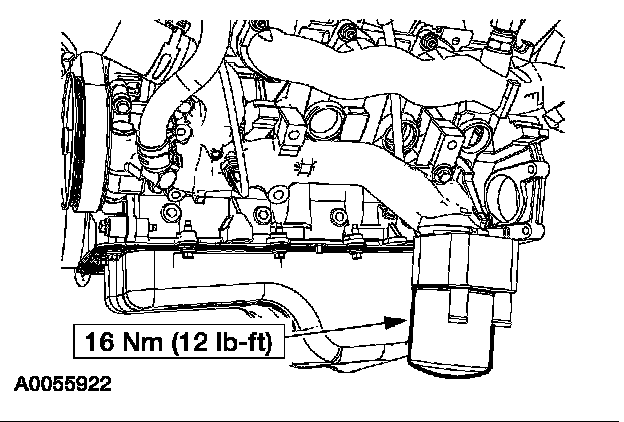
16. Install a new oil filter.
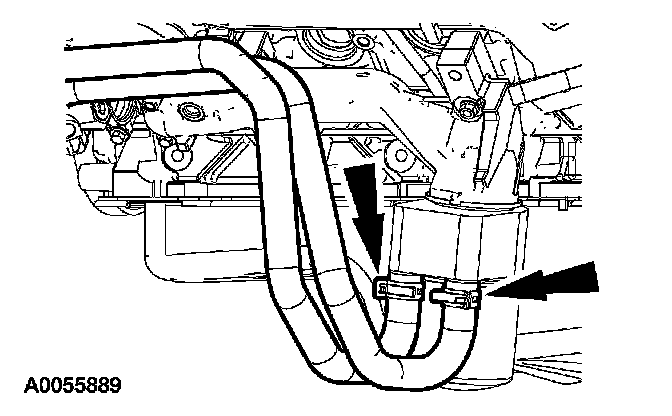
17. Connect the oil cooler hoses.
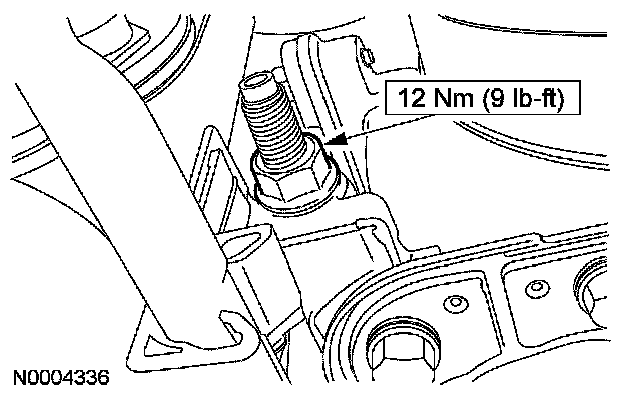
18. Position the transmission fluid cooler tube support bracket and install the nut.
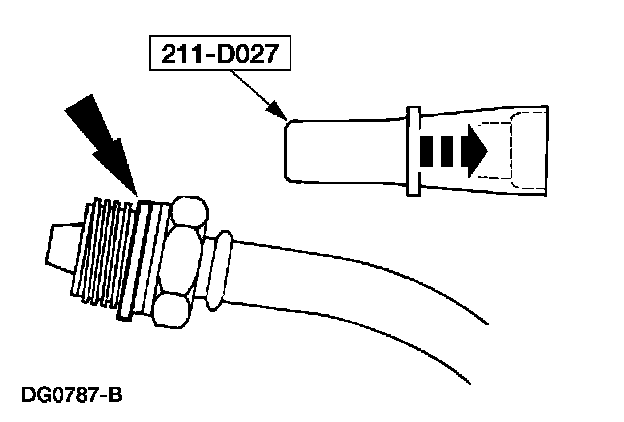
19. Using the special tool, install a new Teflon seal on the power steering pressure tube
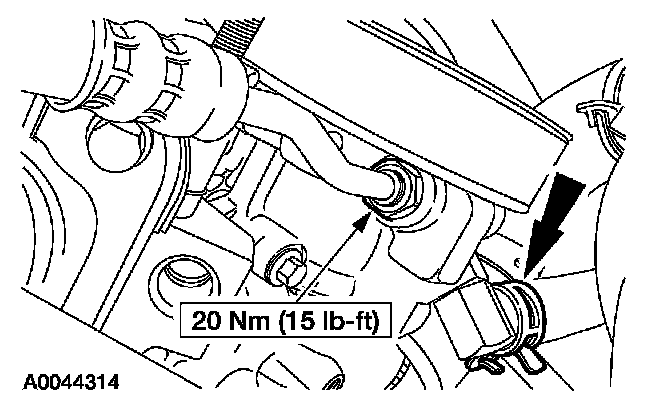
20. Connect the power steering pressure tube and the power steering reservoir hose to the power steering pump.
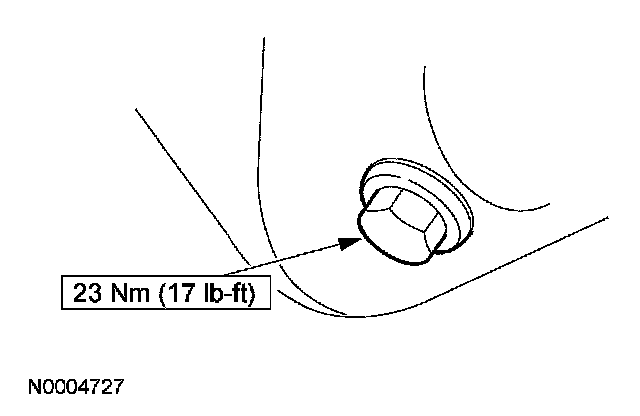
21. Install and tighten the oil drain plug.
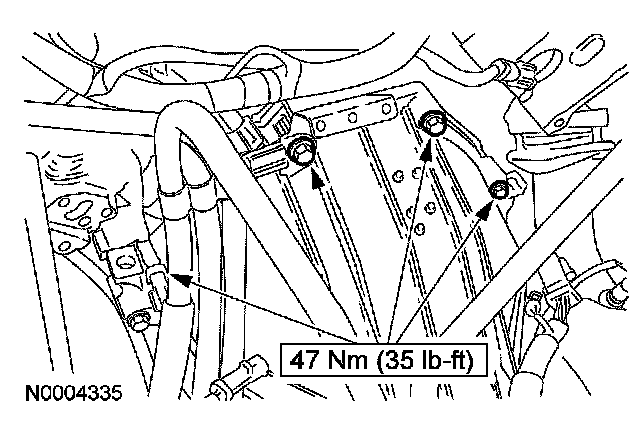
22. Position the fuel line and the LH Heated Oxygen Sensor (HO2S) brackets. Install the four upper transmission-to-engine bolts.
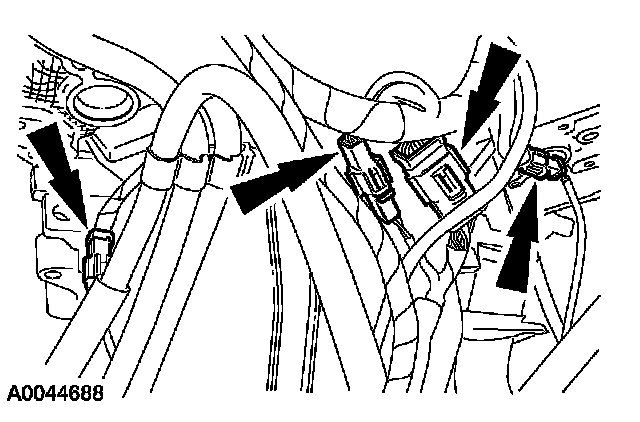
23. Connect the transmission wiring harness and the LH and RH HO2S electrical connectors. Install the transmission wiring harness connector retainer in the bracket.
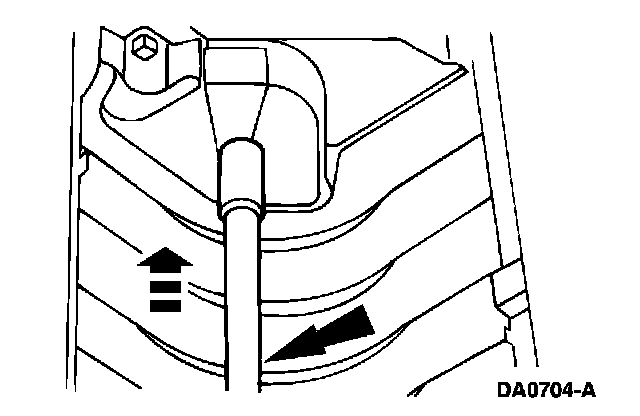
24. NOTE: Do not reuse the O-ring seals. Lubricate the new O-ring seals with clean engine coolant before installing the heater outlet tube.
Insert the heater outlet tube over the new seals.
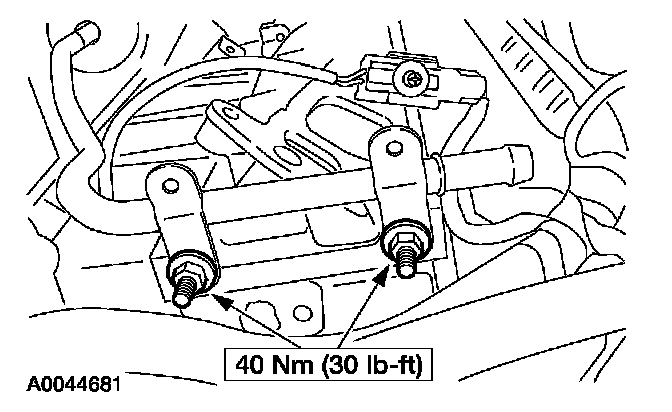
25. Install the heater outlet tube studs.
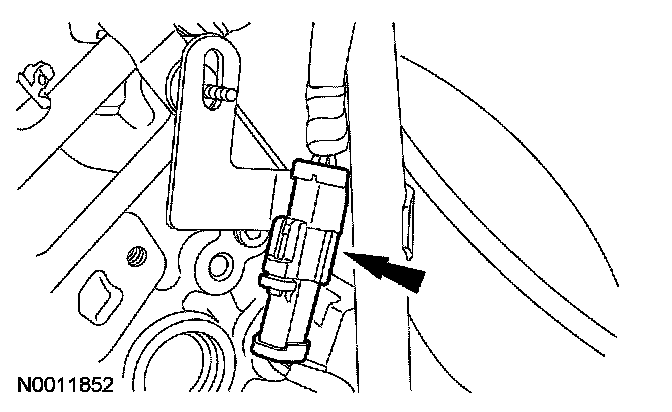
26. NOTE: Lubricate the O-ring seals with clean transmission fluid before installing the transmission fluid filler tube.
Position the transmission fluid filler tube in the vehicle. Connect the H02S electrical connector.
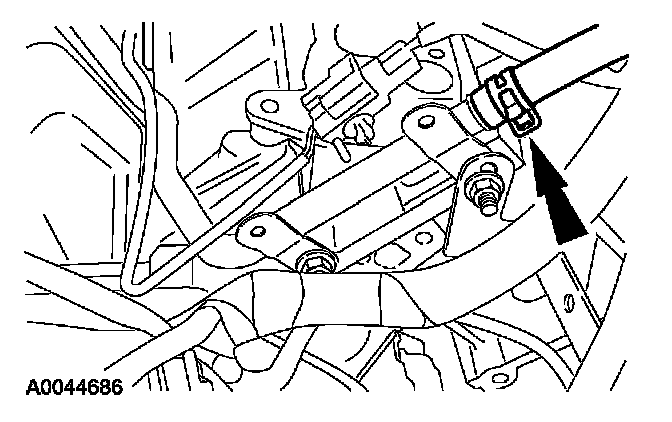
27. Connect the hose to the heater outlet tube.
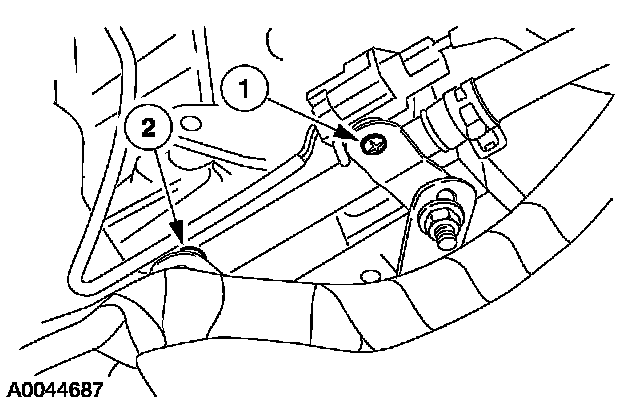
28. Install the wiring retainers in the heater outlet tube bracket.
1 Install the knock sensor electrical connector retainer.
2 Install the engine harness routing clip retainer.
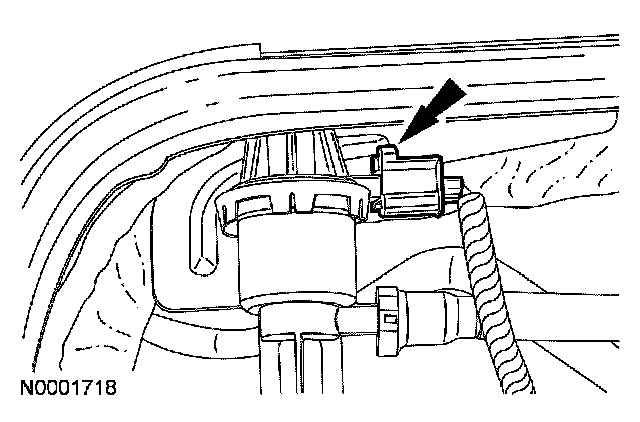
29. Connect the evaporative emission canister purge valve electrical connector.
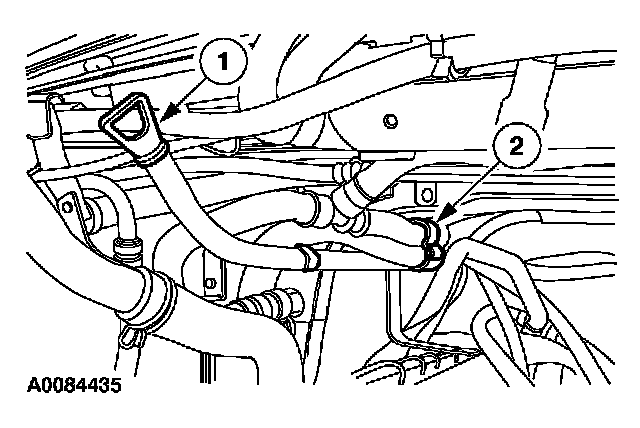
30. Connect the attachments to the transmission fluid filler tube and install the fluid level indicator.
1 Connect the rear heater hose hanger.
2 Install the fluid level indicator.
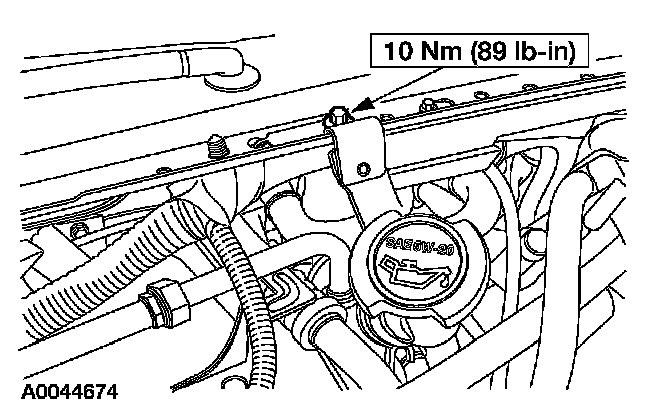
31. Install the engine oil filler tube support strap bolt.
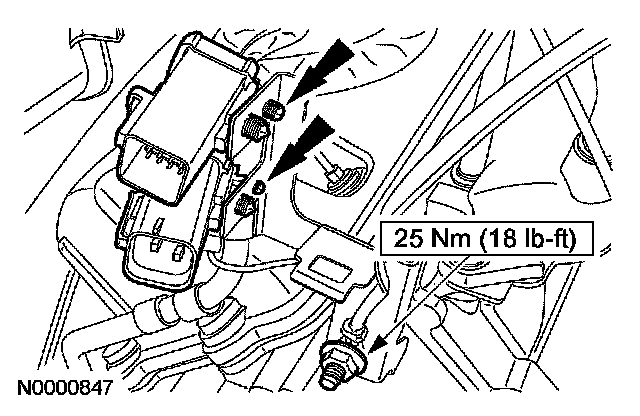
32. Position the mounting bracket, install the ground strap and nut, and connect the electrical connectors to the bracket.
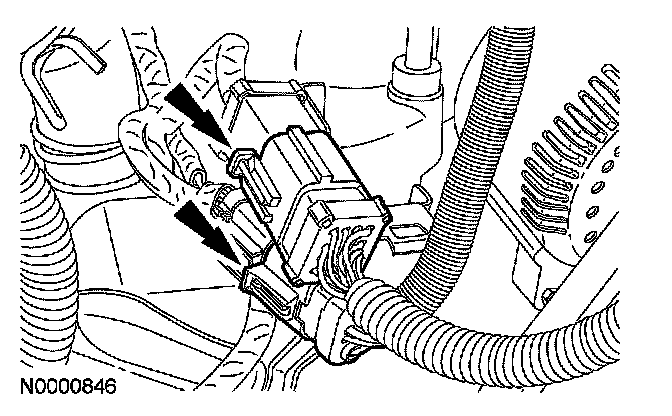
33. Connect the engine wiring harness electrical connectors.
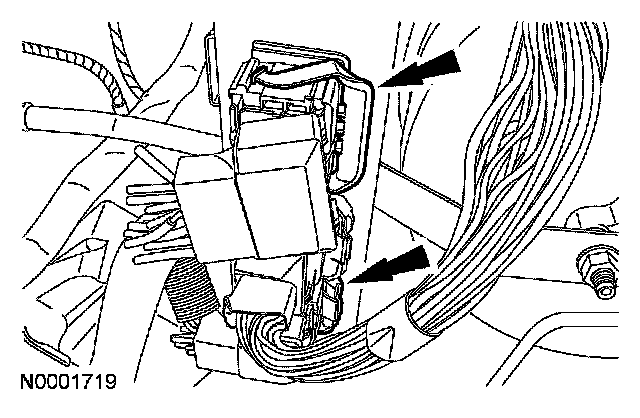
34. Connect the Powertrain Control Module (PCM) electrical connectors.
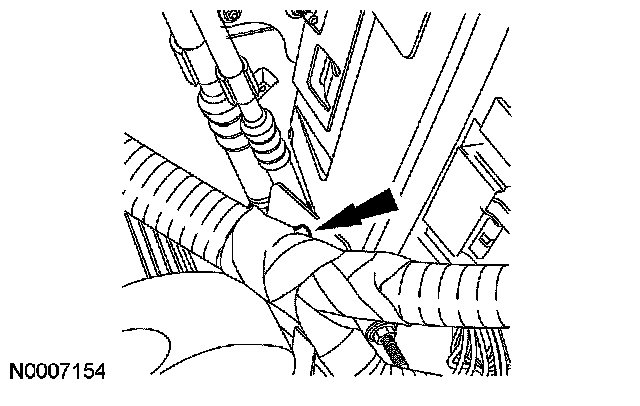
35. Connect the engine wiring harness to the PCM bracket.
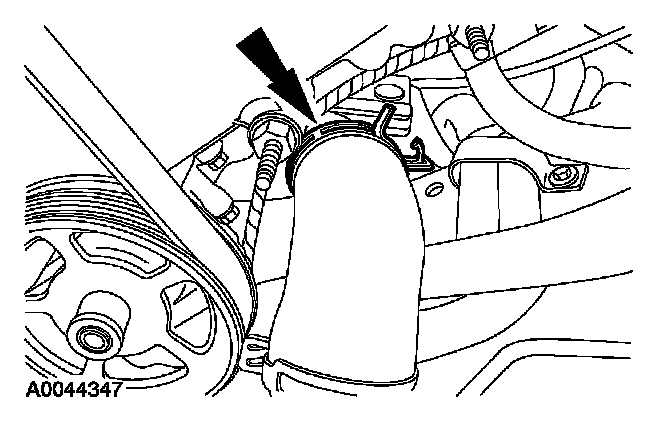
36. Connect the lower radiator hose to the oil filter adapter coolant inlet.
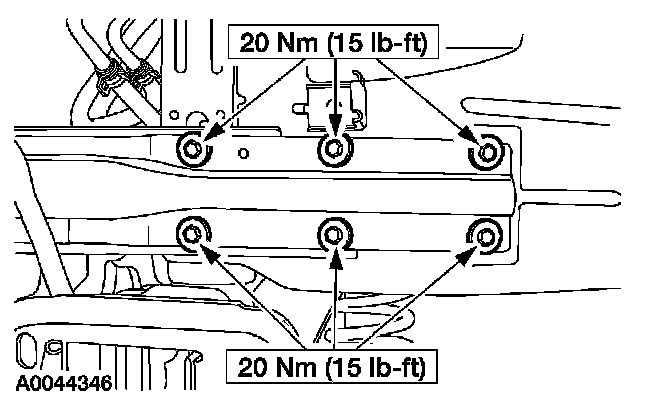
37. NOTE: LH shown, RH similar.
Position the lower radiator support and install the twelve bolts.
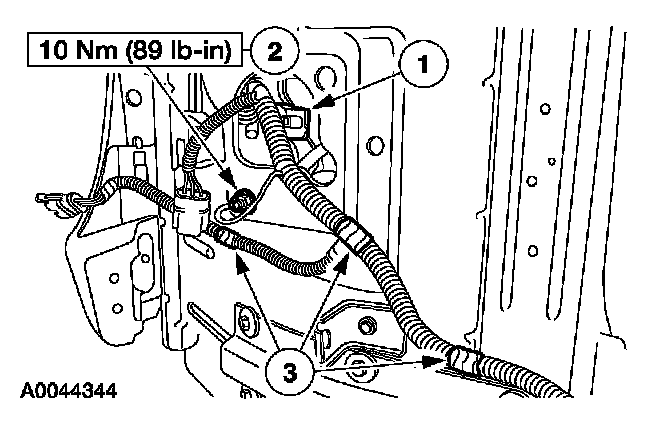
38. Install the RH side of the headlamp dash panel Junction wiring harness.
1 Connect the electrical connector.
2 Install the screw.
3 Insert the routing clips.
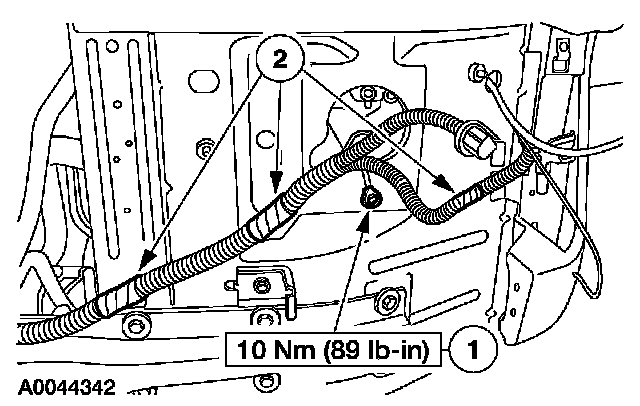
39. Install the LH side of the headlamp dash panel junction wiring harness.
1 Install the screw.
2 Insert the routing clips.
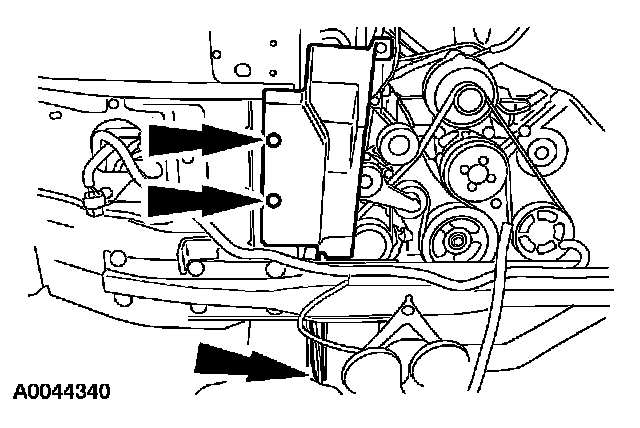
40. NOTE: RH shown, LH similar.
Position the RH and LH air deflectors and install the pin-type retainers.
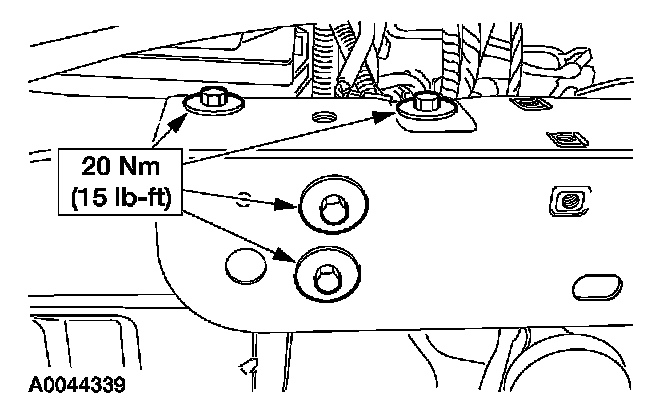
41. NOTE: RH shown, LH similar.
Position the upper radiator support and install the eight bolts.
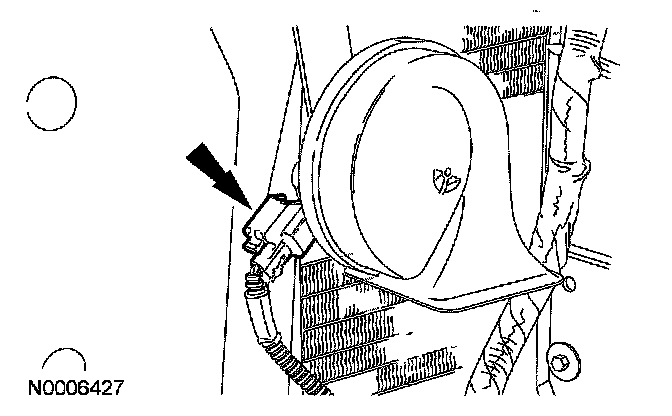
42. Connect the horn electrical connector.
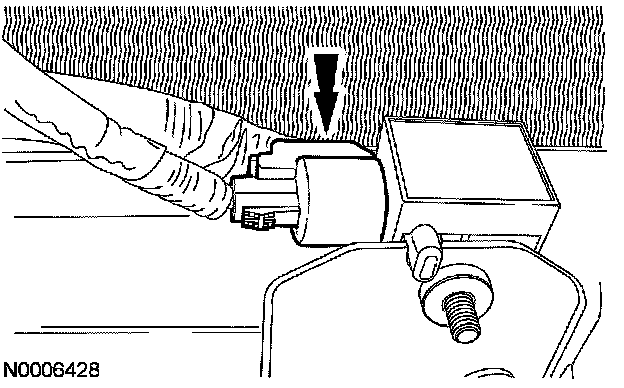
43. Connect the front impact severity sensor electrical connector.
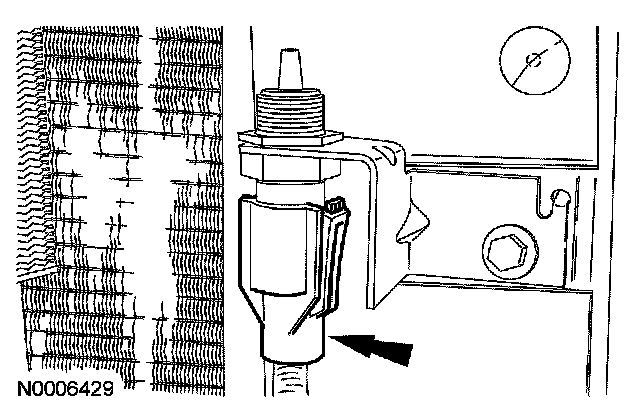
44. If equipped, connect the air temperature sensor electrical connector.
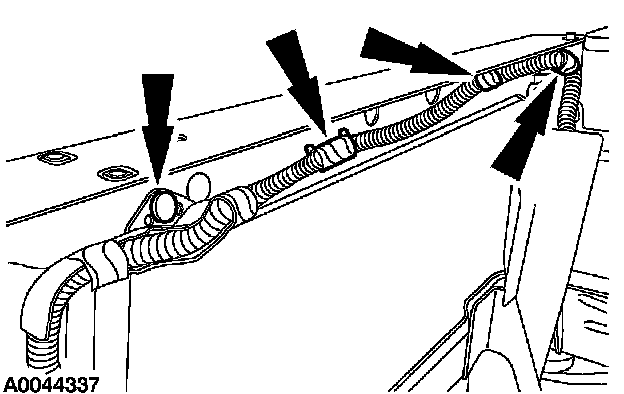
45. Route the battery feed wiring harness to the power distribution box and insert the routing clips.
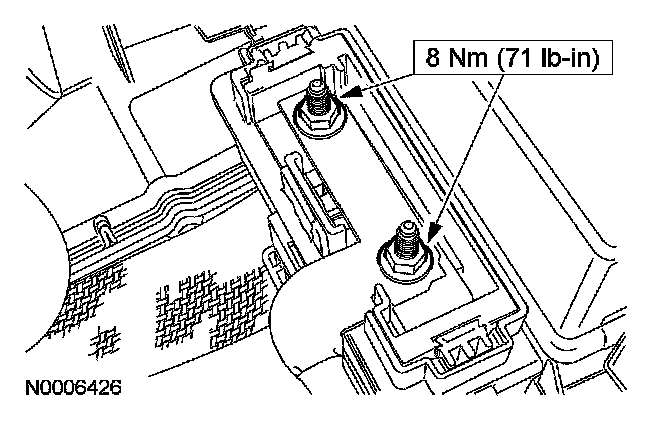
46. NOTE: Cover removed for clarity.
Install the battery feed cable to the power distribution box.
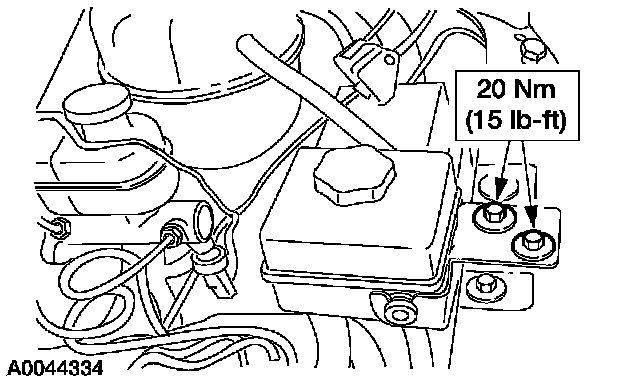
47. Install the power steering reservoir.
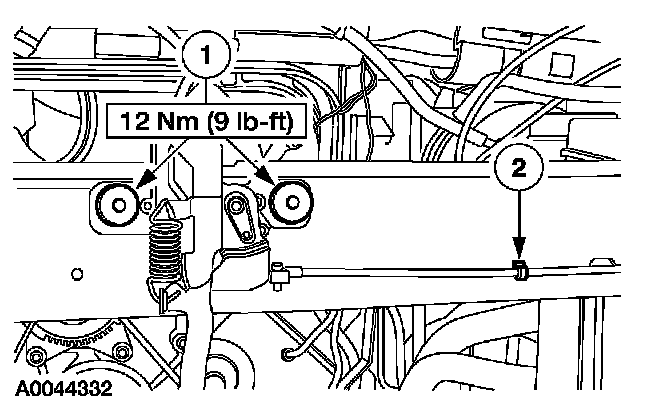
48. Install the hood latch.
1 Install the hood latch.
2 Insert the cable routing clip.
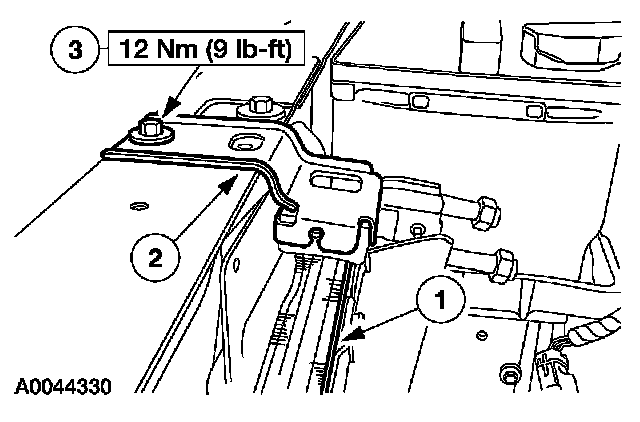
49. Install the A/C condenser core.
1 Position the A/C condenser core in the vehicle.
2 Position the A/C condenser brackets.
3 Install the bolts.
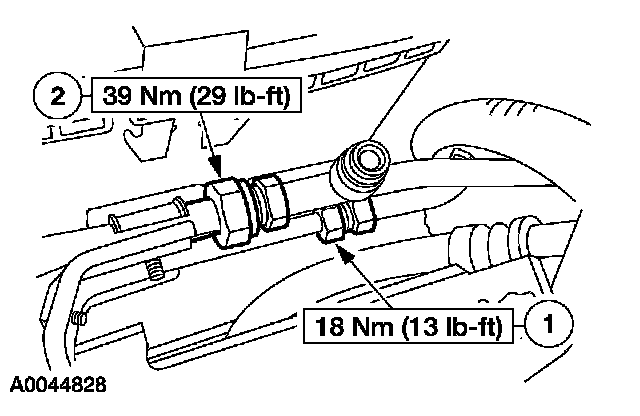
50. CAUTION: Use a wrench on each side of the fitting to prevent damage to the A/C fitting.
Connect the condenser core refrigerant tubes.
1 Connect the condenser to evaporator tube.
2 Connect the compressor discharge tube.
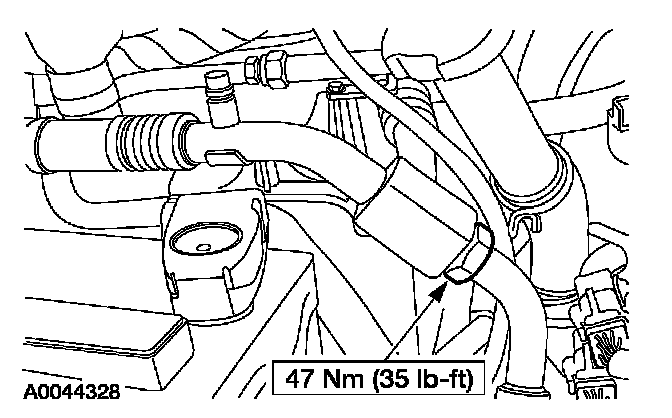
51. CAUTION: Use a wrench on each side of the fitting to prevent damage to the A/C fitting.
Connect the compressor suction tube.
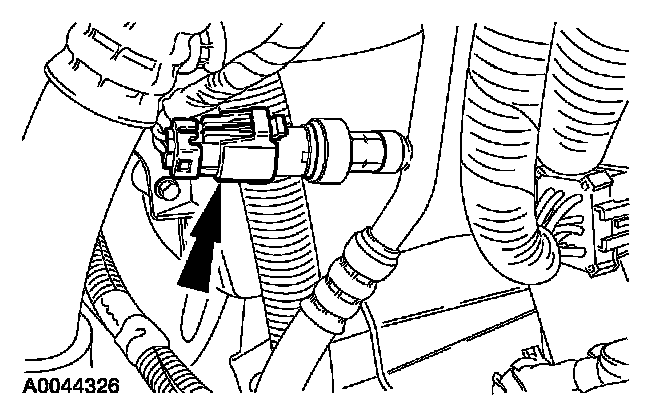
52. Connect the A/C pressure cutoff switch electrical connector.
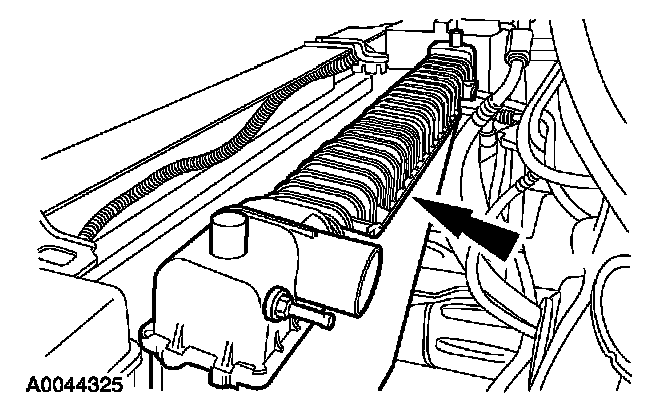
53. Position the radiator in the vehicle.
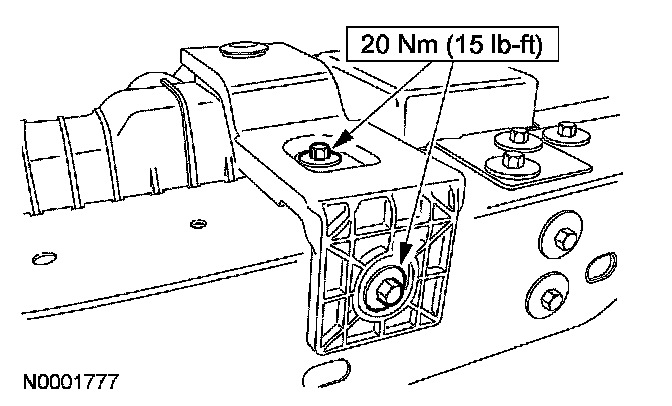
54. NOTE: LH shown, RH similar.
Position the radiator support brackets and install the bolts.
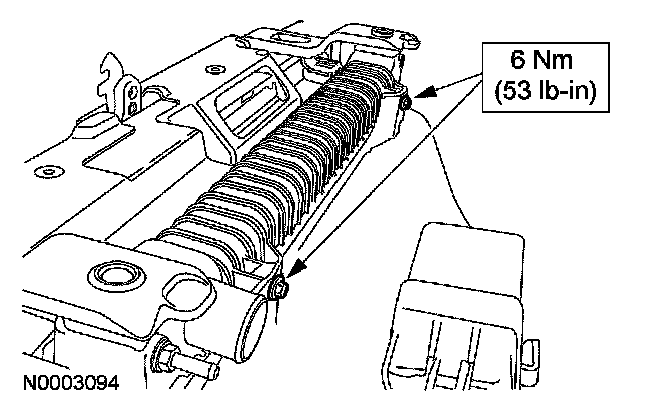
55. Position the fan shroud and the fan and fan clutch in the vehicle, and install the bolts.
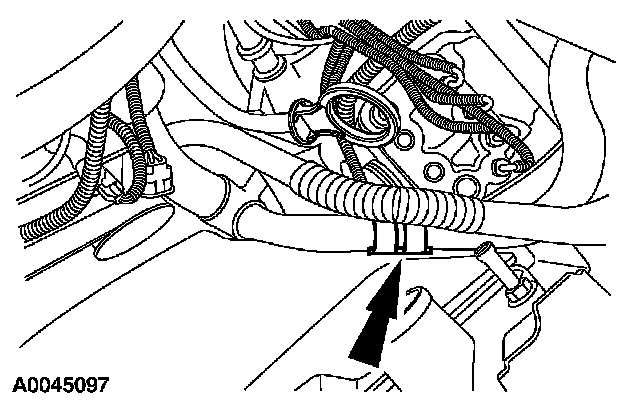
56. Insert the degas hose retainer in the fan shroud.
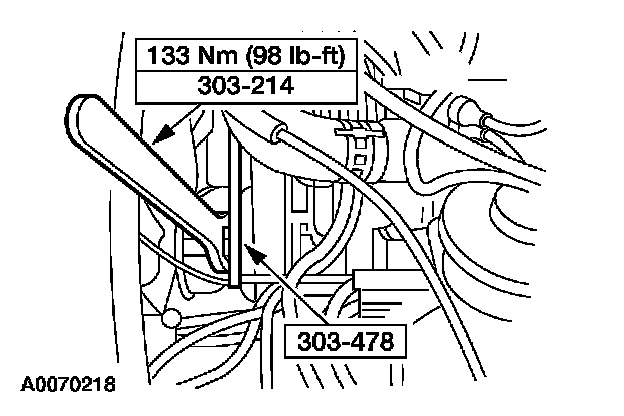
57. Install the fan blade assembly and fan clutch.
^ Install the fan blade and the fan clutch.
^ Using the special tool, hold the coolant pump pulley.
^ Using the special tool, tighten the fan clutch nut.
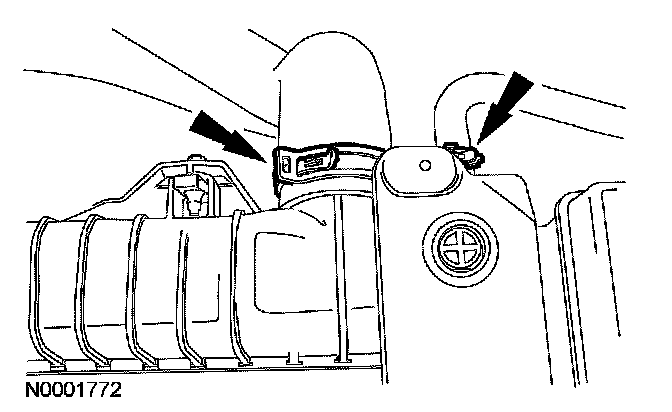
58. Connect the upper radiator hose and the degas hose to the radiator.
59. Install the valance panel.
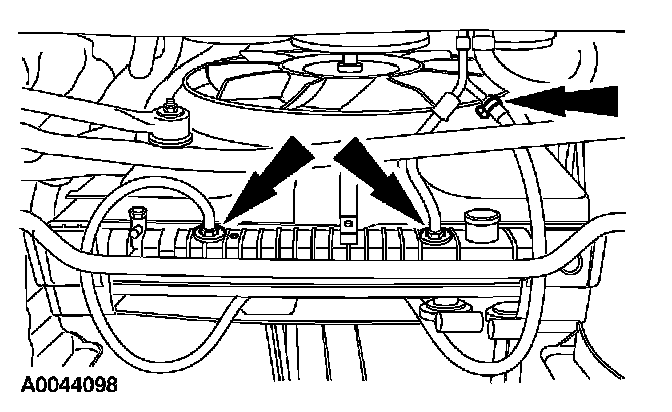
60. Connect the transmission cooler tubes.
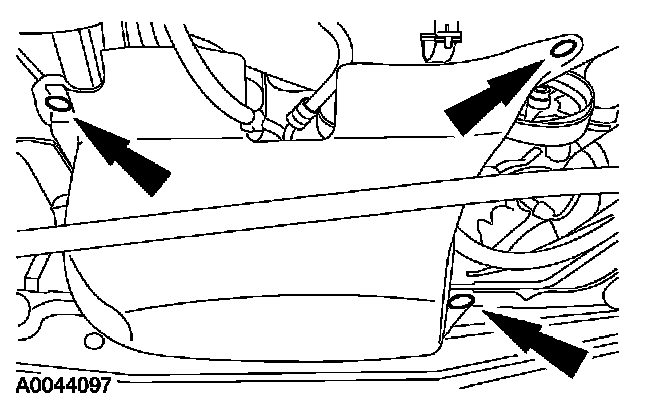
61. Position the splash shield and install the pushpin retainers.
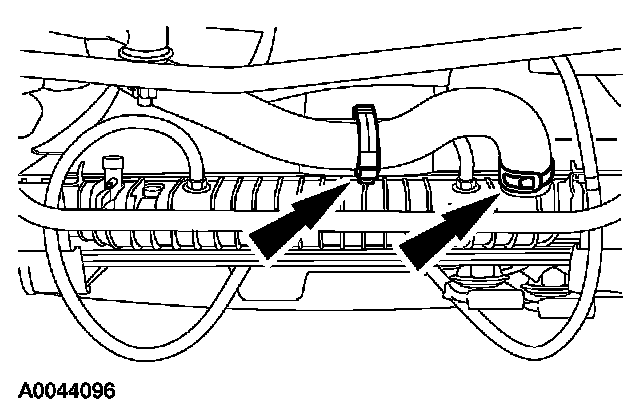
62. Connect the lower radiator hose to the radiator.
^ Connect the hose.
^ Connect the hose hanger.
63. Install the front bumper.
64. CAUTION: The oil pump must be primed prior to starting the engine.
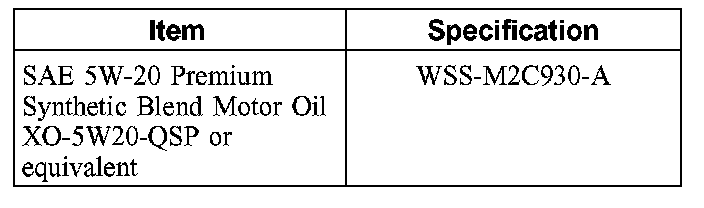
Fill the engine with clean engine oil.
65. Install the intake manifold.
66. Fill all fluids to the correct levels.
^ Fill the transmission with clean transmission fluid.
^ Fill the power steering system with clean fluid.
67. Start the engine and check for leaks. Stop the engine and recheck the fluid levels.
Vehicles equipped with A/C
68. Evacuate and recharge the air conditioning system.