Condenser HVAC: Service and Repair
CONDENSER CORE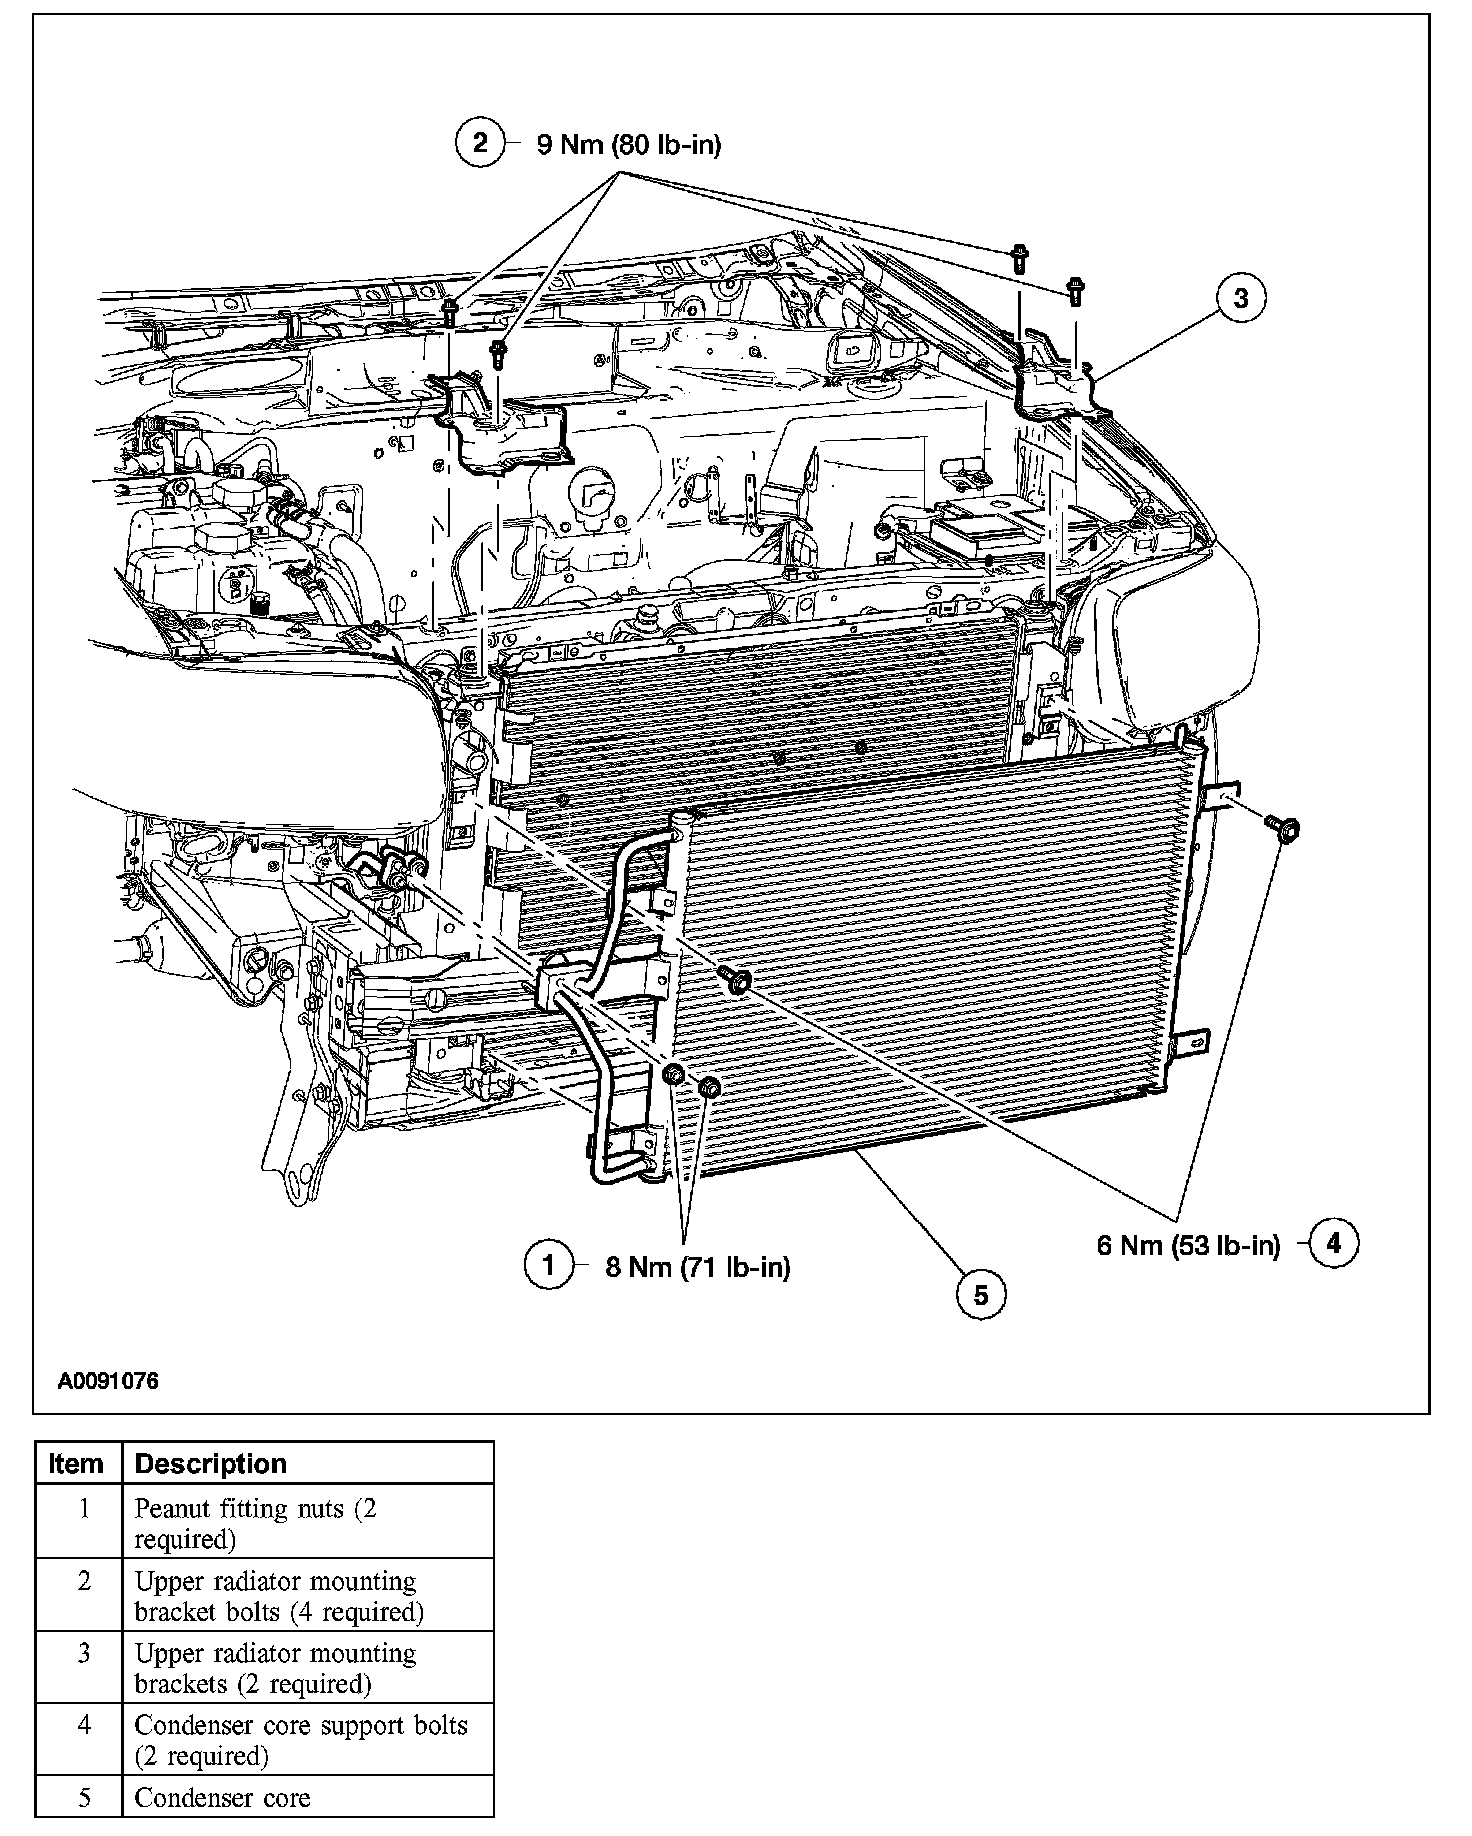
Removal and Installation
NOTE: If a condenser core leak is suspected, the condenser core must be leak tested before it is removed from the vehicle.
1. With the vehicle in NEUTRAL, position it on a hoist.
2. Recover the refrigerant.
3. Remove the front bumper cover.
4. Remove the auxiliary cooling radiator.
5. Disconnect the peanut fittings from the condenser.
- To install, tighten to 8 Nm (71 lb-in).
6. Remove the 4 bolts and the upper radiator mounting brackets.
- To install, tighten to 9 Nm (80 lb-in).
7. Remove the 2 condenser core supports bolts and the condenser.
- To install, tighten to 6 Nm (53 lb-in).
8. NOTE: New O-ring seals, lubricated in clean mineral oil, must be installed before reconnecting any A/C fitting which has been disconnected.
To install, reverse the removal procedure.
- Lubricate the refrigerant system with the correct amount of clean PAG oil.
- Evacuate, leak test and charge the refrigerant system.