Compressor to Condenser Discharge Line
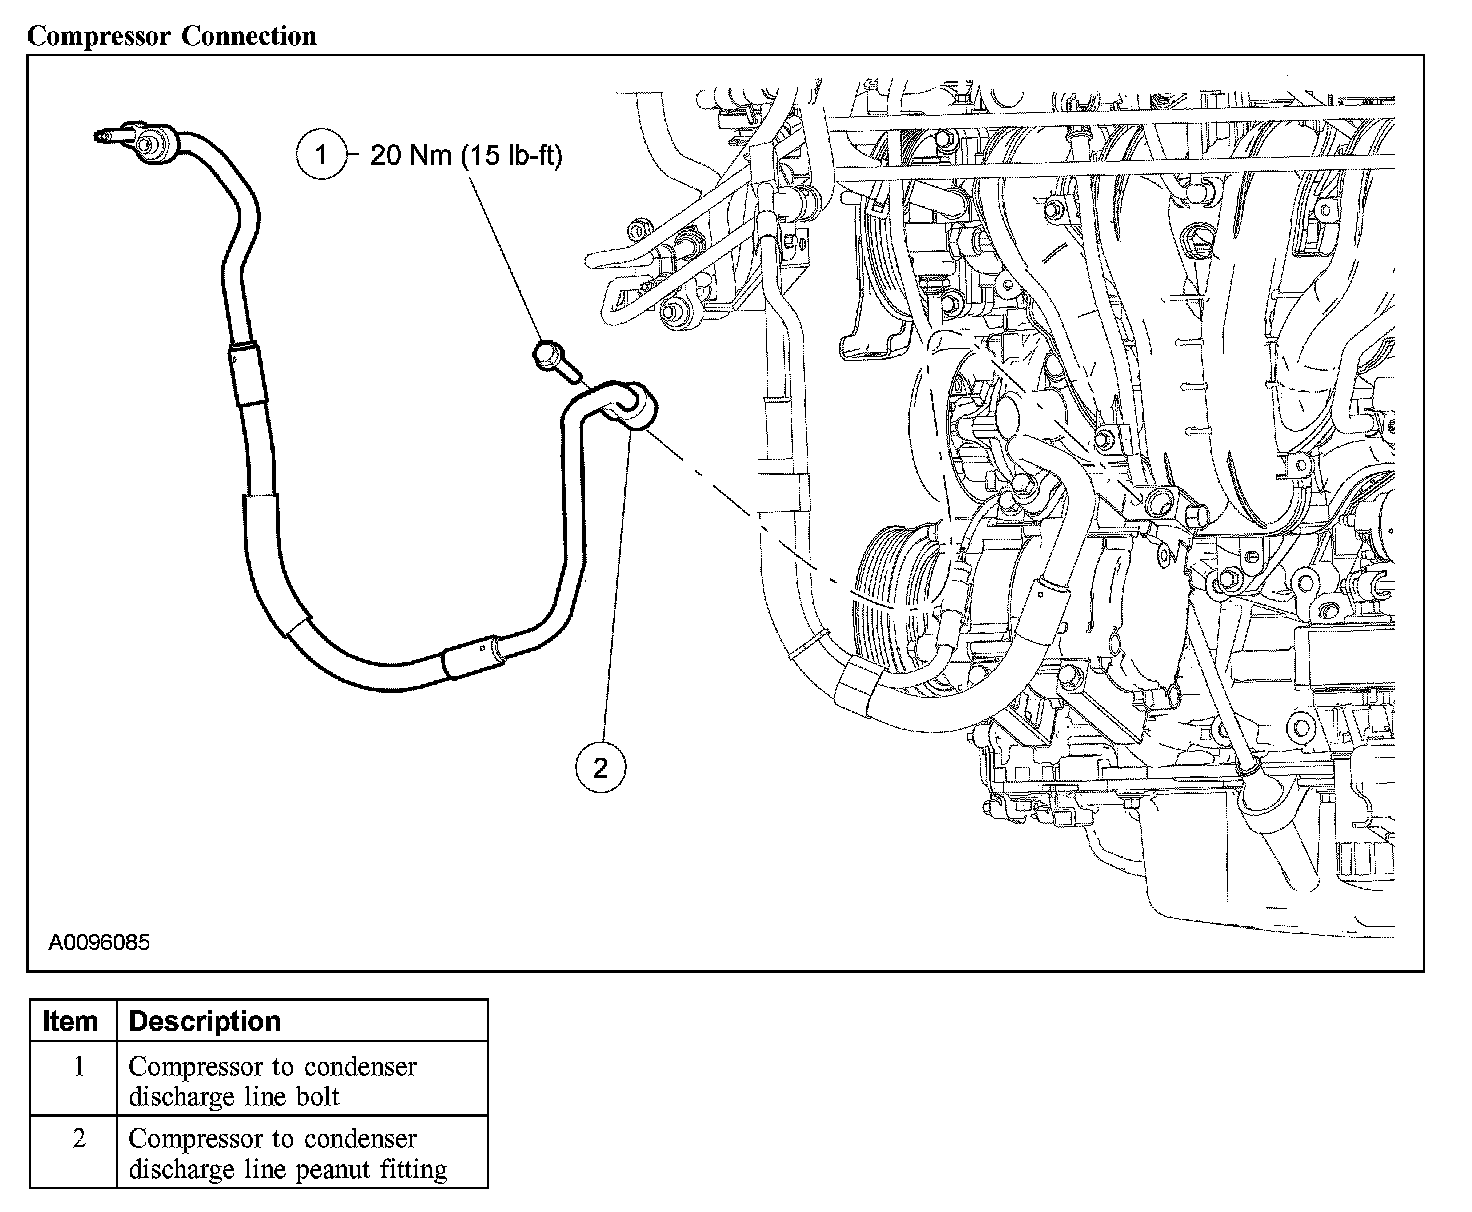
COMPRESSOR TO CONDENSER DISCHARGE LINECompressor Connection:
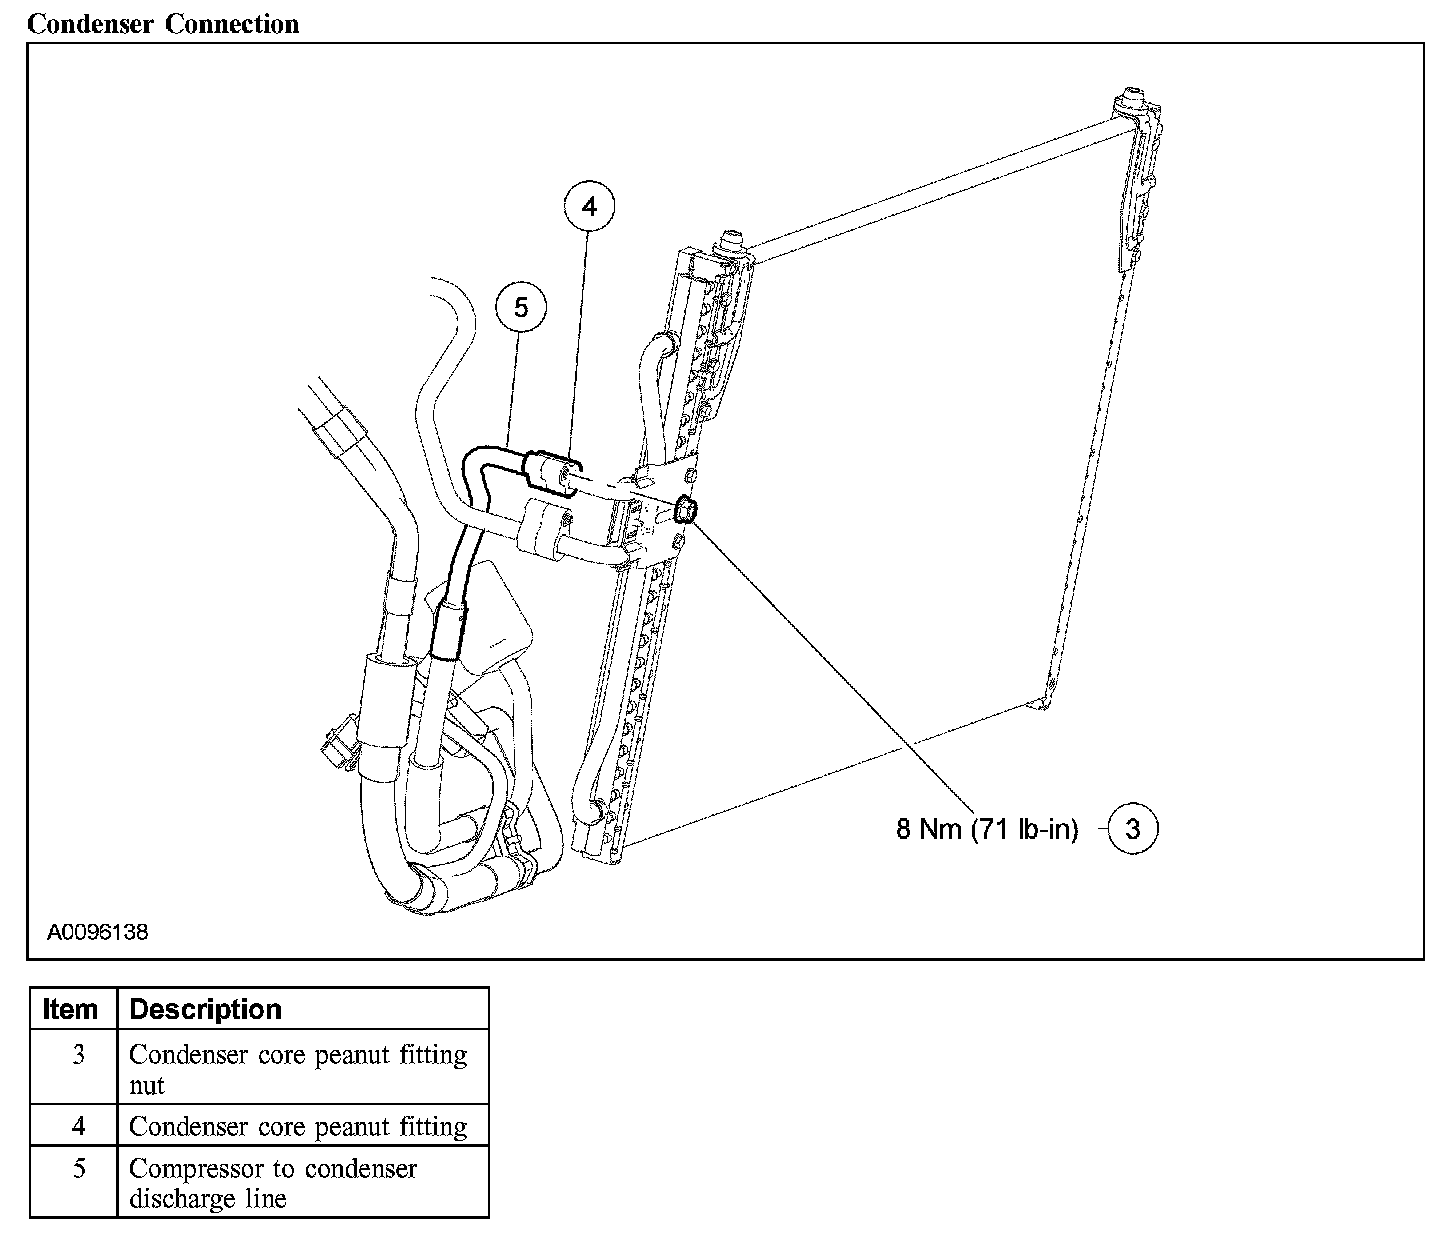
Condenser Connection:
Removal and Installation
1. With the vehicle in NEUTRAL, position it on a hoist.
2. Recover the air conditioning (A/C) refrigerant.
3. Remove the front bumper cover.
4. Remove the RH splash shield.
5. If equipped, disconnect the block heater electrical connector.
6. Remove the compressor to condenser discharge line bolt.
- To install, tighten to 20 Nm (15 lb-ft).
7. Disconnect the compressor to condenser discharge line from the compressor.
- To install, tighten to 20 Nm (15 lb-ft).
8. Remove the condenser core peanut fitting nut and disconnect the condenser core peanut fitting compressor.
- To install, tighten to 8 Nm (71 lb-in).
9. Remove the compressor to condenser discharge line.
10. NOTE: New O-ring seals lubricated with clean mineral oil must be installed before connecting any A/C fitting which has been disconnected.
To install, reverse the removal procedure.
- Evacuate, leak test, and charge the refrigerant system.