Timing Cover: Service and Repair
Engine Front Cover
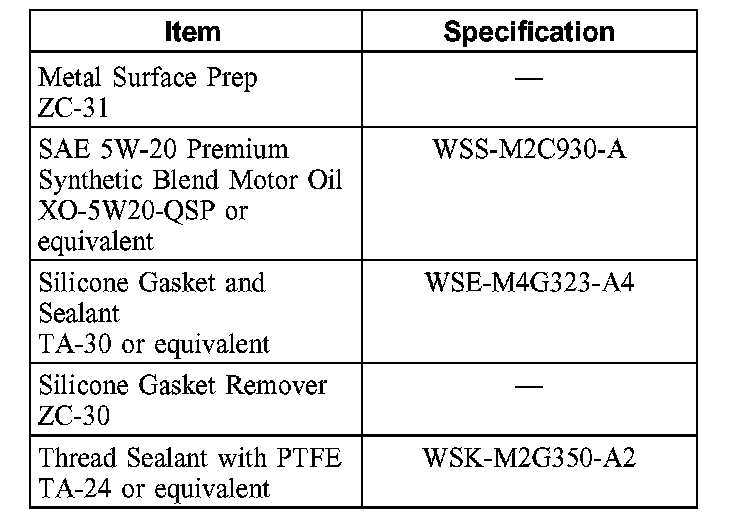
Material
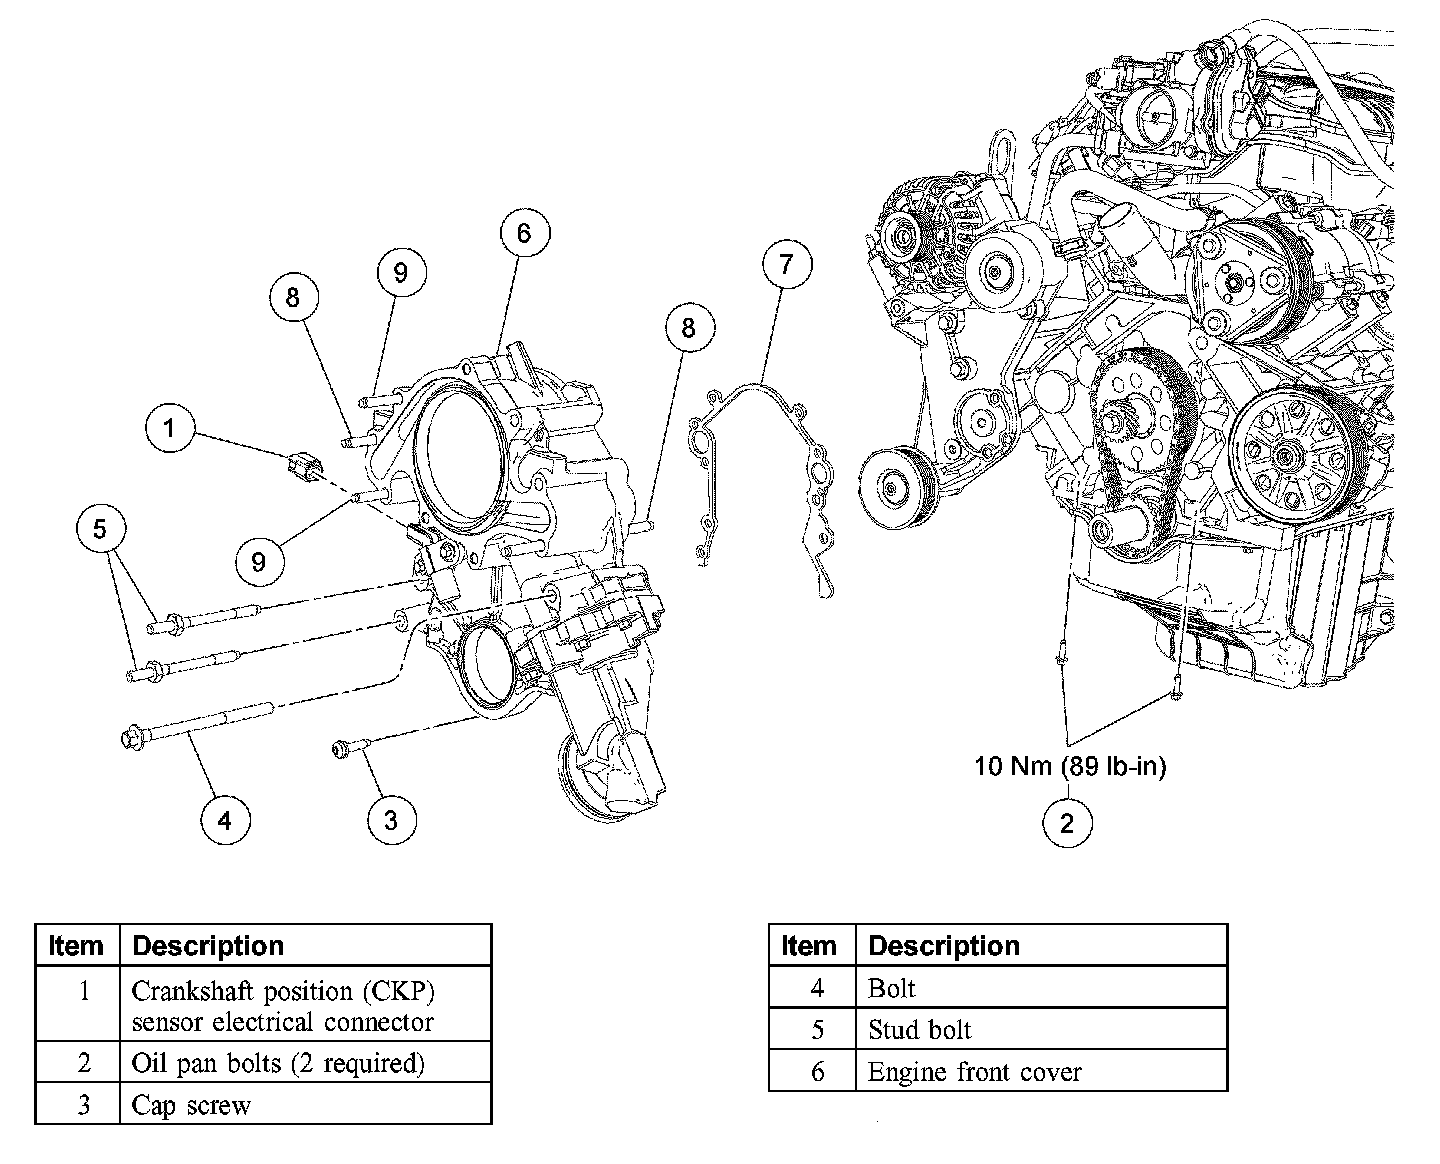
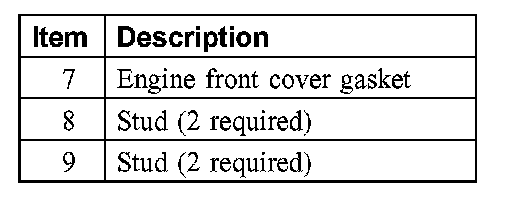
Removal
CAUTION: During engine repair procedures, cleanliness is extremely important. Any foreign material, including any material created while cleaning gasket surfaces, that enters the oil passages, coolant passages or the oil pan can cause engine failure.
1. Remove the coolant pump.
2. Remove the camshaft synchronizer. Timing Components
3. Remove the crankshaft front seal. Seals and Gaskets
4. Drain the engine oil. Install the drain plug when finished.
^ Tighten to 23 Nm (17 ft. lbs.).
5. Remove the oil filter.
6. Remove the 2 oil pan-to-engine front cover bolts.
7. CAUTION: The cap screw is concealed by the oil pump housing. Failure to remove this retainer will result in damage to the engine front cover.
Remove the bolt and the stud bolts. Slide the engine front cover from the studs. Remove and discard the gasket.
8. NOTE: There are 2 different studs. Note the locations of the studs for installation reference. Remove the 4 studs
Installation
1. CAUTION: In order to prevent foreign material from contaminating the engine block or the engine front cover, it is necessary to seal the coolant and oil passages of both components. Failure to follow these directions will result in engine damage.
CAUTION: Do not use metal scrapers, wire brushes, power abrasive discs or other abrasive means to clean the sealing surfaces. These tools cause scratches and gouges which make leak paths. Use a plastic scraping tool to remove all traces of old sealant.
Clean and inspect the engine block and engine front cover as follows:
^ Pack the exposed portion of the oil pan with clean shop towels.
^ Plug the oil and coolant passages.
^ Clean the gasket surfaces. Use silicone gasket remover and metal surface prep. Follow the directions on the packaging.
^ Using compressed air, remove any remaining foreign material from the engine block and front cover.
^ Remove the shop towels from the oil pan.
^ Remove the plugs or seals from the oil and coolant passages.
2. Apply thread sealant to the threads on the studs and the cap screw.
3. Install the engine front cover studs.
^ Tighten to 7 Nm (62 inch lbs.).
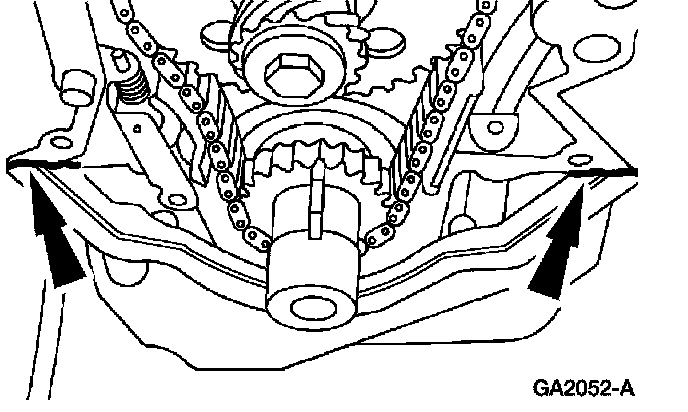
4. NOTE: If the engine front cover is not secured within 4 minutes, the sealant must be removed and the sealing areas cleaned. To clean the sealing area, use silicone gasket remover and metal surface prep. Follow the directions on the packaging. Failure to follow this procedure can cause future oil leakage.
Apply silicone gasket and sealant as shown.
5. Install the engine front cover gasket.
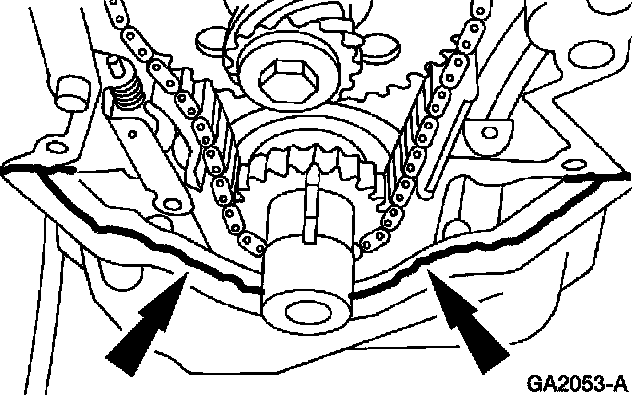
6. NOTE: If the engine front cover is not secured within 4 minutes, the sealant must be removed and the sealing areas cleaned. To clean the sealing area, use silicone gasket remover and metal surface prep. Follow the directions on the packaging. Failure to follow this procedure can cause future oil leakage.
Apply silicone gasket and sealant to the oil pan as shown.

7. CAUTION: The coolant pump and gasket must be installed at this time to correctly tighten all of the engine front cover fasteners in sequence.
Install the engine front cover and coolant pump.
^ Position the engine front cover and install the bolt, the stud bolts and the cap screw finger tight.
^ Position a new coolant pump gasket and the coolant pump and install the fasteners finger tight.
^ Tighten the fasteners in the sequence shown.
^ Tighten the cap screw in position number 12 to 10 Nm (89 inch lbs.).
^ Tighten all other fasteners to 28 Nm (21 ft. lbs.).
8. Install the 2 oil pan-to-engine front cover bolts.
^ Tighten to 10 Nm (89 inch lbs.).
9. Install a new oil filter.
10. Install the crankshaft front seal. Seals and Gaskets
11. Install the camshaft synchronizer.
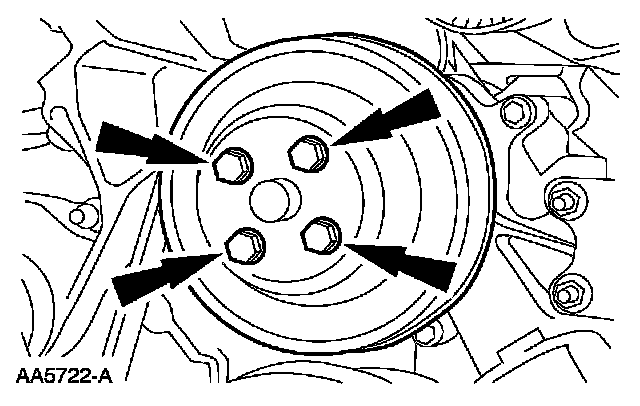
12. Position the coolant pump pulley and install the bolts.
^ Tighten to 10 Nm (89 inch lbs.).
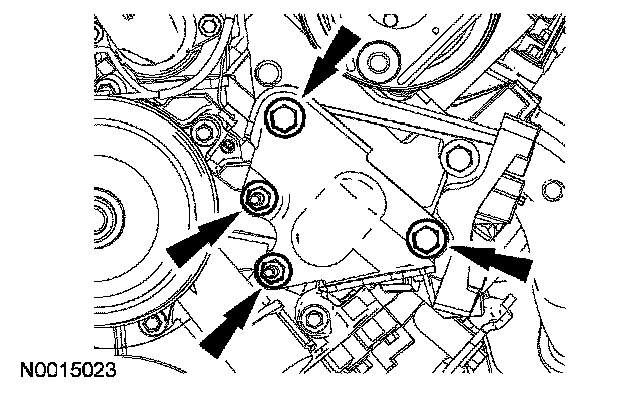
13. Position the A/C compressor and power steering pump pulley bracket brace and install the 2 bolts and 2 nuts.
^ Tighten the bolts to 48 Nm (35 ft. lbs.).
^ Tighten the nuts to 25 Nm (18 ft. lbs.).
14. Install the accessory drive belt. Drive Belt
15. Install the cooling fan and fan shroud. Fan Shroud
16. Fill the engine with clean engine oil.
17. Fill and bleed the cooling system. Service and Repair