Part 2
EngineInstallation (Steps 23-43)
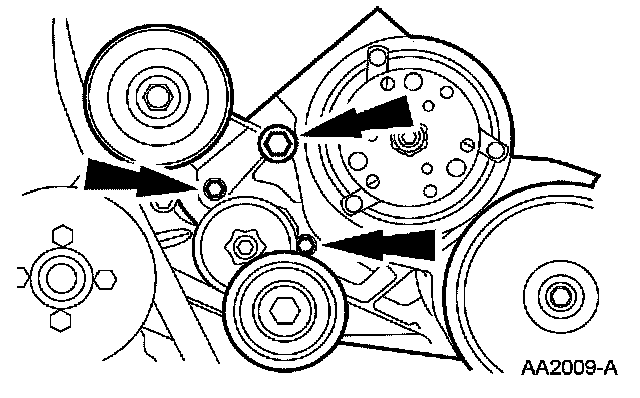
23. Position the A/C compressor and A/C compressor mounting bracket as an assembly and install the bolts.
^ Tighten to 47 Nm (35 ft. lbs.).
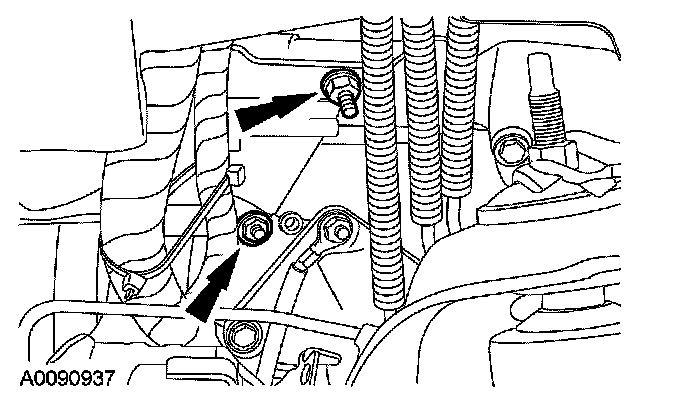
24. Install the studbolts to the A/C compressor mounting bracket.
^ Tighten to 47 Nm (35 ft. lbs.).
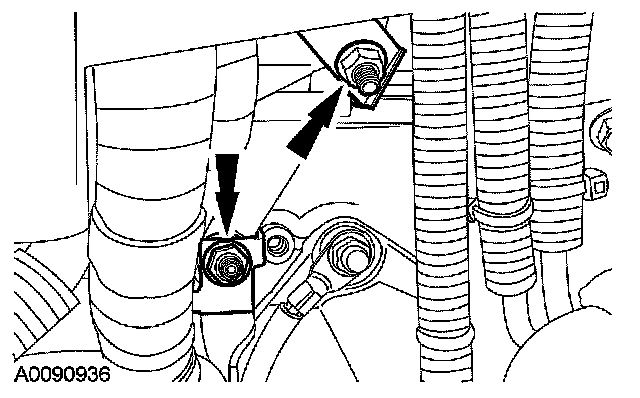
25. Position the wiring harness bracket and the fuel tube bracket and install the nuts.
^ Tighten to 10 Nm (89 inch lbs.).
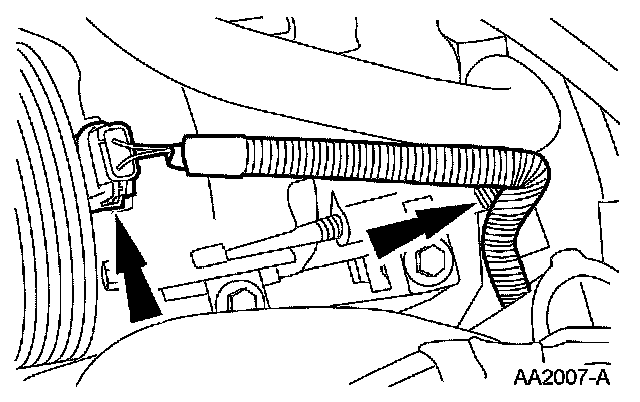
26. Connect the A/C compressor electrical connector.
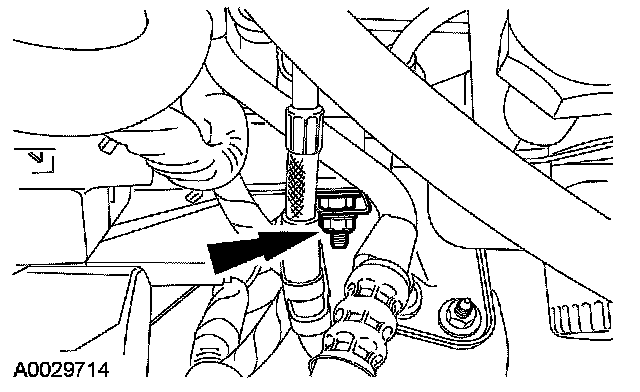
27. Install the fuel tube bracket.
^ Tighten to 10 Nm (89 inch lbs.).
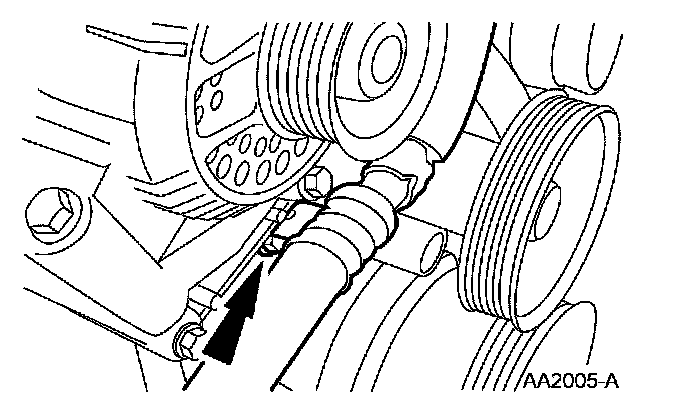
28. Position the A/C suction/discharge tube and install the nut.
^ Tighten to 11 Nm (8 ft. lbs.).
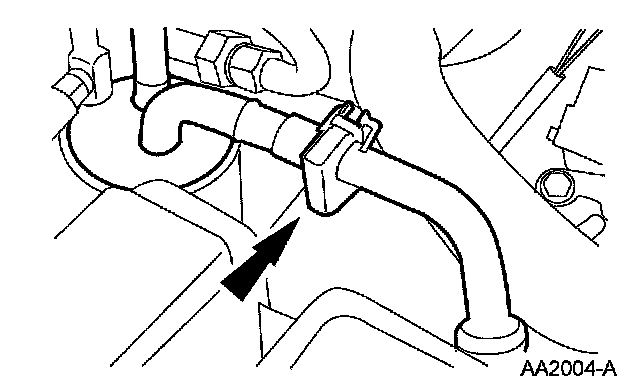
29. Connect the A/C tube at the accumulator.
30. Install the A/C manifold on the A/C compressor. For additional information, refer to Heating and Air Conditioning.
31. Connect the engine sensor control wiring to the A/C cut-out switch.
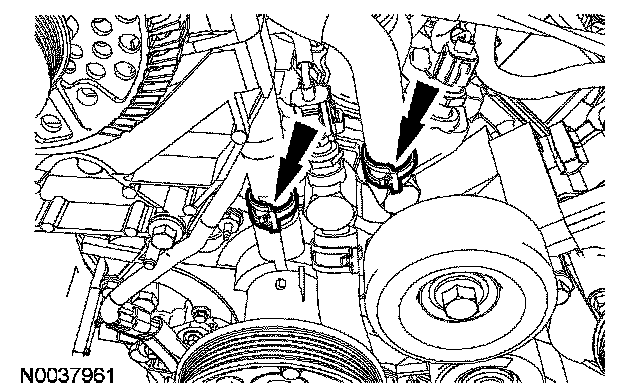
32. Connect the heater hoses.
33. Install the radiator. For additional information, refer to Cooling System.
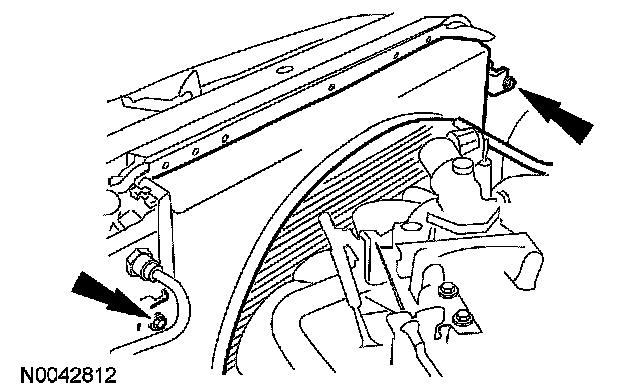
34. Install the fan shroud.
^ Position the fan shroud.
^ Install the bolts.
^ Tighten to 7 Nm (62 inch lbs.).
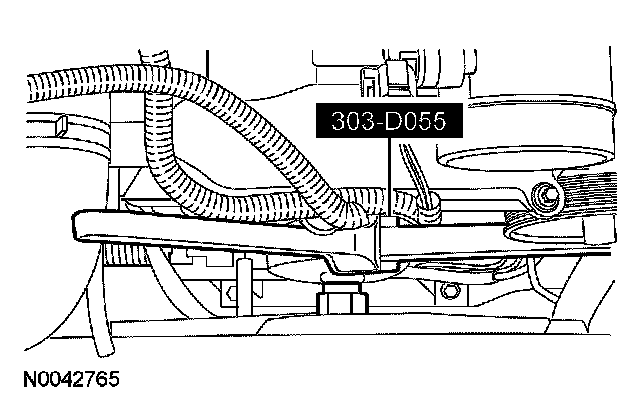
35. CAUTION: The fan clutch has left-hand threads.
Using the special tool, install the fan clutch and the fan blade.
36. Install the accessory drive belt. For additional information, refer to Drive Belts, Mounts, Brackets and Accessories.
37. Install the upper intake manifold.
38. Install the hood.
39. Fill the engine with clean engine oil.
40. Connect the battery ground cable. For additional information, refer to Battery.
41. Fill and bleed the engine cooling system. For additional information, refer to Cooling System.
42. Charge the A/C system. For additional information, refer to Heating and Air Conditioning.
43. Inspect the engine and cooling system for leaks.