Part 2
EngineInstallation (Steps 34-66)
34. Connect the brake booster vacuum tube and the vacuum reservoir tube.
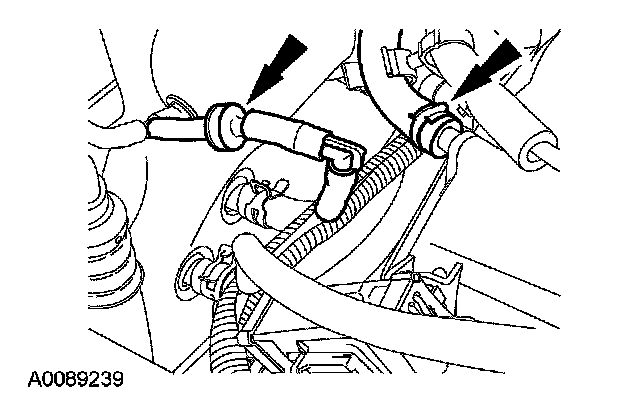
35. Connect the evaporative emissions purge valve vacuum tube to the intake manifold.
^ Attach the vacuum tube retainer to the transmission fill tube.
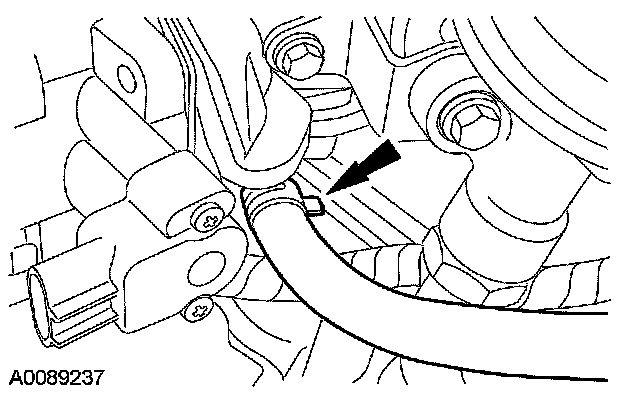
36. Position the exhaust gas recirculation (EGR) tube and loosely install the fittings.
^ Tighten the EGR tube-to-EGR valve fitting to 40 Nm (30 ft. lbs.)
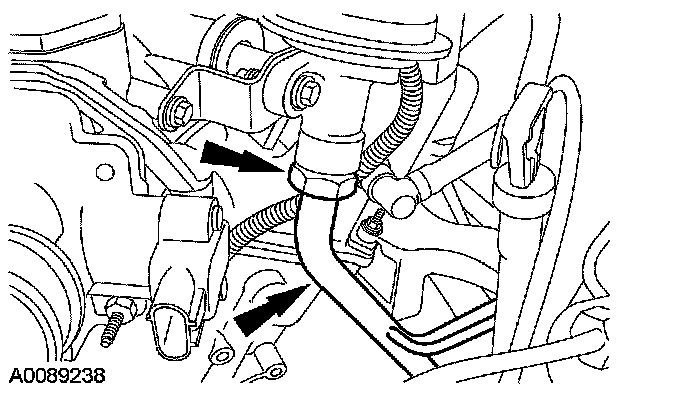
37. Connect the differential pressure feedback EGR sensor electrical connector and attach the pin-type retainer.
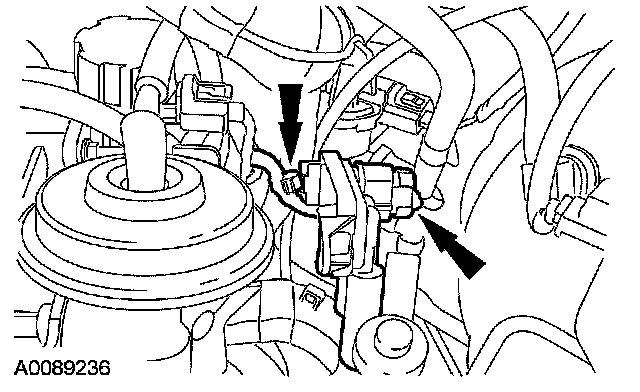
38. Position the gearshift cable bracket and install the bolts.
^ Tighten to 19 Nm (14 ft. lbs.)
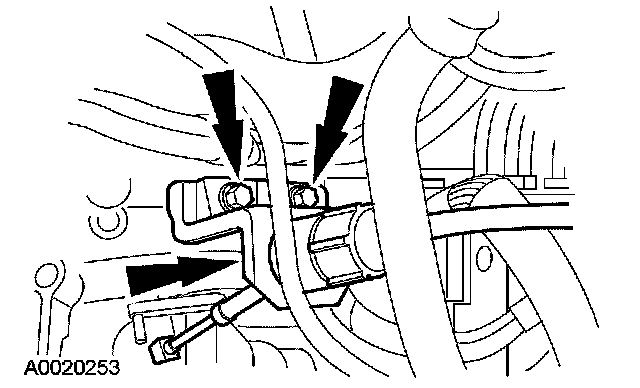
39. Attach the wiring harness pin-type retainer to the gearshift cable bracket.
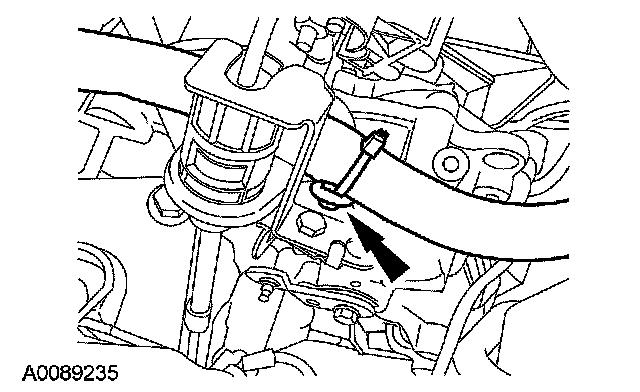
40. Connect the fuel supply tube quick connect coupling at the fuel rail. For additional information, refer to Fuel Delivery and Air Induction.
41. Connect the heater hoses and the throttle body coolant hose.
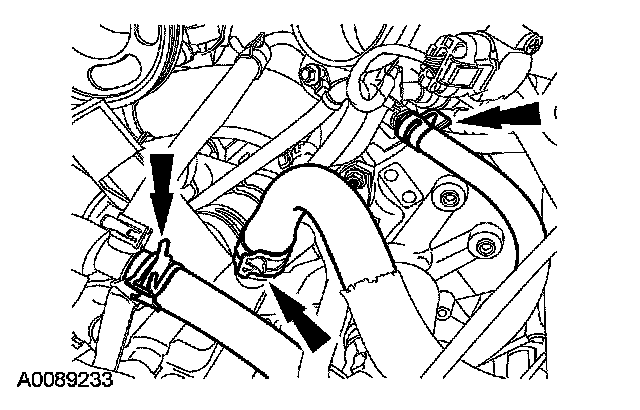
42. Connect the hoses.
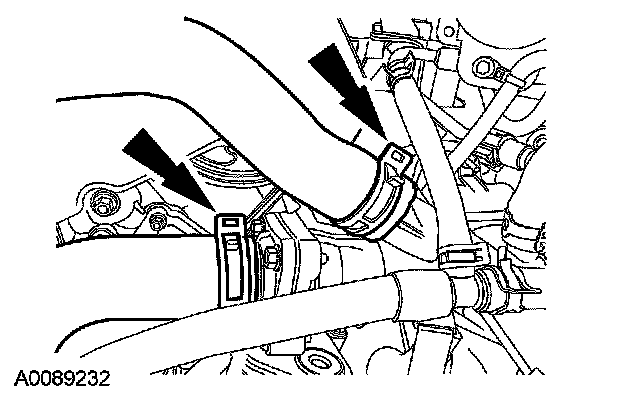
43. Position the accelerator and speed control cables and bracket. Install the nut.
^ Tighten to 10 Nm (89 inch lbs.)
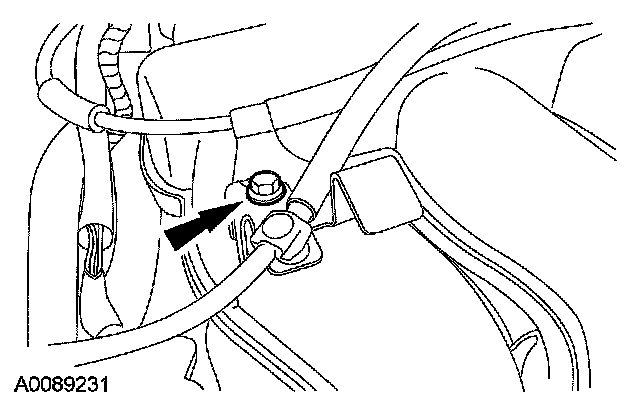
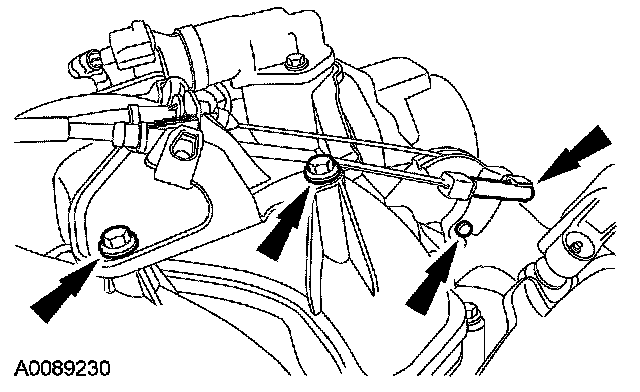
44. Position the bracket and install the bolts.
^ Tighten to 10 Nm (89 inch lbs.)
^ Connect the accelerator cable and the speed control actuator cable.
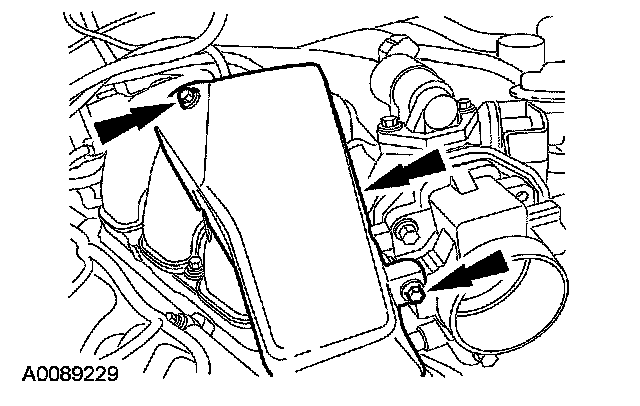
45. Position the accelerator cable snow shield and install the bolts.
^ Tighten to 10 Nm (89 inch lbs.)
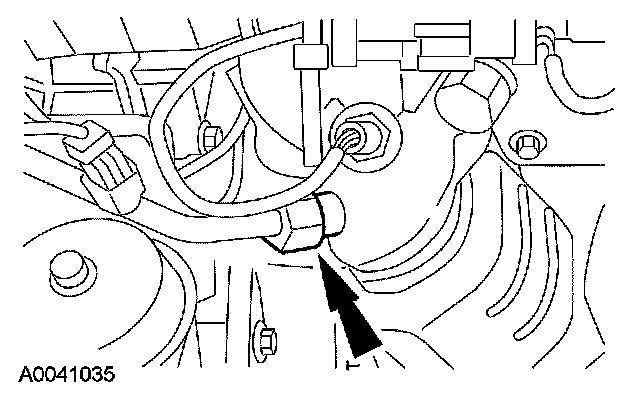
46. Tighten the EGR tube-to-RH catalytic converter fitting to 40 Nm (30 ft. lbs.)
47. Connect the 2 transmission cooler tubes.
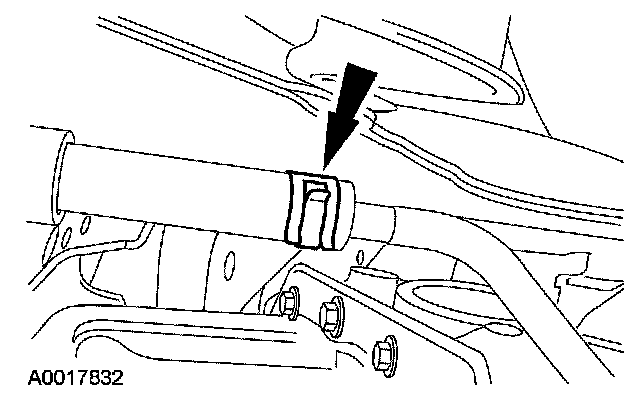
48. Install the crossbrace and the new nut.
^ Tighten to 175 Nm (129 ft. lbs.)
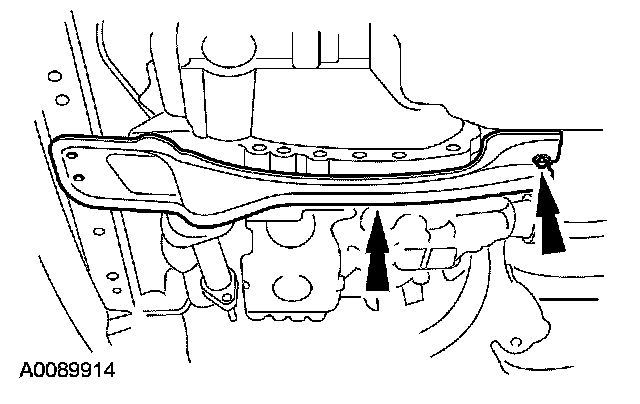
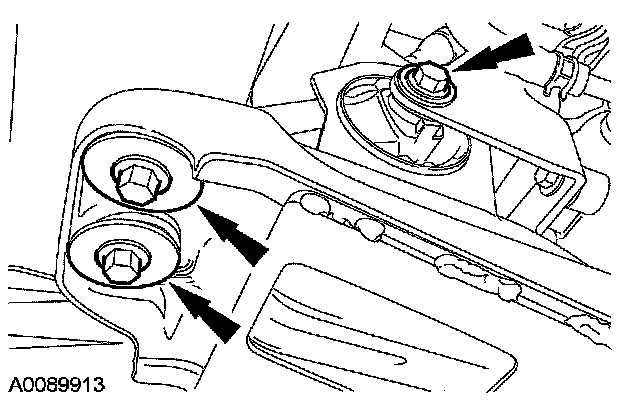
49. Install the bolt for the transaxle mount and install the 2 bolts for the crossbrace.
^ Tighten the transaxle mount bolt to 115 Nm (85 ft. lbs.)
^ Tighten the crossbrace bolts to 90 Nm (66 ft. lbs.)
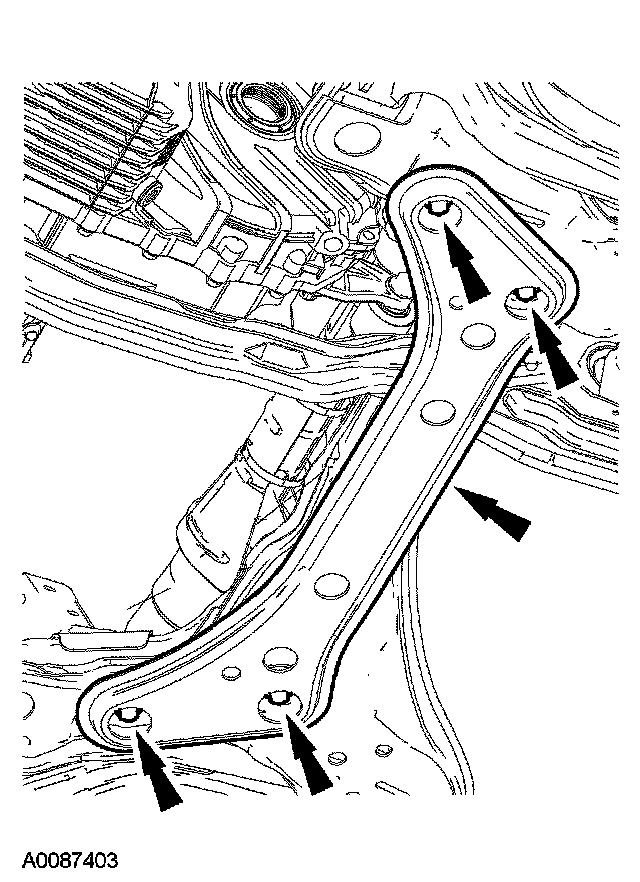
50. Install the lateral support crossmember and the 4 bolts.
^ Tighten to 115 Nm (85 ft. lbs.)
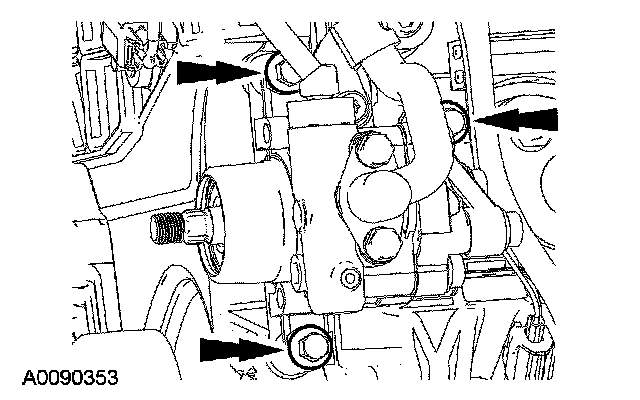
51. Position the power steering pump and install the bolts.
^ Tighten to 25 Nm (18 ft. lbs.)
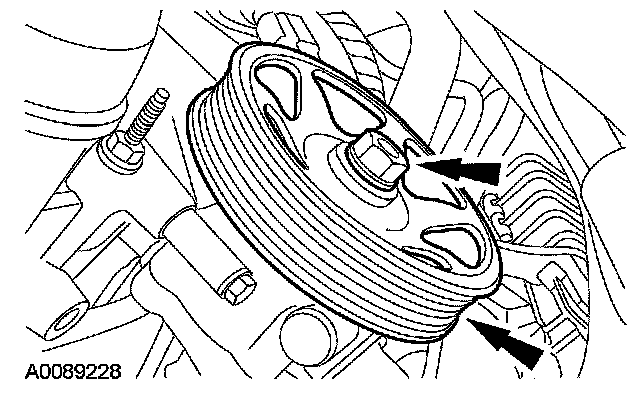
52. Install the power steering pump pulley and the nut.
^ Tighten to 49 Nm (36 ft. lbs.)
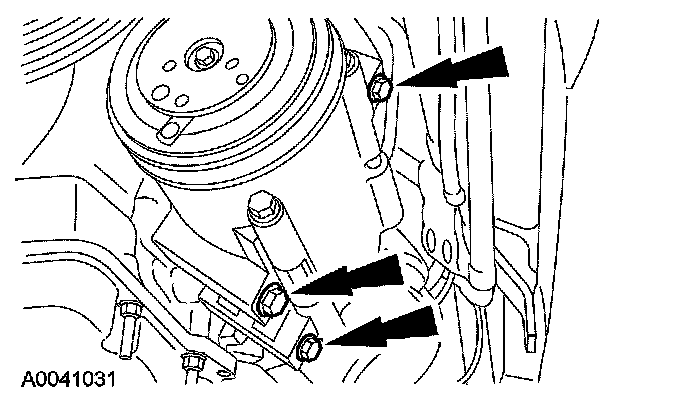
53. Install the A/C compressor and the bolts.
^ Tighten to 25 Nm (18 ft. lbs.)
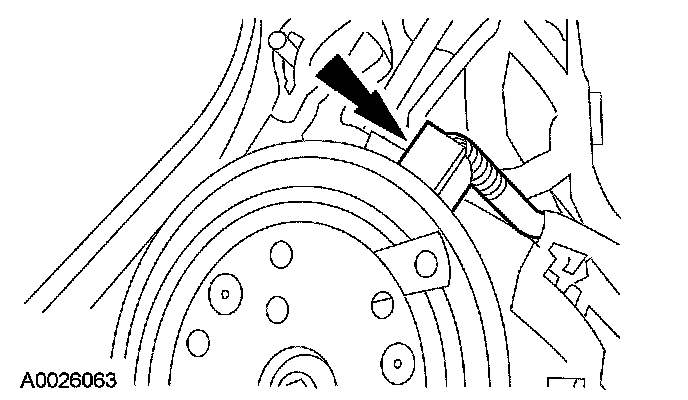
54. Connect the A/C clutch field coil electrical connector.
AWD vehicles
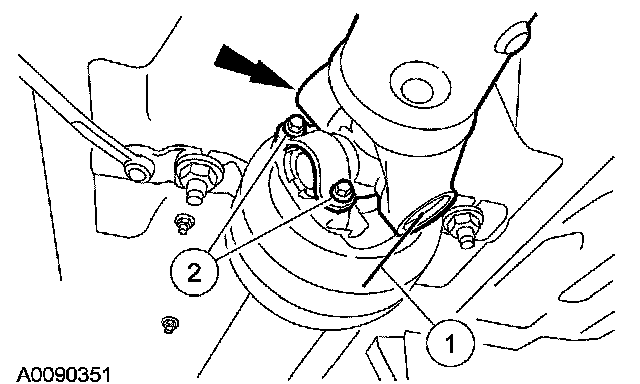
55. CAUTION: Do not reuse the bolts and straps for the center U -joint. Install new bolts and straps or damage to the vehicle may occur.
NOTE: There is a difference in the length of the head of the replacement yoke strap bolts from the production bolts. The longer head pinion bolts can be used in either location.
Install the driveshaft.
1 Align the driveshaft with the index marks.
2 Install the new straps and bolts.
^ Tighten to 23 Nm (17 ft. lbs.)
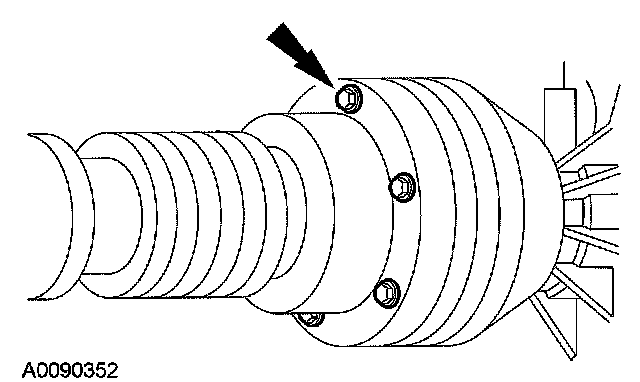
56. CAUTION: Do not reuse the CV joint bolts and washers. Install new bolts and washers or damage to the vehicle may occur.
Install the 6 front driveshaft-to-power take off bolts and washers.
^ Tighten to 37 Nm (27 ft. lbs.)
All vehicles
57. Install the LH halfshaft.
58. Position the accessory drive belt on all pulleys except the generator pulley.
59. Install the generator. For additional information, refer to Alternator.
60. Install the exhaust system flexpipe.
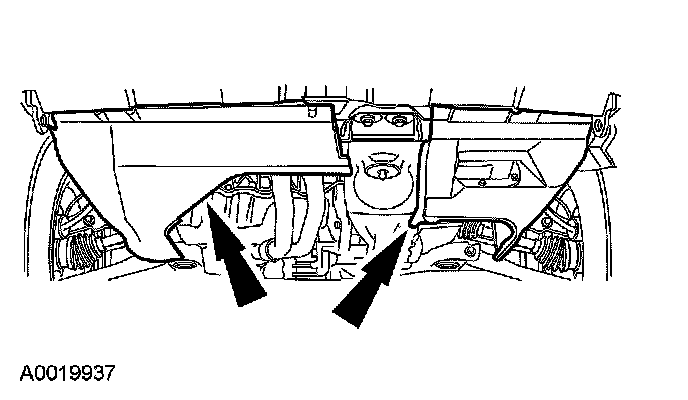
61. Install the lower radiator air deflectors.
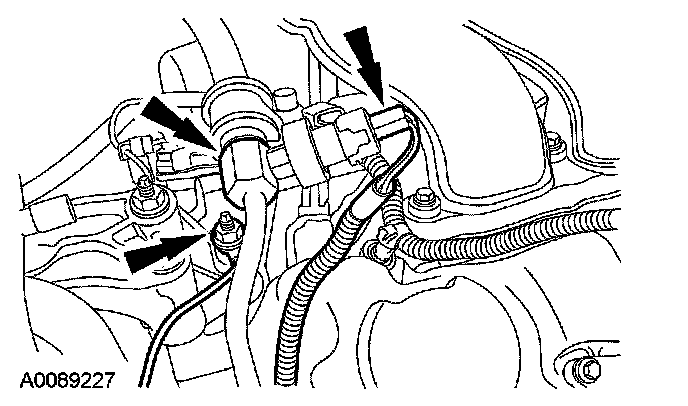
62. Position the power steering hose bracket and install the nut.
^ Tighten to 25 Nm (18 ft. lbs.)
^ Connect the power steering pressure (PSP) switch electrical connector.
63. Install the air cleaner outlet pipe and air cleaner. For additional information, refer to Fuel Delivery and Air Induction.
64. Install the battery tray. For additional information, refer to Battery.
65. Fill and bleed the cooling system.
66. Fill the engine with clean engine oil.