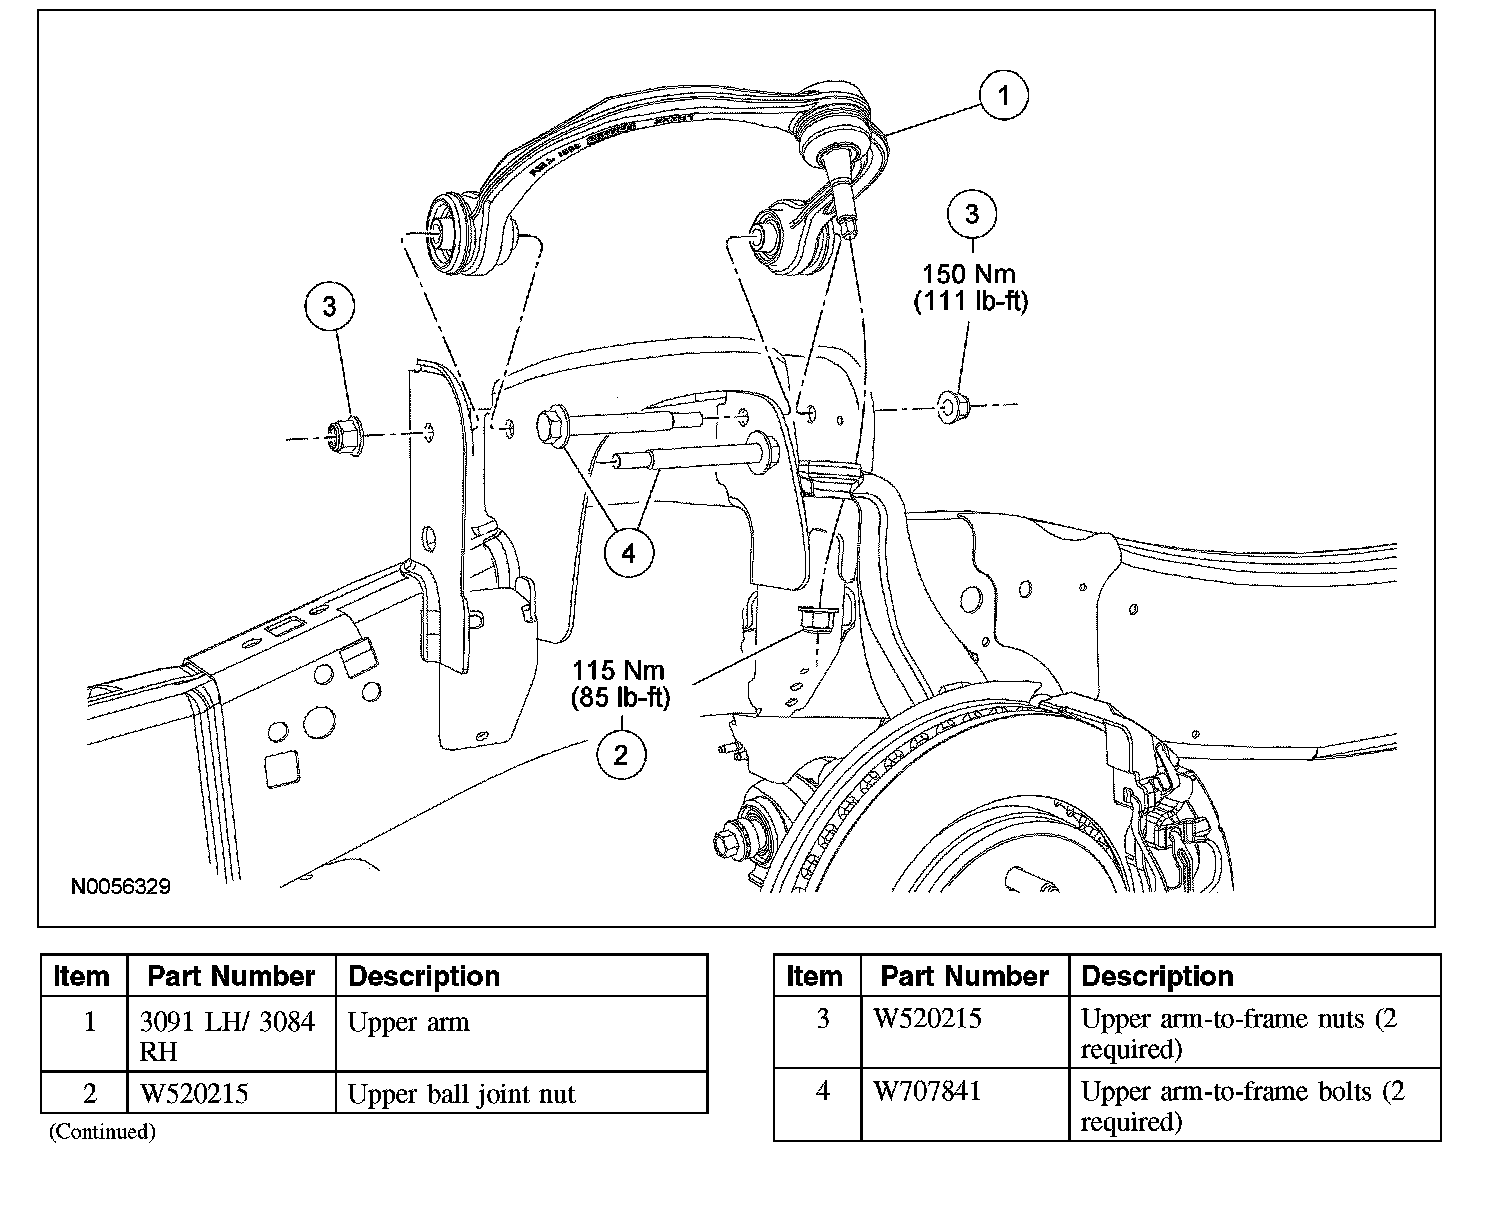
Upper Arm
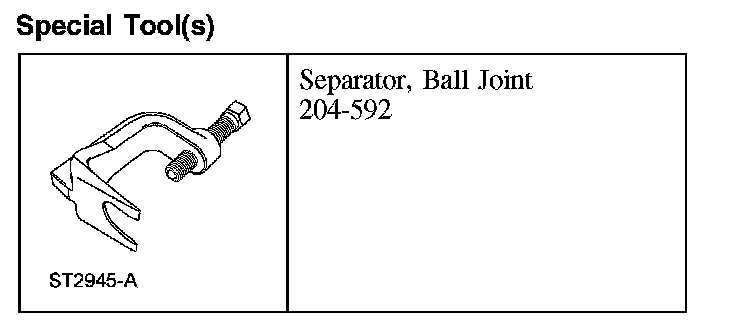
Upper ArmSpecial Tool(s):
Removal and Installation
CAUTION: Suspension fasteners are critical parts because they affect performance of vital parts and systems and their failure can result in major service expense. A new part with the same part number must be installed if installation becomes necessary. Do not use a replacement part of lesser quality or substitute design. Torque values must be used as specified during reassembly to make sure of correct retention of these parts.
CAUTION: Before tightening any suspension bushing fasteners, use a suitable jack to raise the suspension until the distance between the center of the hub and the lip of the fender is equal to the measurement taken in Step 1 (curb height).
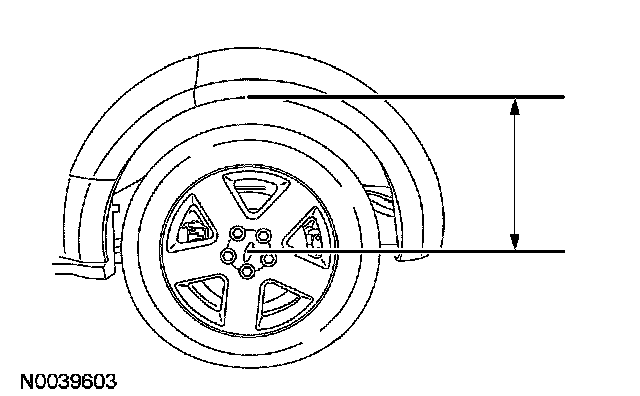
1. Measure the distance from the center of the hub to the lip of the fender with the vehicle in a level, static ground position (curb height).
2. Remove the shock absorber and spring assembly.
3. Remove and discard the upper ball joint nut.
^ To install, tighten to 115 Nm (85 lb-ft).
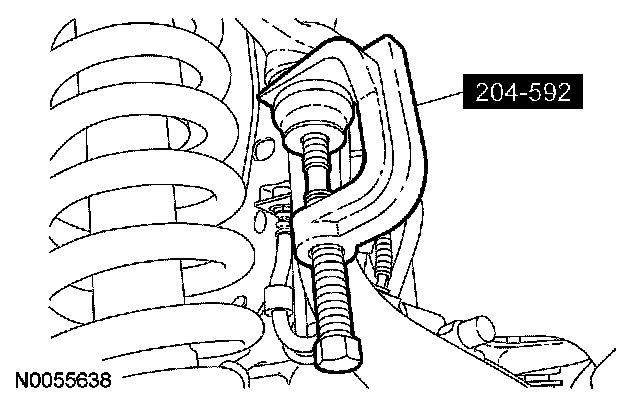
4. Using the special tool, separate the upper ball joint from the wheel knuckle.
5. Remove the upper arm-to-frame nuts and bolts and the upper bolts.
^ Discard the bolts.
^ To install, tighten to 150 Nm (111 lb-ft).
6. CAUTION: Before tightening any suspension bushing fasteners, use a suitable jack to raise the suspension until the distance between the center of the hub and the lip of the fender is equal to the measurement taken in Step 1 (curb height).
To install, reverse the removal procedure.
7. Check and, if necessary, align the front end.