Auxiliary Climate Control Housing
AUXILIARY CLIMATE CONTROL HOUSING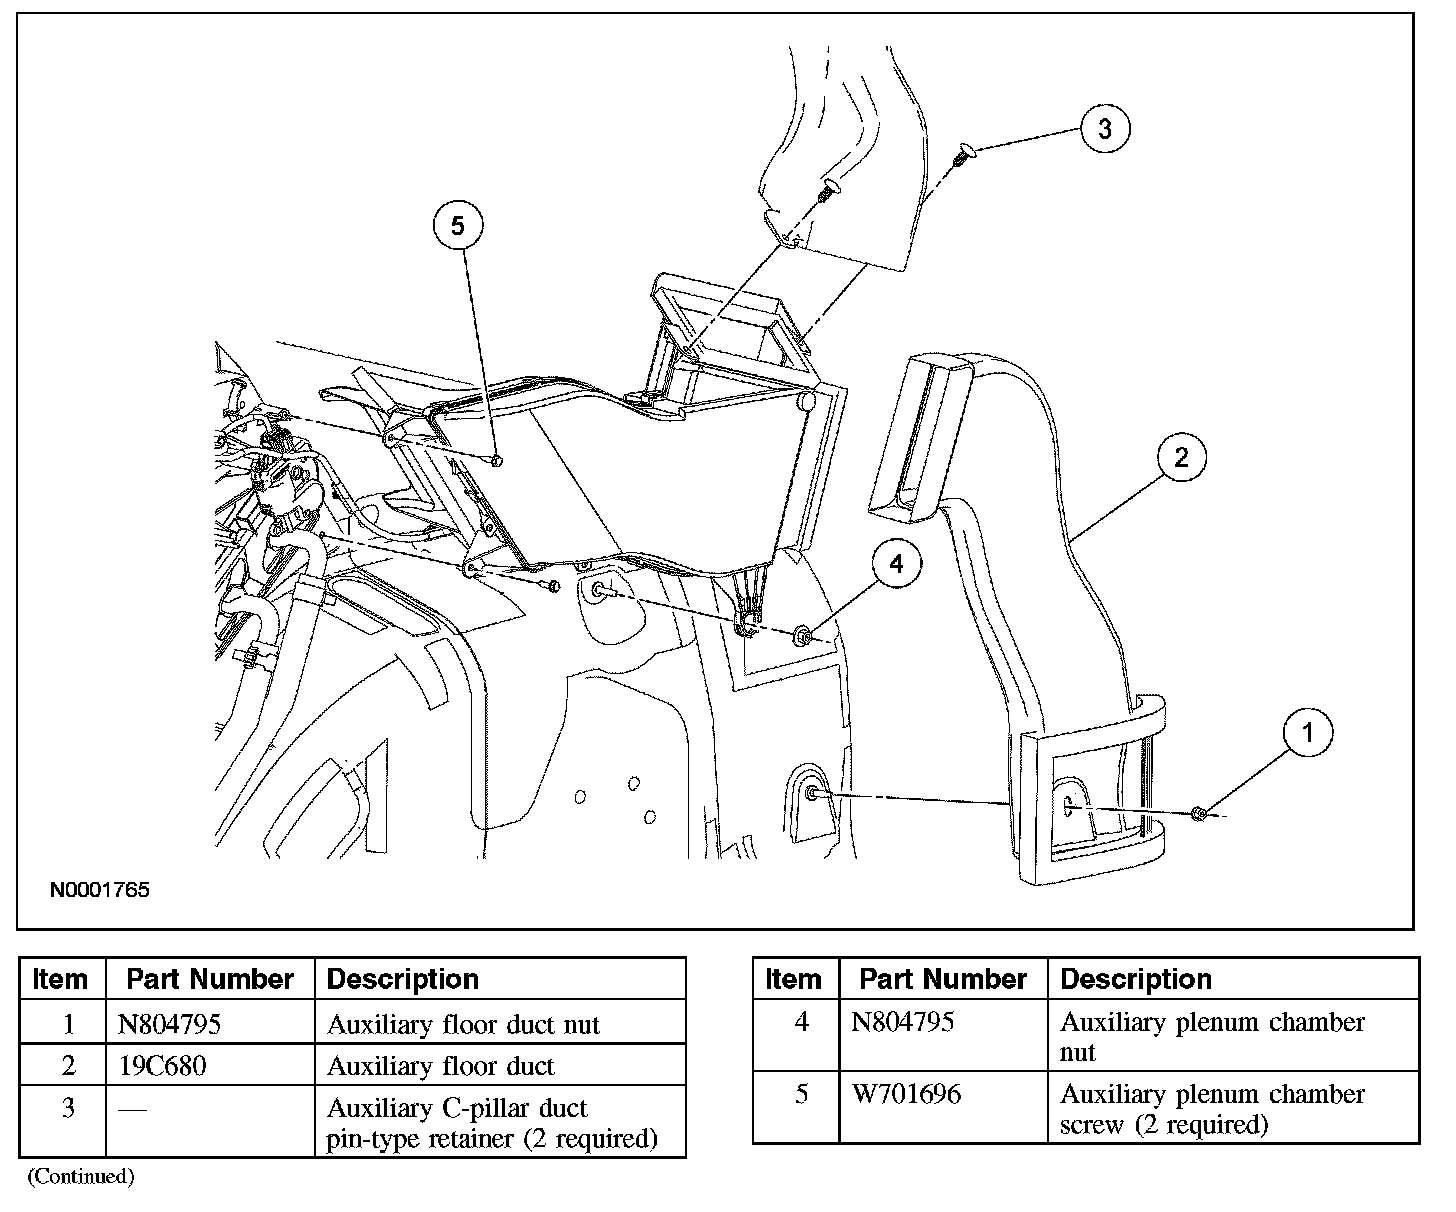
Removal and Installation
NOTE: Installation of a new suction accumulator is not required when repairing the air conditioning system, except when there is physical evidence of contamination from a failed A/C compressor or damage to the suction accumulator.
1. Recover the refrigerant.
2. Drain the cooling system.
3. With the vehicle in NEUTRAL, position it on a hoist.
4. Remove the LH quarter trim panel.
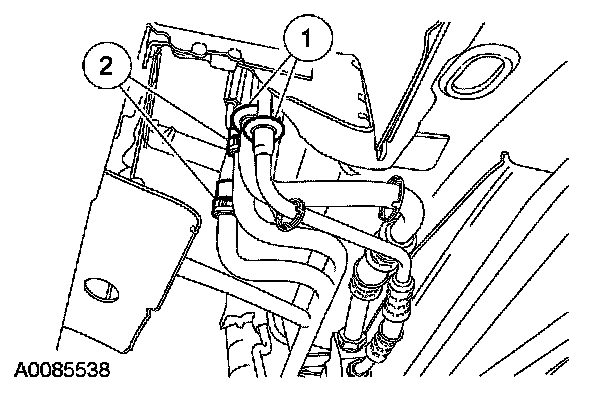
5. Disconnect the auxiliary lines.
1 Disconnect the auxiliary A/C fittings.
2 Disconnect the auxiliary heater hoses.
- Discard the O-ring seals.
6. Remove the auxiliary floor duct nut.
7. Remove the auxiliary floor duct.
8. Remove the 2 auxiliary C-pillar duct pin-type retainers.
9. Remove the auxiliary plenum chamber nut.
10. Remove the 2 auxiliary plenum chamber screws.
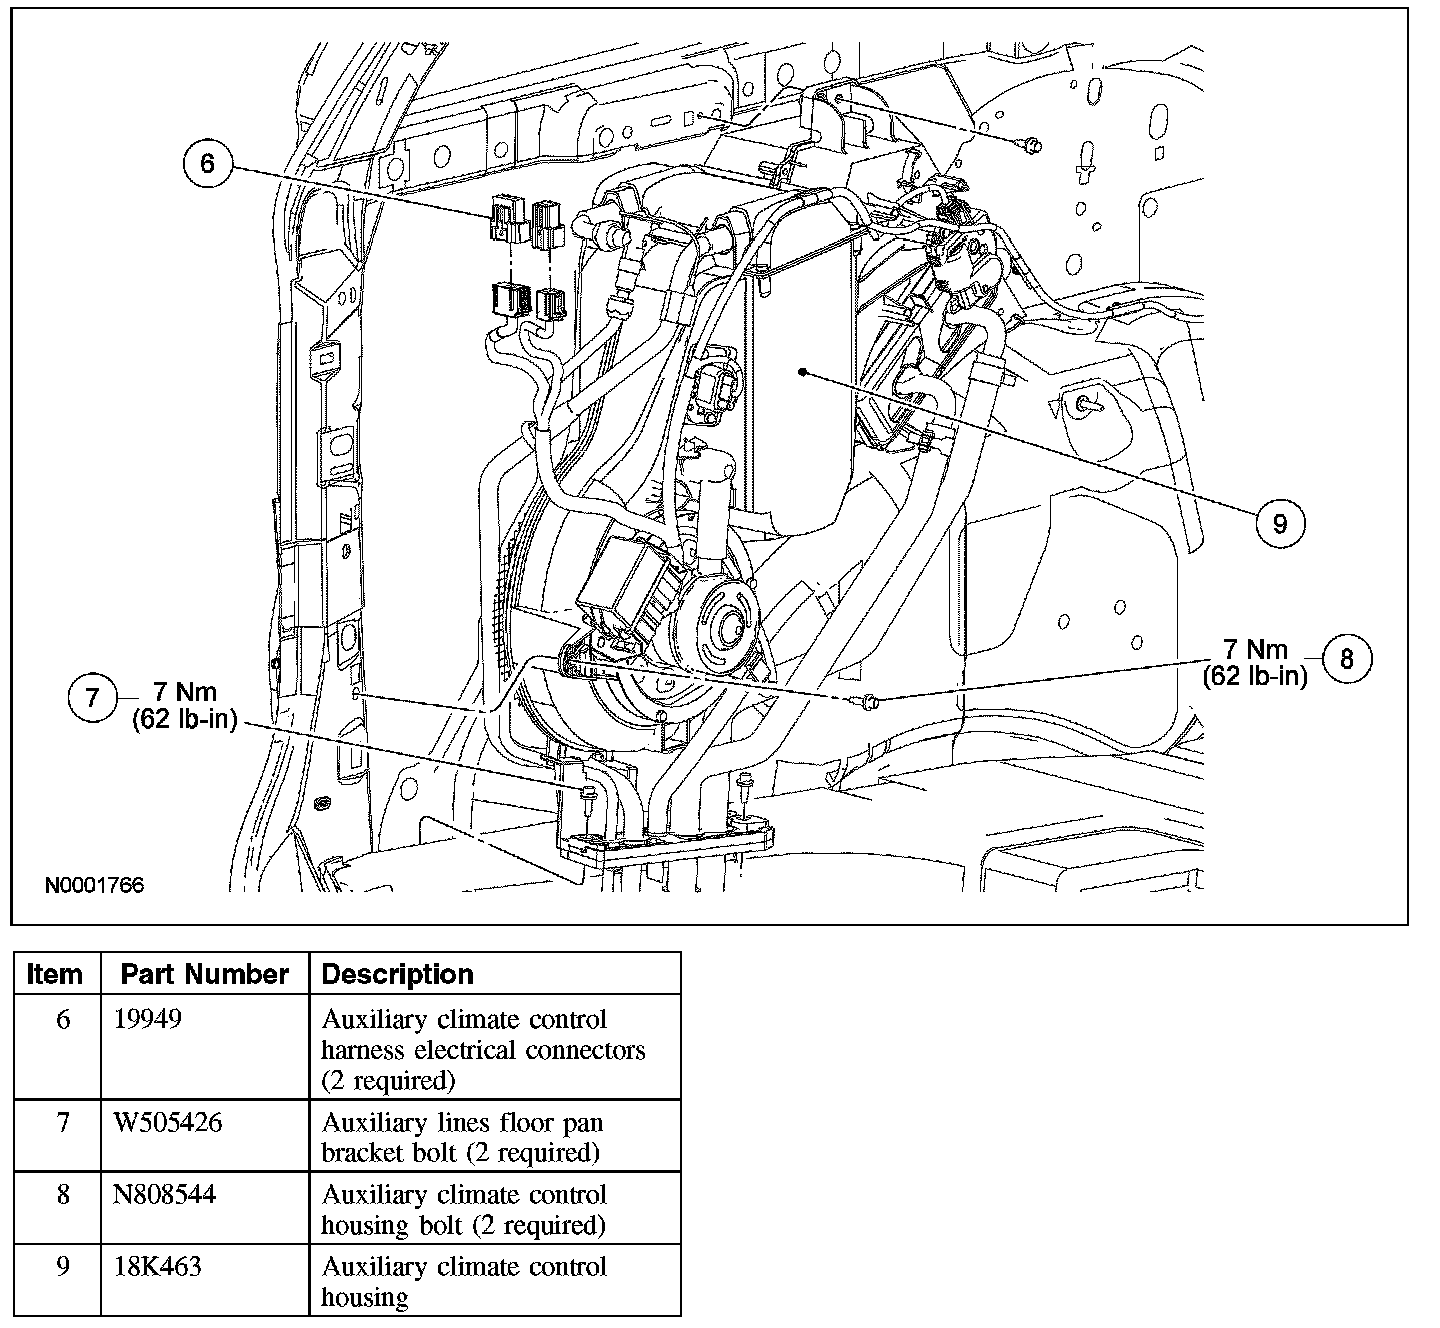
11. Disconnect the 2 auxiliary climate control harness electrical connectors.
12. Remove the 2 auxiliary lines floor pan bracket bolts.
- To install, tighten to 7 Nm (62 lb-in).
13. Remove the 2 auxiliary climate control housing bolts.
- To install, tighten to 7 Nm (62 lb-in).
14. Remove the auxiliary climate control housing.
15. To install, reverse the removal procedure.
- Install new O-ring seals.
- Lubricate the refrigerant system with the correct amount of clean PAG oil.
16. Fill the engine cooling system.
17. Evacuate, leak test and charge the refrigerant system.