Canister Purge Control Valve: Service and Repair
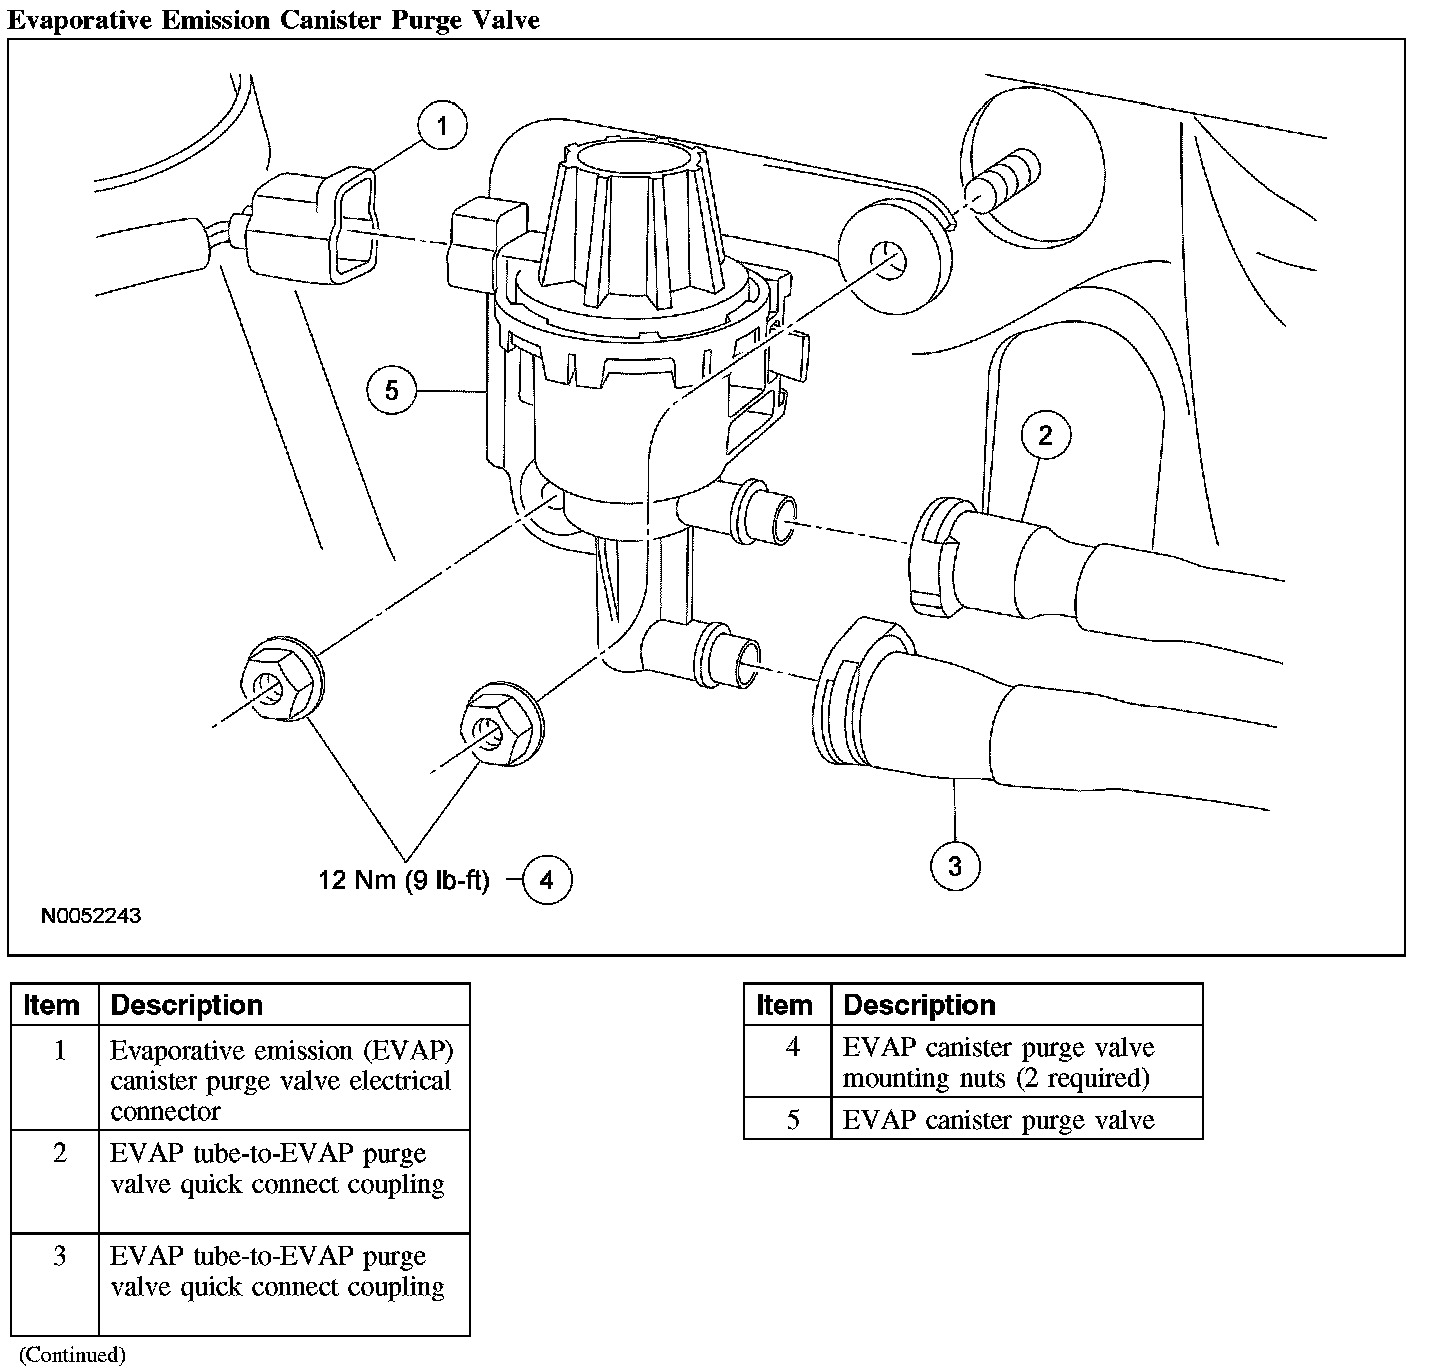
EVAPORATIVE EMISSION CANISTER PURGE VALVEEvaporative Emission Canister Purge Valve:
Evaporative Emission Canister:
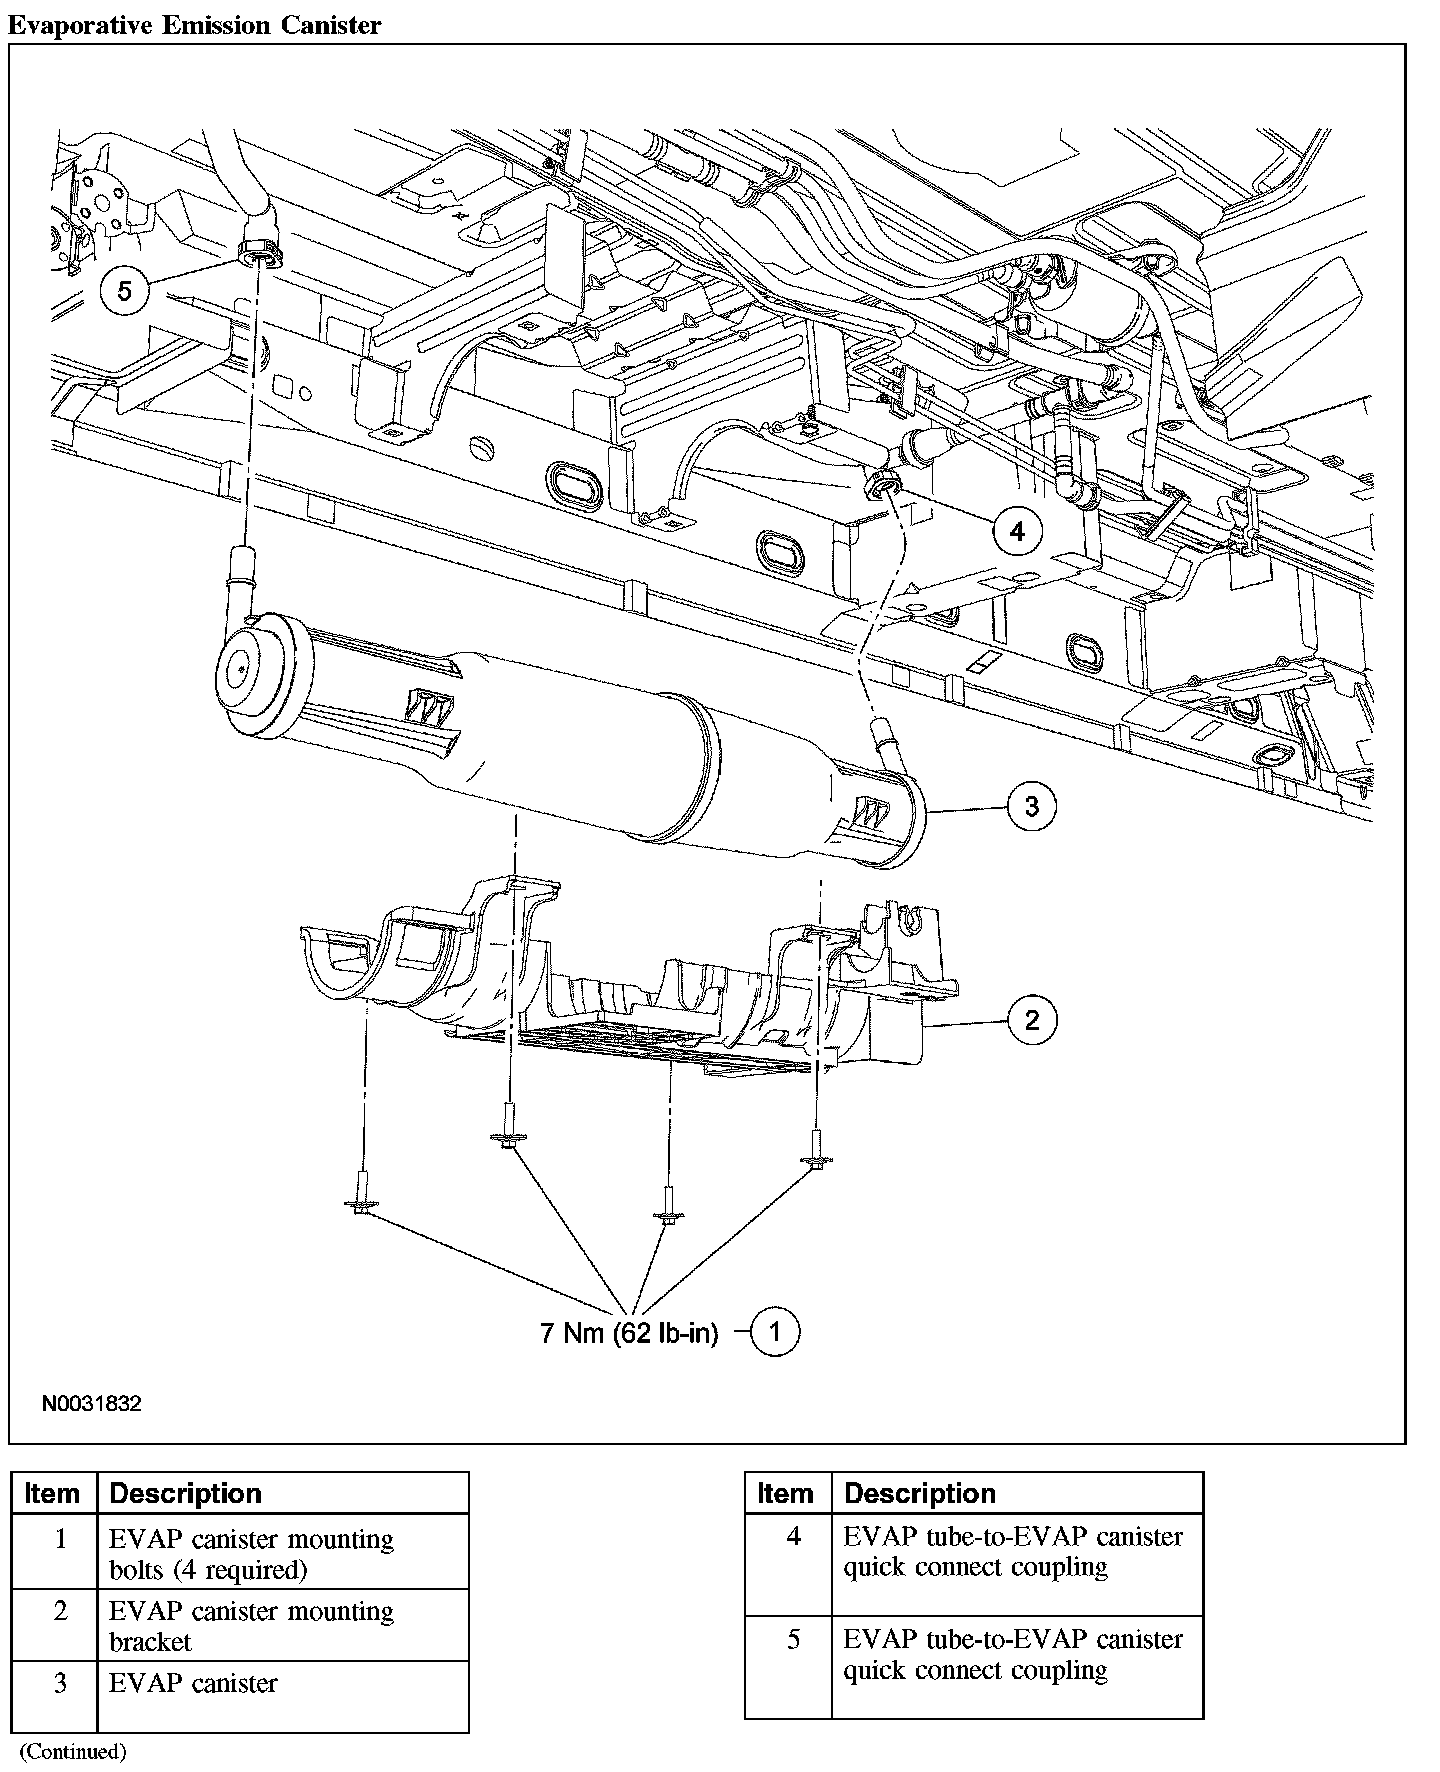
Exploded View
Removal and Installation
WARNING: The evaporative emission system contains fuel vapor and condensed fuel vapor. Although not present in large quantities, it still presents the danger of explosion or fire. Disconnect the battery ground cable from the battery to minimize the possibility of an electrical spark occurring, which can cause a fire or explosion if fuel vapor or liquefied fuel are present in the area. Failure to follow these instructions can result in personal injury.
1. Remove the cowl panel grille.
2. Disconnect the battery ground cable.
3. Disconnect the evaporative emission (EVAP) canister purge valve electrical connector.
4. Disconnect the 2 EVAP tube-to-EVAP canister purge valve quick connect couplings.
5. Remove the 2 EVAP canister purge valve bracket mounting nuts and the EVAP canister purge valve and mounting bracket.
- To install, tighten to 12 Nm (9 lb-ft).
6. Depress the release tab and remove the EVAP canister purge valve from the bracket.
7. To install, reverse the removal procedure.
- Carry out a leak test. Testing and Inspection
- Carry out the evaporative emission repair verification drive cycle.