Radiator: Service and Repair
Radiator - 2.3LRadiator and Cooling Fan - Exploded View, 2.3L (Part 1):
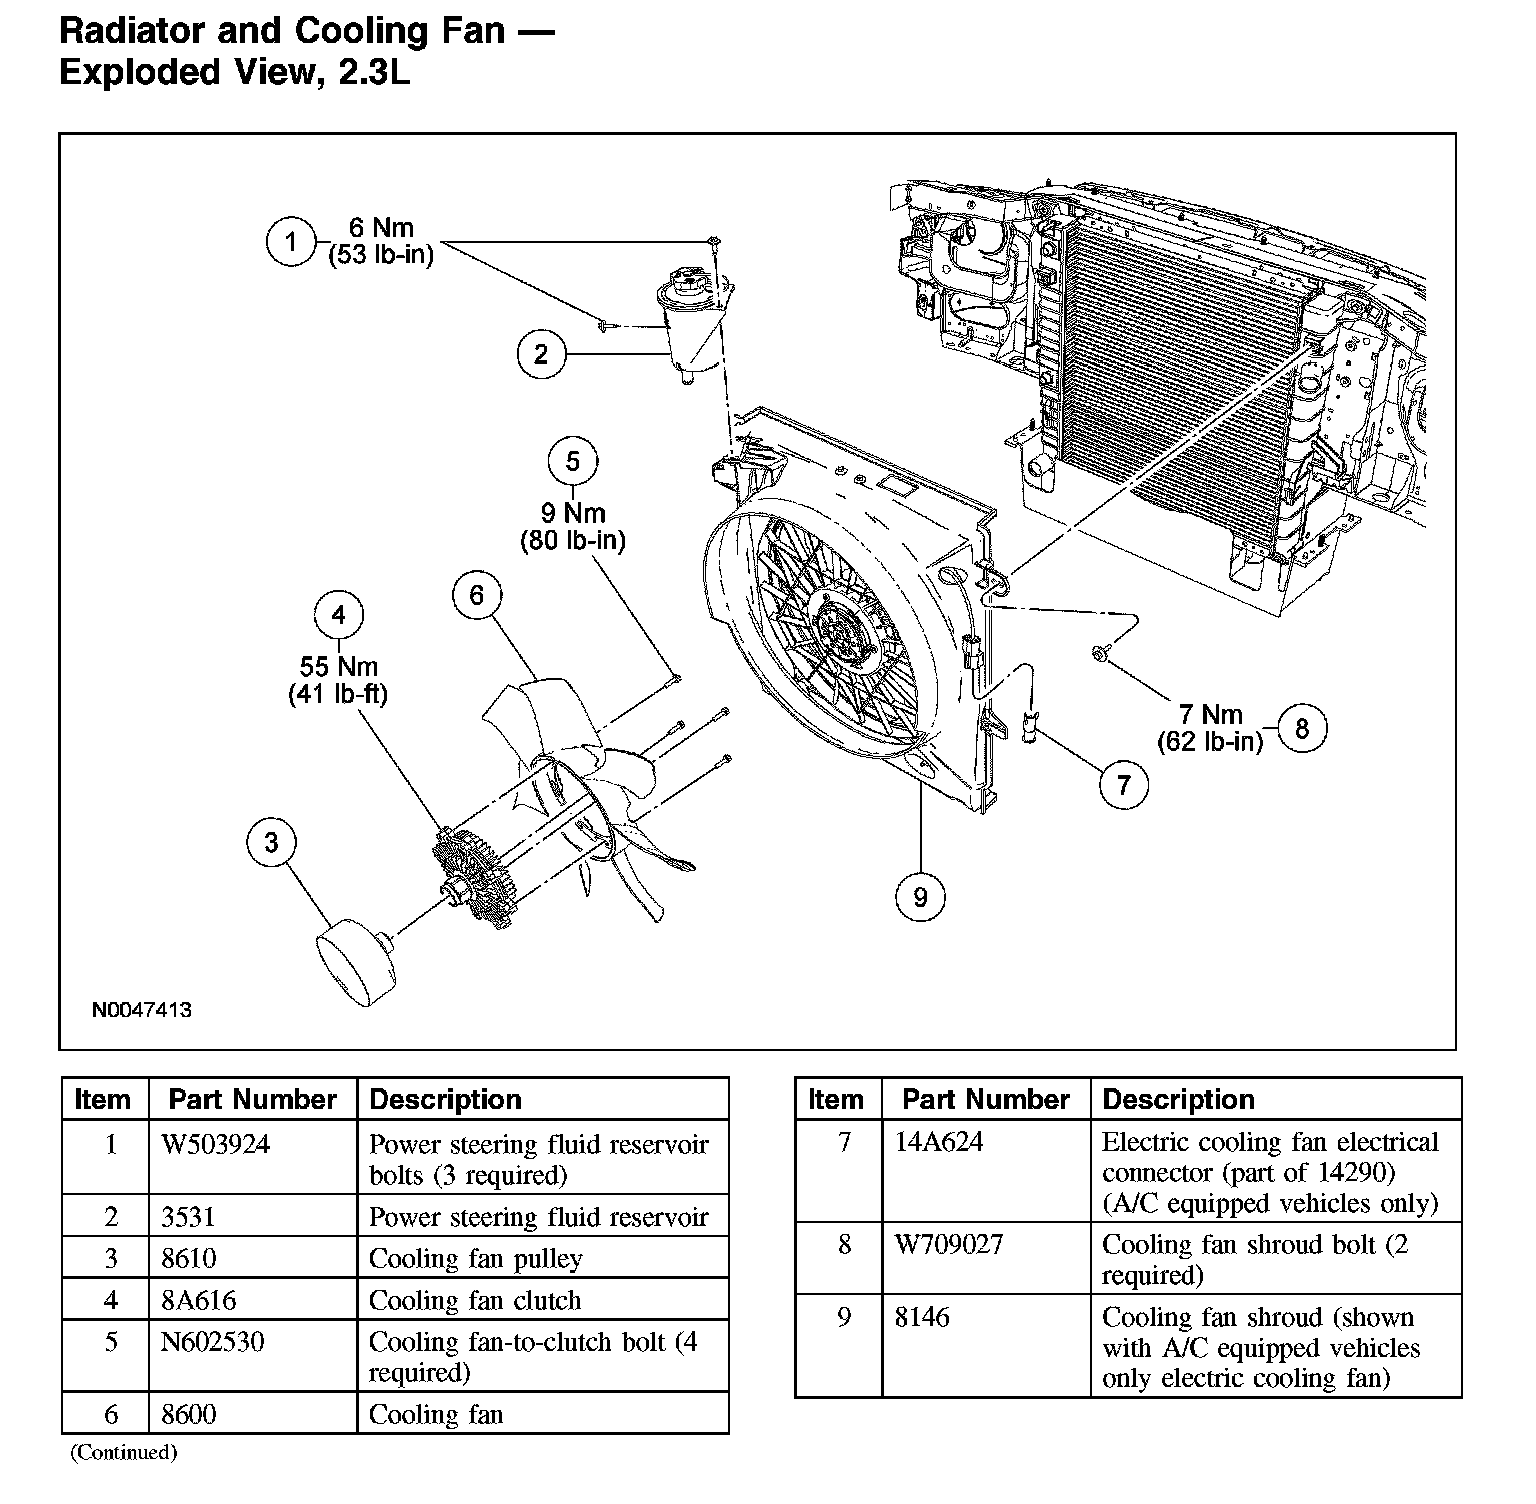
Radiator and Cooling Fan - Exploded View, 2.3L (Part 2):
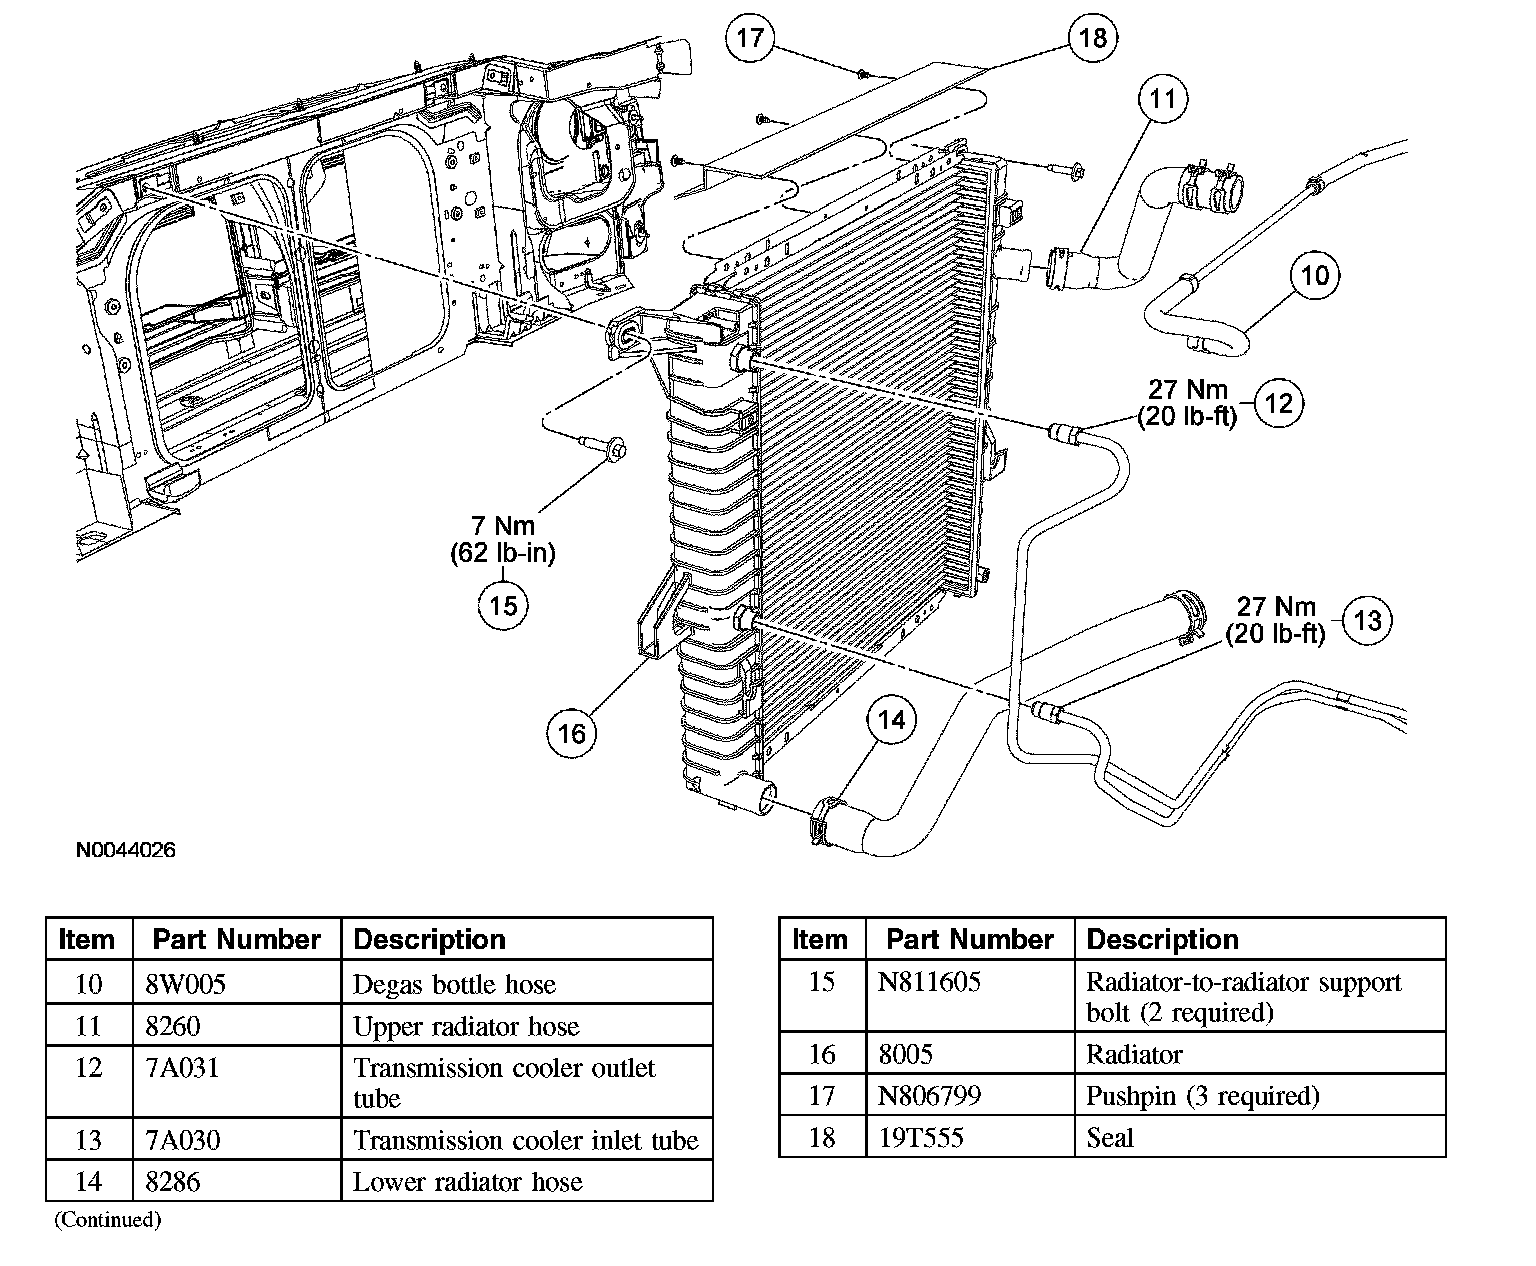
Radiator and Cooling Fan - Exploded View, 2.3L (Part 3):
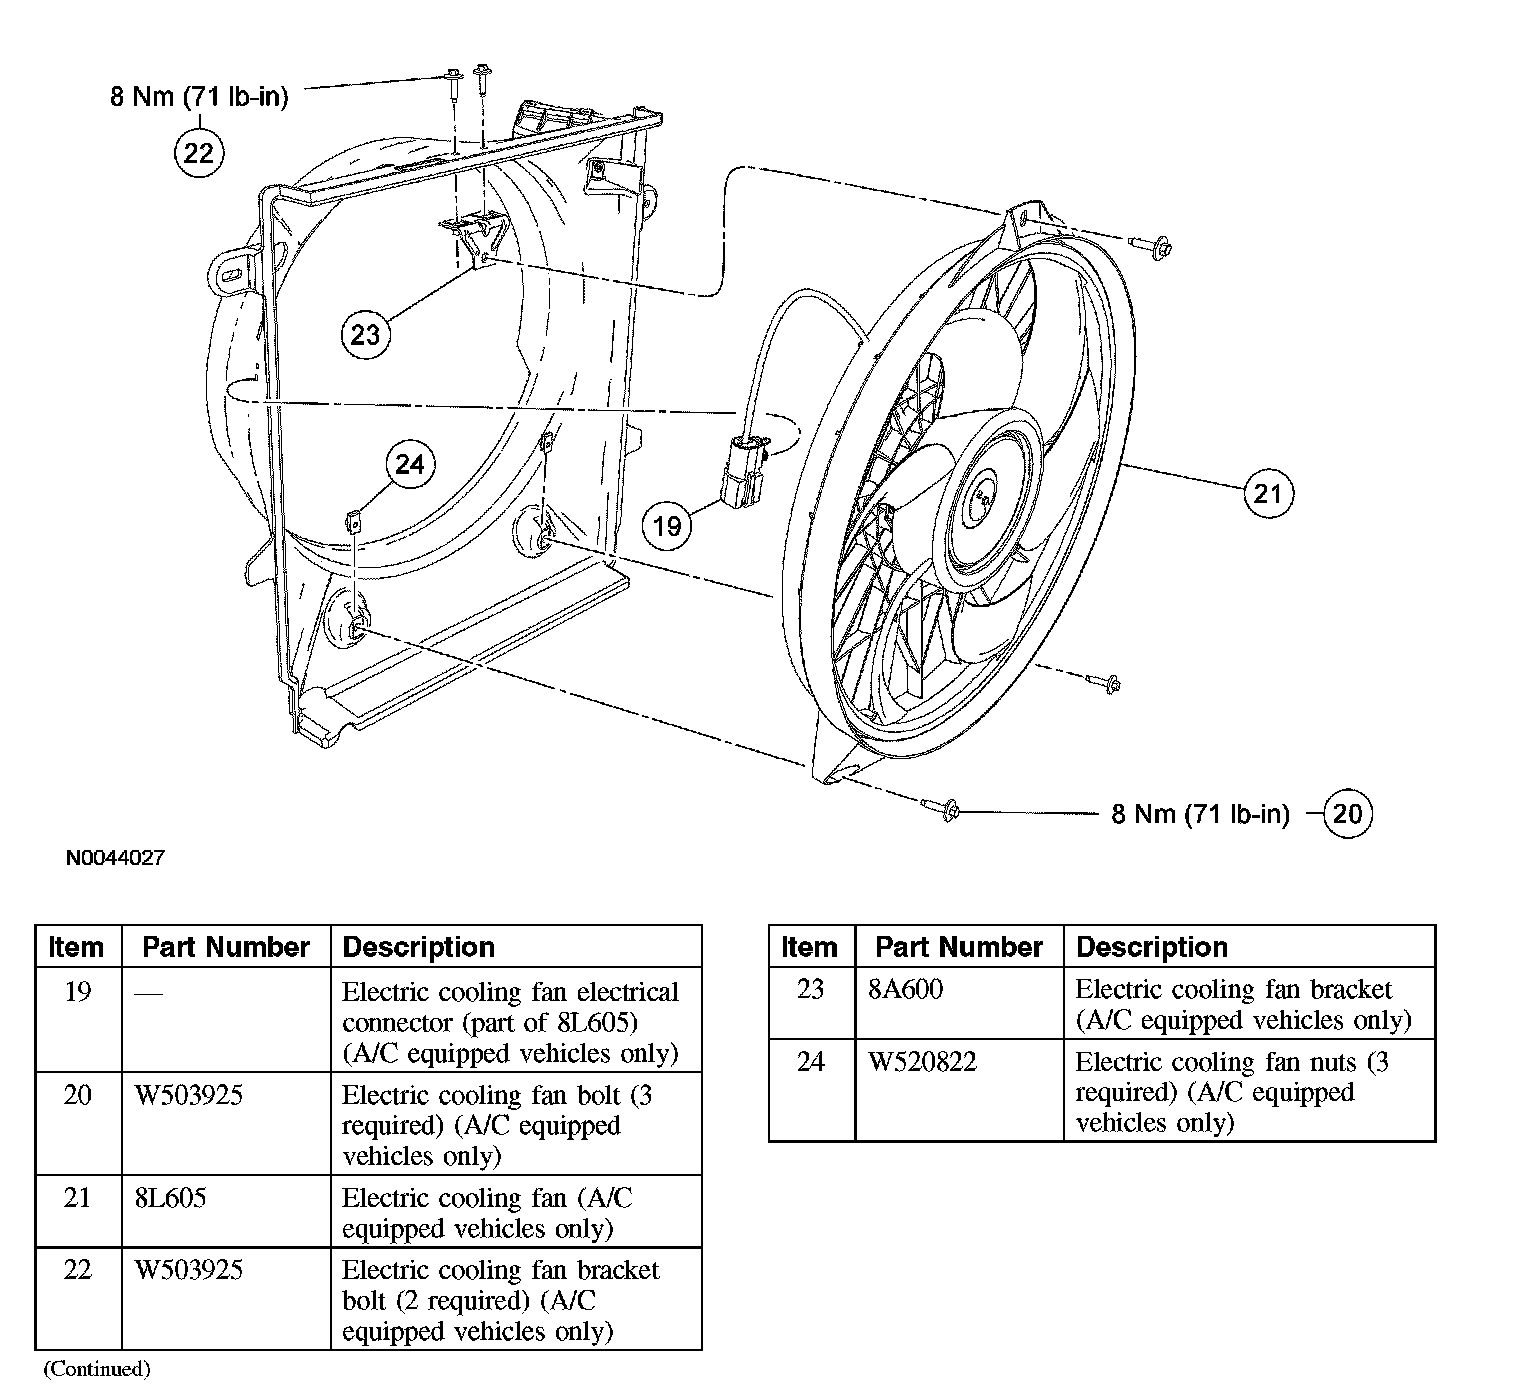
Removal
All vehicles
1. Drain the cooling system. For additional information, refer to Cooling System Draining, Filling and Bleeding.
Vehicles equipped with an automatic transmission
2. NOTE: To avoid disturbing the transmission oil cooler fittings, use a back up wrench.
Disconnect the transmission cooling tubes from the radiator.
All vehicles
3. Disconnect the degas bottle hose from the radiator and position the hose away from the radiator.
4. Disconnect the upper radiator hose from the radiator.
5. Remove the cooling fan and shroud.
6. Disconnect the lower radiator hose from the radiator.
7. Remove the bolts and the radiator.
8. Remove the 3 pushpins and the seal from the top of the radiator.
Installation
All vehicles
1. Install the seal and the 3 pushpins on the top of the radiator.
2. Position the radiator into the engine compartment and install the bolts.
^ Tighten to 7 Nm (62 inch lbs).
3. Connect the lower radiator hose to the radiator.
4. Install the cooling fan and shroud.
5. Connect the upper radiator hose to the radiator.
6. Position the coolant overflow hose in the channel on top of the radiator, then connect the hose to the radiator.
Vehicles equipped with an automatic transmission
7. NOTE: To avoid disturbing the transmission or cooler fittings, use a back up wrench.
Connect the transmission cooling tubes to the radiator.
^ Tighten to 27 Nm (20 ft. lbs).
All vehicles
8. Fill and bleed the cooling system.
9. WARNING: Do not stand in line with or near the engine cooling fan blade when revving the engine. Failure to follow these instructions may result in personal injury.
Operate the engine for several minutes and check the hoses and connections for leaks.
Vehicles equipped with an automatic transmission
10. Check the transmission fluid level. Fill as needed.