Thermostat: Service and Repair
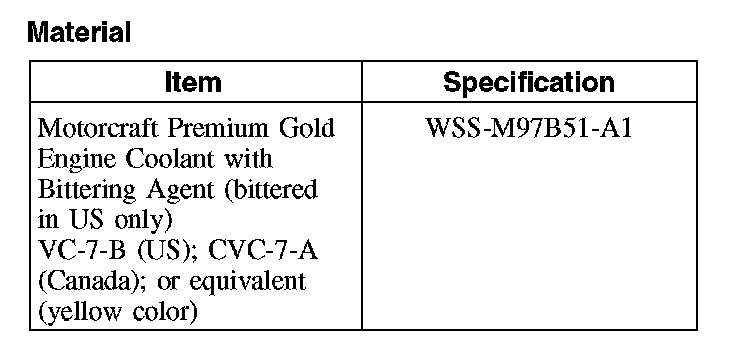
Thermostat HousingMaterial:
Removal and Installation
1. NOTE: The thermostat and thermostat housing are serviced as an assembly.
With the vehicle in NEUTRAL, position it on a hoist. For additional information, refer to Maintenance/Service and Repair.
2. Drain the cooling system. For additional information, refer to Cooling System Draining, Filling and Bleeding.
3. Remove the accessory drive belt. For additional information, refer to Drive Belts, Mounts, Brackets and Accessories.
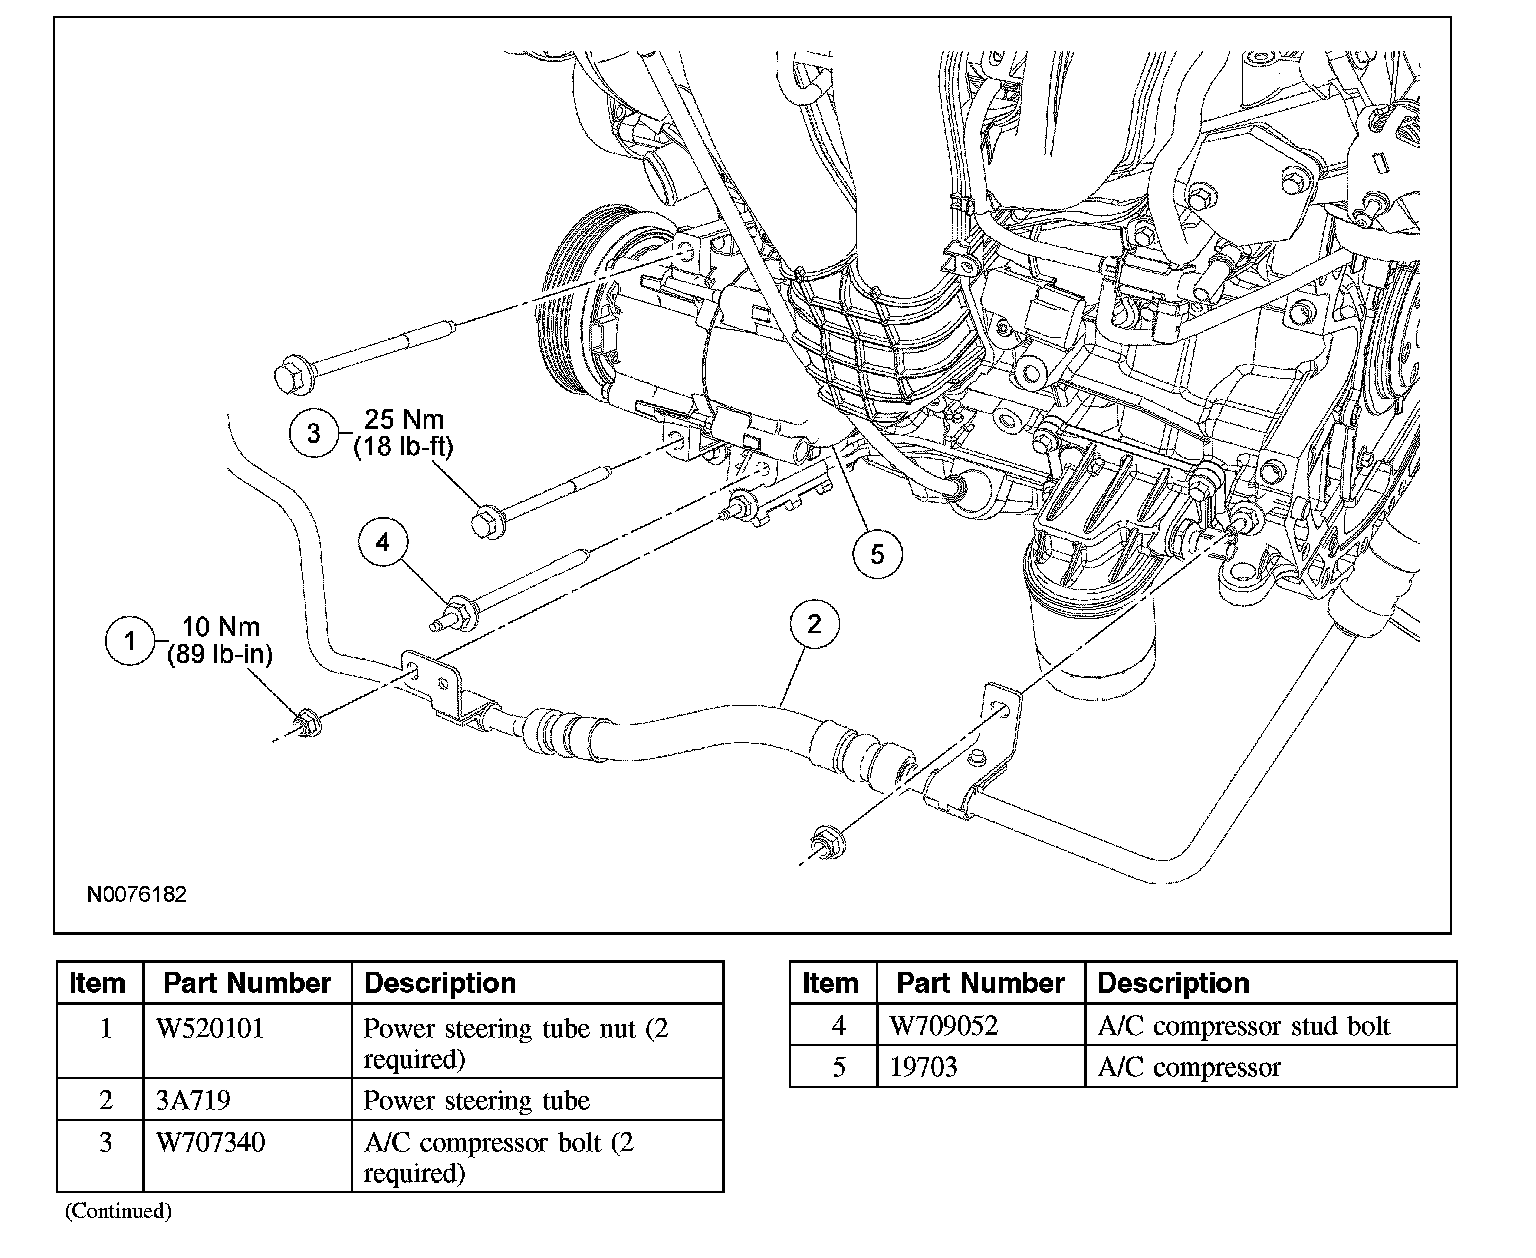
4. Remove the 2 nuts and position aside the power steering tube.
^ To install, tighten to 10 Nm (89 lb-in).
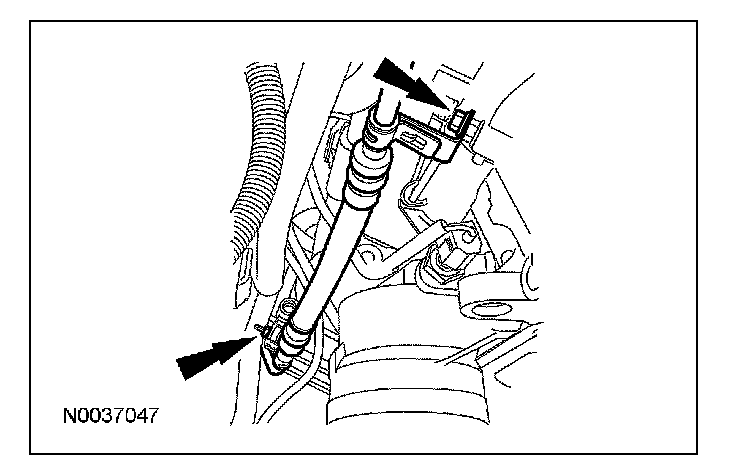
5. Remove the cooling fan motor and shroud. For additional information, refer to Cooling Fan Motor and Shroud.
6. Remove the 2 bolts, the stud bolt and position aside the A/C compressor.
^ To install, tighten to 25 Nm (18 lb-ft).
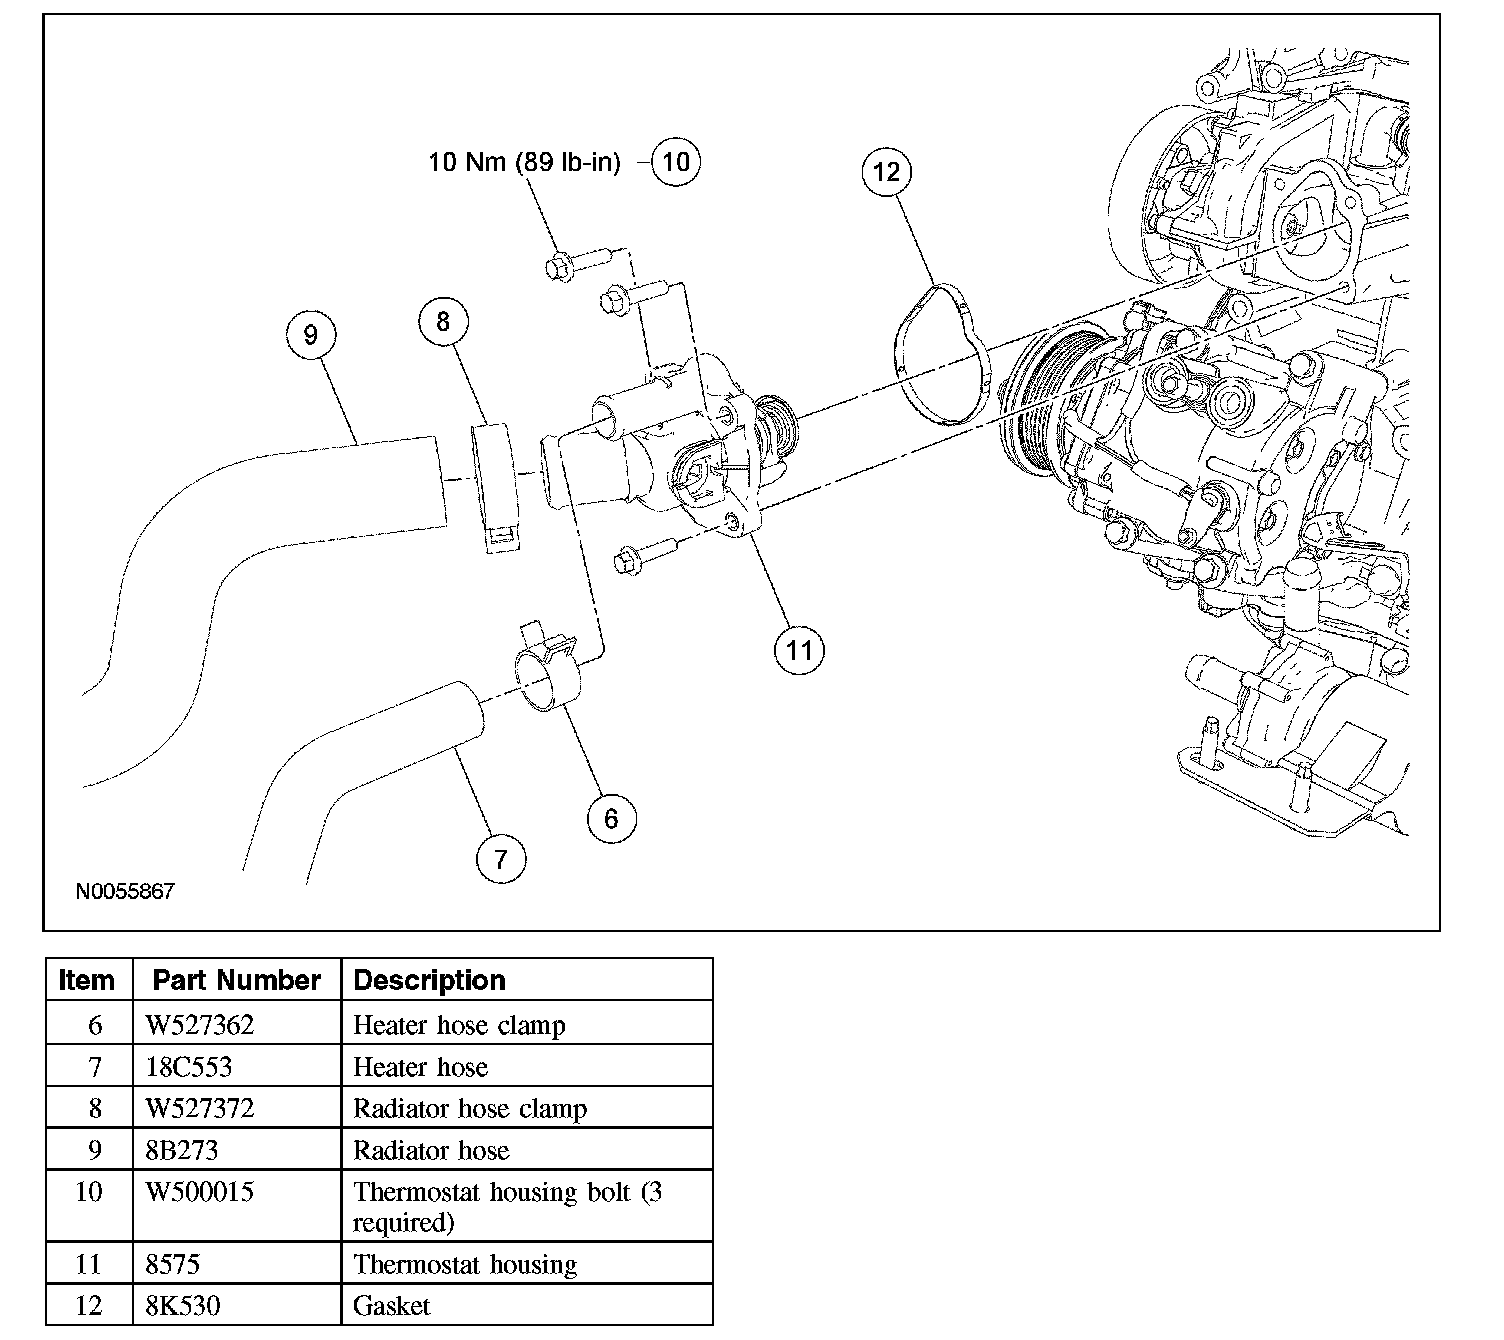
7. Disconnect the radiator and heater hoses from the thermostat housing.
8. Remove the 3 bolts, thermostat housing and thermostat as an assembly.
^ To install, tighten to 10 Nm (89 lb-in).
9. NOTE: Lubricate the thermostat housing O-ring with clean engine coolant.
To install, reverse the removal procedure.
10. Fill and bleed the cooling system.