Console - Front, Floor
Console - Front, Floor, Expedition
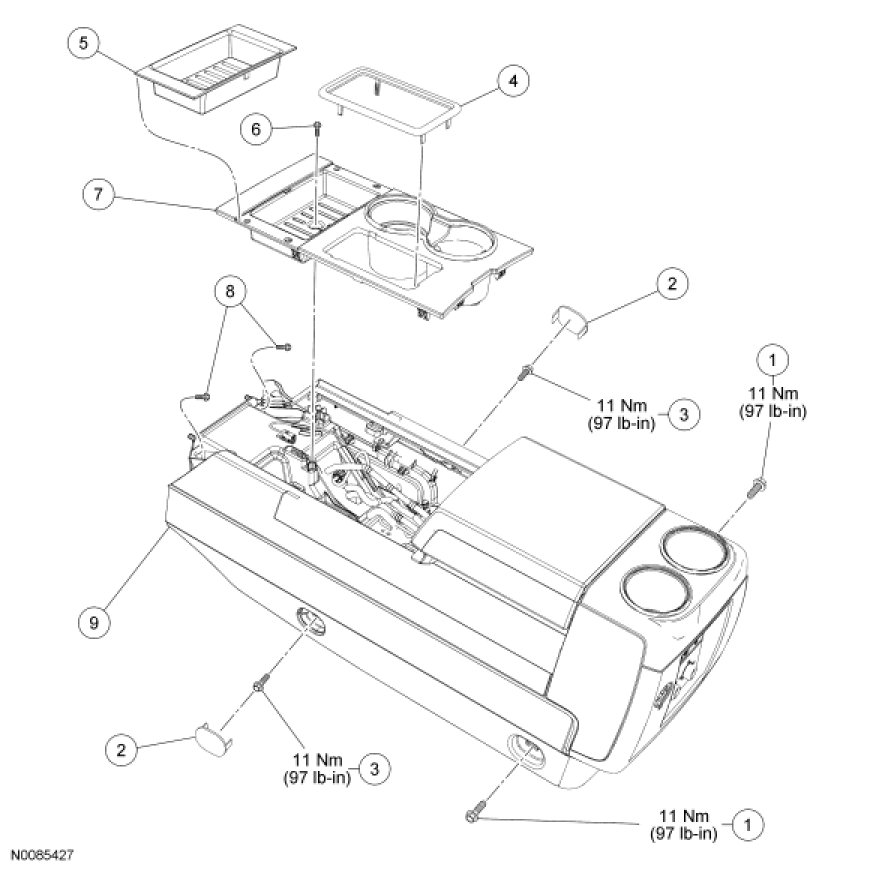
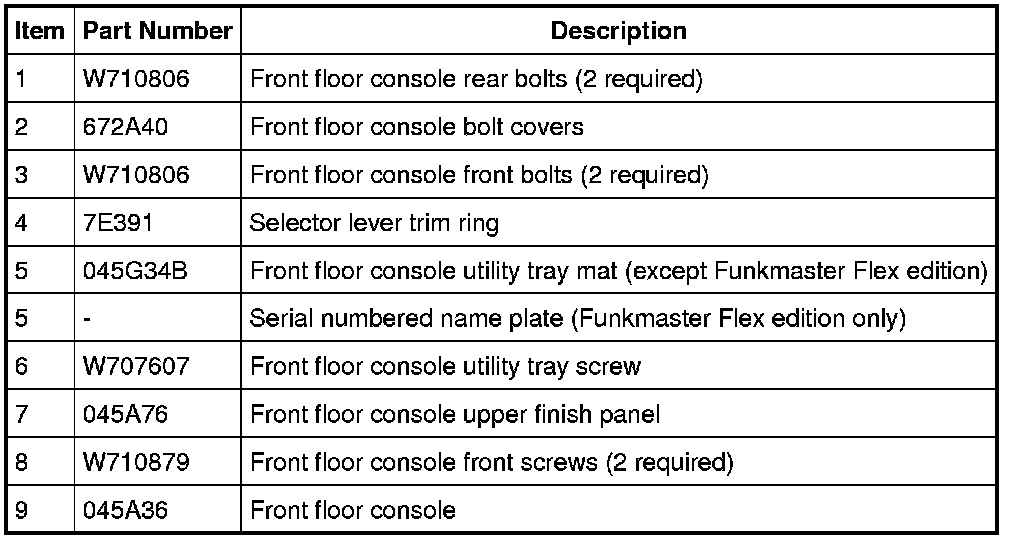
Removal
All vehicles
1. Apply the parking brake.
2. Position the selector lever in the NEUTRAL position.
3. Position the front seats forward.
4. Remove the 2 front floor console rear bolts.
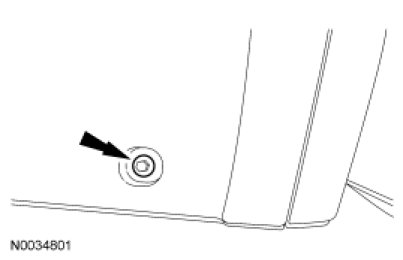
5. Position the front seats rearward.
6. Remove the 2 front floor console front bolts.
- Remove the 2 front floor console bolt covers.
- Remove the 2 front floor console bolts.
7. Remove the selector lever trim ring.
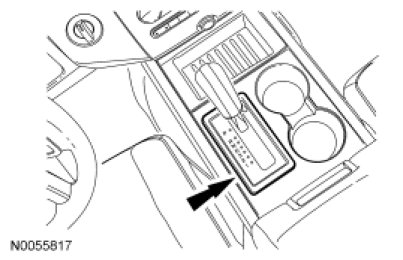
Funkmaster Flex edition only
8. NOTICE: The serial numbered name plate is securely fastened to the console with double-sided adhesive tape. Excessive lifting or prying will bend or damage the serial numbered name plate.
Using an appropriate pry tool, slightly lift the lower RH corner of the serial numbered name plate upward to gain access to the double-sided adhesive tape, located on the bottom of the name plate.
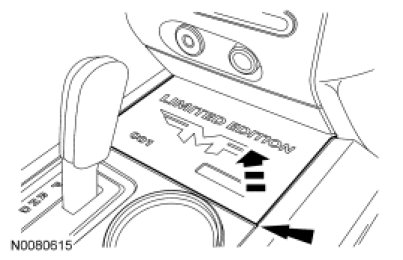
9. NOTICE: The serial numbered name plate is securely fastened to the console with double-sided adhesive tape. Excessive lifting or prying will bend or damage the serial numbered name plate.
Starting at the RH corner of the serial numbered name plate, position a piano wire, or an equivalent tool, between the name plate and the floor console finish panel and cut the double-sided adhesive tape on the bottom of name plate.
10. Remove the serial numbered name plate.
All vehicles except Funkmaster Flex edition
11. Remove the front floor console utility tray mat.
All vehicles
12. Remove the front floor console utility tray screw.
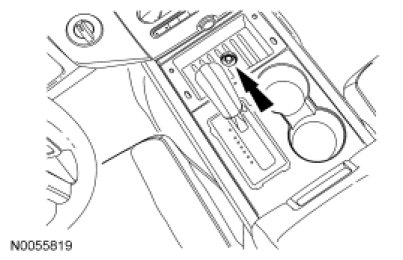
13. Remove the floor console upper finish panel.
14. Position the selector lever indicator bezel aside.
- Release the 4 retainers and position aside.
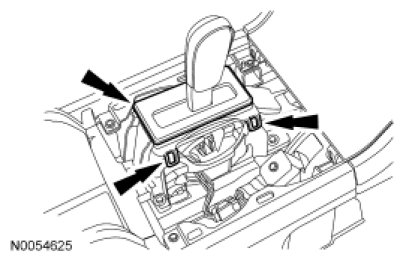
15. Disconnect the selector lever cable from the selector lever and the floor console.
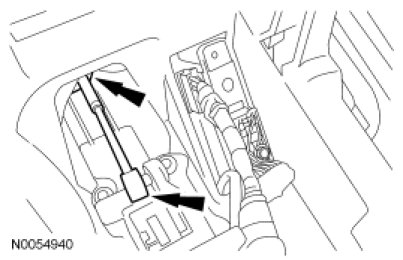
16. Remove the front floor console front screws.
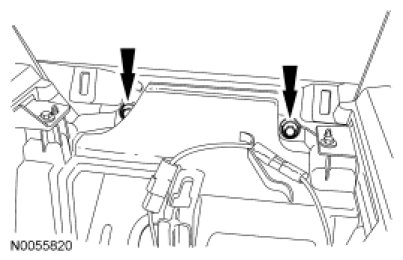
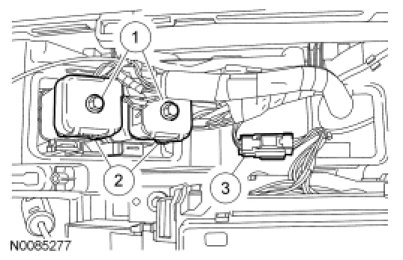
17. Disconnect the front floor console electrical connectors.
1. Loosen the bulkhead electrical connector bolts.
2. Disconnect the bulkhead electrical connectors.
3. Disconnect the electrical connector.
18. Remove the front floor console.
Installation
All vehicles
1. Install the front floor console.
2. Connect the front floor console electrical connectors.
- Tighten the bulkhead electrical connector bolt to 3 Nm (27 lb-in).
3. Install the front floor console front screws.
- Tighten to 7 Nm (62 lb-in).
4. Install the selector lever cable.
5. Install the selector lever indicator bezel.
6. Install the floor console upper finish panel.
- Make sure to align the trim panel retaining clips to the retaining clip holes in the floor console.
7. Install the front floor console utility tray screw.
All vehicles except Funkmaster Flex edition
8. Install the front floor console utility tray mat.
Funkmaster Flex edition only
9. Using alcohol, remove the double-sided adhesive tape from the serial numbered name plate and floor console finish panel surfaces.
10. Locally obtain 3M PT1100 double-sided adhesive tape and apply 6 new tape strips to the bottom of the serial numbered name plate, as indicated.
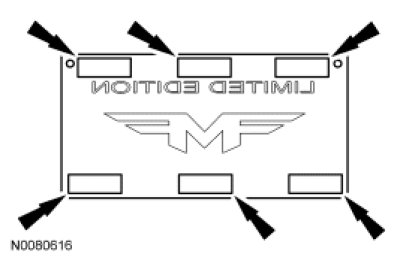
11. Position the serial numbered name plate onto the floor console finish panel and apply downward pressure, to securely fasten the name plate to the floor console finish panel.
All vehicles
12. Install the selector lever trim ring.
13. Install the 2 front floor console front bolts.
- Tighten to 11 Nm (97 lb-in).
14. Install the 2 front floor console front bolt covers.
15. Position the front seats forward.
16. Install the 2 front floor console rear bolts.
- Tighten to 11 Nm (97 lb-in).
17. Position the front seats rearward.
18. Position the selector lever in the PARK position.
19. Release the parking brake